|
| hp officejet d series | |
|
| ||
paper | tips |
| |
Labels | • | Always use |
|
(works only with |
| HP inkjet products (like Avery Inkjet Labels), and make sure that the | |
printing) |
| labels are not over two years old. | |
| • | Fan the stack of labels to make sure none of the pages are sticking | |
|
| together. | |
| • | Place a stack of label sheets on top of standard paper in the main tray, | |
|
|
| |
|
|
| |
4” x 6” Photo paper | Insert the photo paper with the | ||
(works only with | stops. Place the long edge of the photo paper against the right side of the | ||
printing) | main tray, slide the | ||
| photo paper, and slide the | ||
| paper you are using has perforated tabs, load the photo paper so that the | ||
| tabs are closest to you. | ||
|
|
| |
Continuous (banner) | Continuous banner paper is also known as computer or | ||
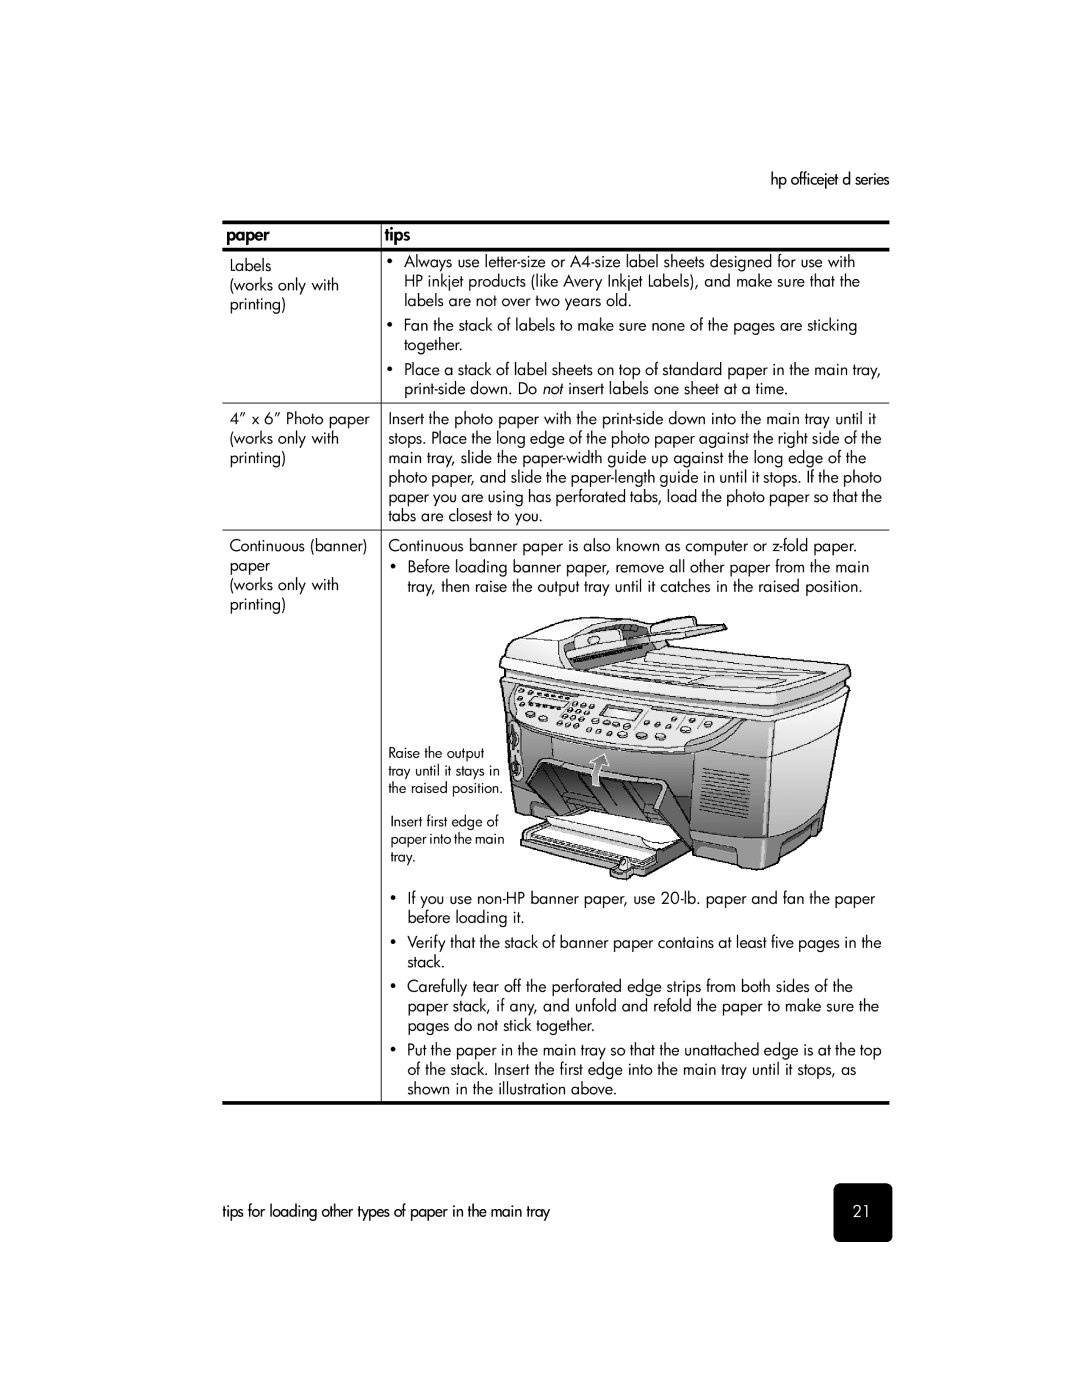
paper | • | Before loading banner paper, remove all other paper from the main | |
(works only with |
| tray, then raise the output tray until it catches in the raised position. | |
printing) |
|
|
|
Raise the output tray until it stays in the raised position.
Insert first edge of paper into the main tray.
•If you use
•Verify that the stack of banner paper contains at least five pages in the stack.
•Carefully tear off the perforated edge strips from both sides of the paper stack, if any, and unfold and refold the paper to make sure the pages do not stick together.
•Put the paper in the main tray so that the unattached edge is at the top of the stack. Insert the first edge into the main tray until it stops, as shown in the illustration above.
tips for loading other types of paper in the main tray | 21 |
