hp officejet d series
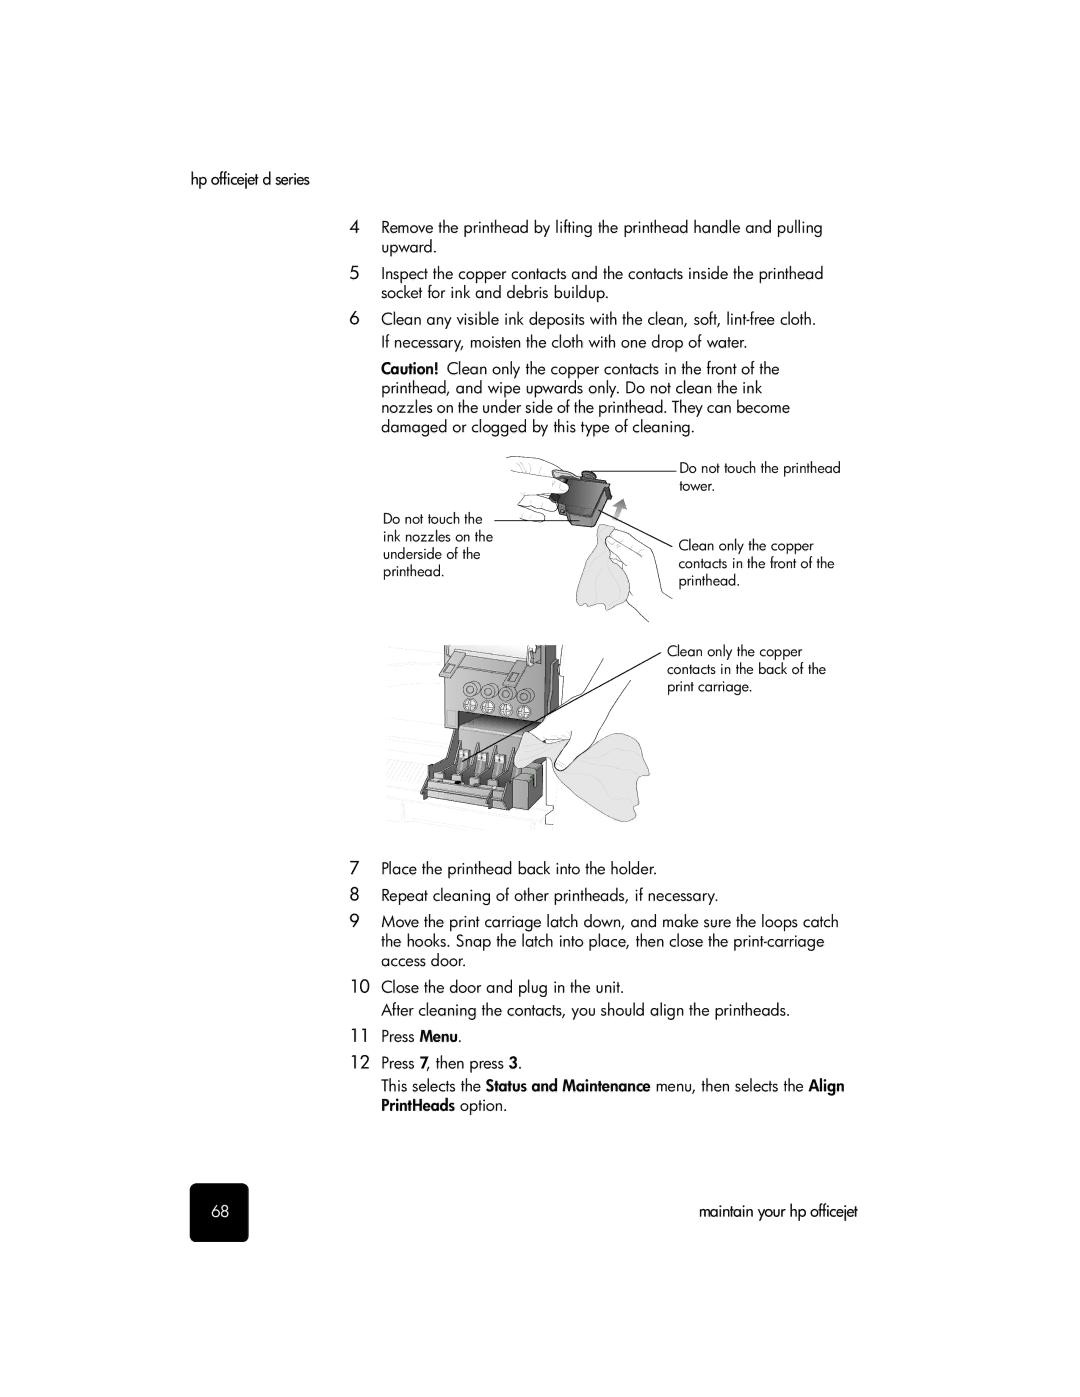
4Remove the printhead by lifting the printhead handle and pulling upward.
5Inspect the copper contacts and the contacts inside the printhead socket for ink and debris buildup.
6Clean any visible ink deposits with the clean, soft,
Caution! Clean only the copper contacts in the front of the printhead, and wipe upwards only. Do not clean the ink nozzles on the under side of the printhead. They can become damaged or clogged by this type of cleaning.
Do not touch the ink nozzles on the underside of the printhead.
Do not touch the printhead tower.
![]() Clean only the copper contacts in the front of the printhead.
Clean only the copper contacts in the front of the printhead.
Clean only the copper contacts in the back of the print carriage.
7Place the printhead back into the holder.
8Repeat cleaning of other printheads, if necessary.
9Move the print carriage latch down, and make sure the loops catch the hooks. Snap the latch into place, then close the
10Close the door and plug in the unit.
After cleaning the contacts, you should align the printheads.
11Press Menu.
12Press 7, then press 3.
This selects the Status and Maintenance menu, then selects the Align PrintHeads option.
68 | maintain your hp officejet |