Installing HyperFabric
Installing HyperFabric Switches
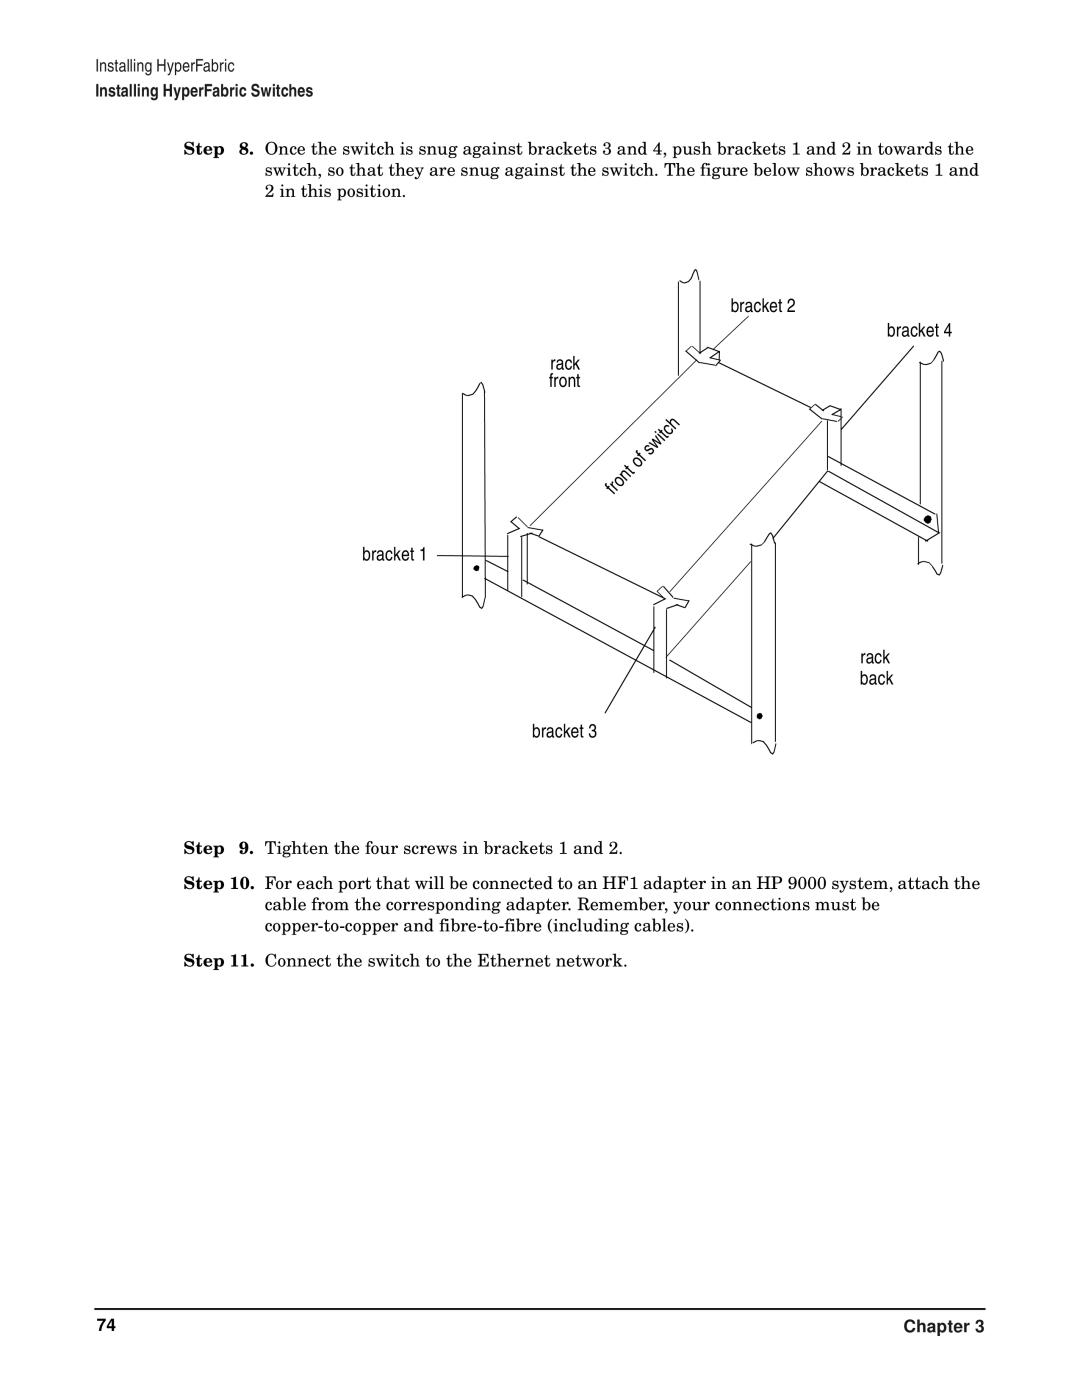
Step 8. Once the switch is snug against brackets 3 and 4, push brackets 1 and 2 in towards the switch, so that they are snug against the switch. The figure below shows brackets 1 and 2 in this position.
bracket 1
rack front
|
|
|
|
|
|
|
| h |
|
|
|
|
|
|
| c | |
|
|
|
|
|
|
| t |
|
|
|
|
|
|
| i |
| |
|
|
|
|
|
| w |
|
|
|
|
|
|
| s |
|
| |
|
|
|
| f |
|
|
| |
|
|
|
| o |
|
|
|
|
|
|
| t |
|
|
|
| |
|
| n |
|
|
|
|
| |
| o |
|
|
|
|
|
| |
r |
|
|
|
|
|
|
| |
f |
|
|
|
|
|
|
|
|
bracket 3
bracket 2
bracket 4
rack back
Step 9. Tighten the four screws in brackets 1 and 2.
Step 10. For each port that will be connected to an HF1 adapter in an HP 9000 system, attach the cable from the corresponding adapter. Remember, your connections must be
Step 11. Connect the switch to the Ethernet network.
74 | Chapter 3 |
