e_hd250.book Page 67 Tuesday, October 24, 2006 3:11 PM
Dubbing with AV Devices
By connecting the video signal output terminal and the AUDIO OUTPUT terminal on
5.Set the audio output. X See page 63.
Set the AUDIO menu screen. X See page 87.
AUDIO menu screen
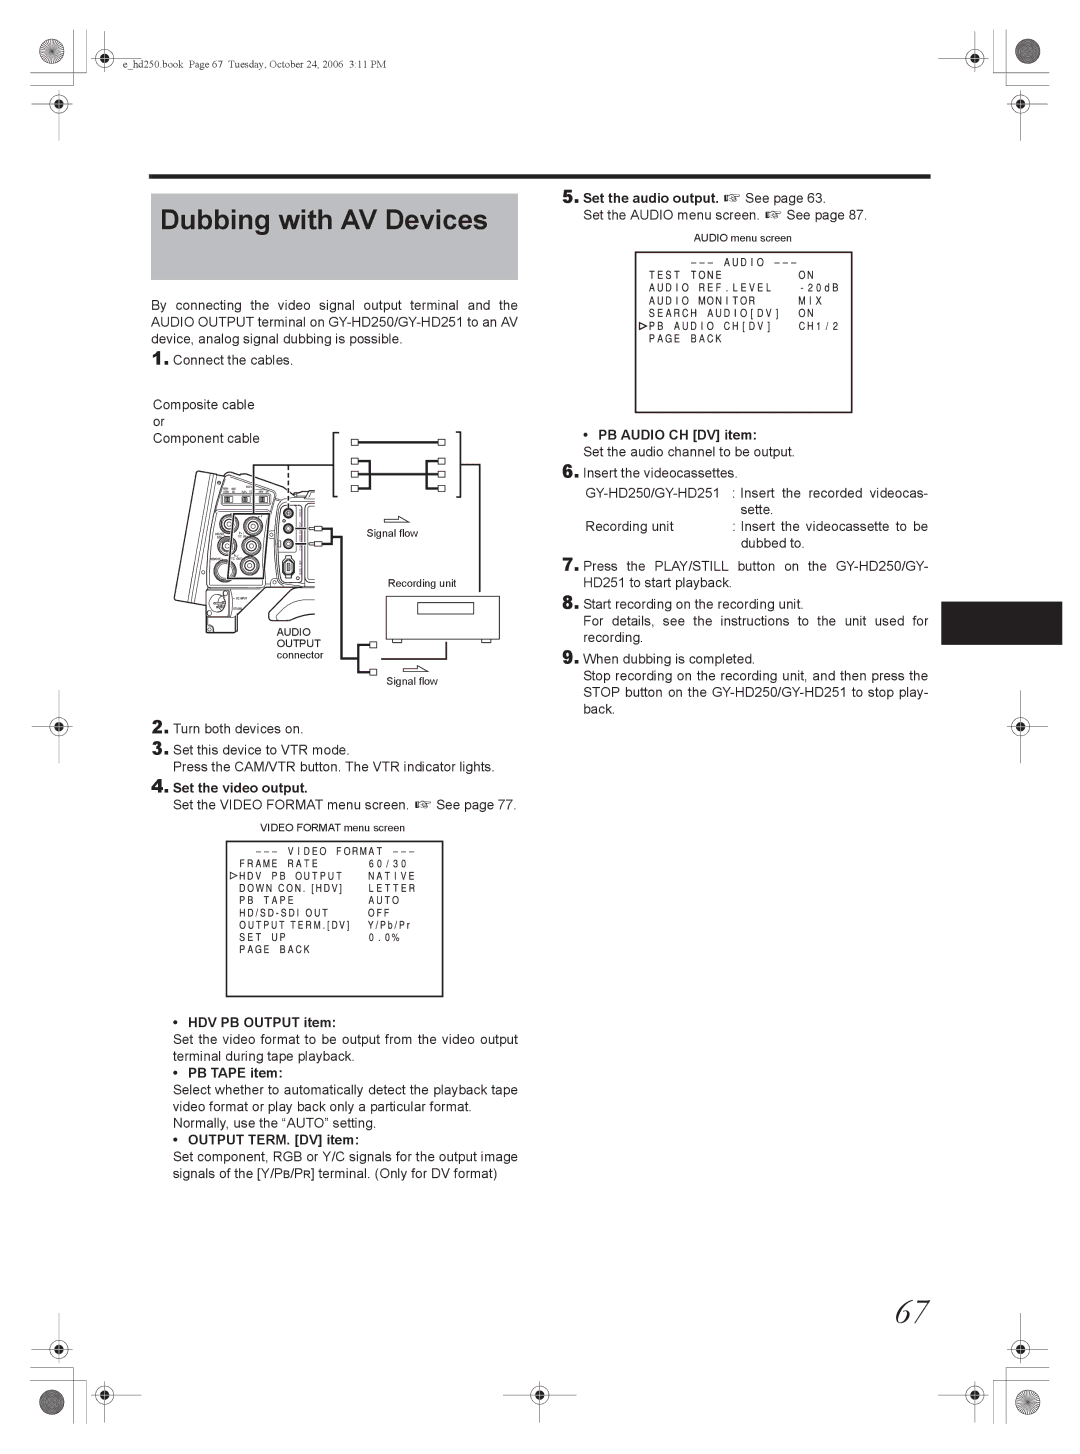
1.Connect the cables.
Composite cable or Component cable
IEEE 1394 CH2 - AUDIO OUT - CH1 VIDEO![]()
![]()
![]()
AUDIO
OUTPUT connector
Signal flow
Recording unit
Signal flow
• PB AUDIO CH [DV] item:
Set the audio channel to be output.
6.Insert the videocassettes.
sette.
Recording unit : Insert the videocassette to be dubbed to.
7. Press the PLAY/STILL button on the |
HD251 to start playback. |
8. Start recording on the recording unit. |
For details, see the instructions to the unit used for |
recording. |
9. When dubbing is completed. |
Stop recording on the recording unit, and then press the |
STOP button on the |
back. |
2.Turn both devices on.
3.Set this device to VTR mode.
Press the CAM/VTR button. The VTR indicator lights.
4.Set the video output.
Set the VIDEO FORMAT menu screen. X See page 77.
VIDEO FORMAT menu screen
• HDV PB OUTPUT item:
Set the video format to be output from the video output terminal during tape playback.
• PB TAPE item:
Select whether to automatically detect the playback tape video format or play back only a particular format. Normally, use the “AUTO” setting.
• OUTPUT TERM. [DV] item:
Set component, RGB or Y/C signals for the output image signals of the [Y/PB/PR] terminal. (Only for DV format)
67