
SM 2855 specifications
The Kettler SM 2855 is a high-quality indoor rower designed for both fitness enthusiasts and those looking to enhance their home workout experience. Renowned for its robust construction and user-friendly features, this rowing machine offers an effective full-body workout that engages multiple muscle groups.One of the main features of the Kettler SM 2855 is its sturdy frame, constructed from high-grade steel, which ensures long-lasting durability and stability. The design allows for a weight capacity of up to 150 kg, making it suitable for a wide range of users. Additionally, the machine's compact design allows it to fit seamlessly into almost any workout space, whether it's a dedicated gym area or a small apartment.
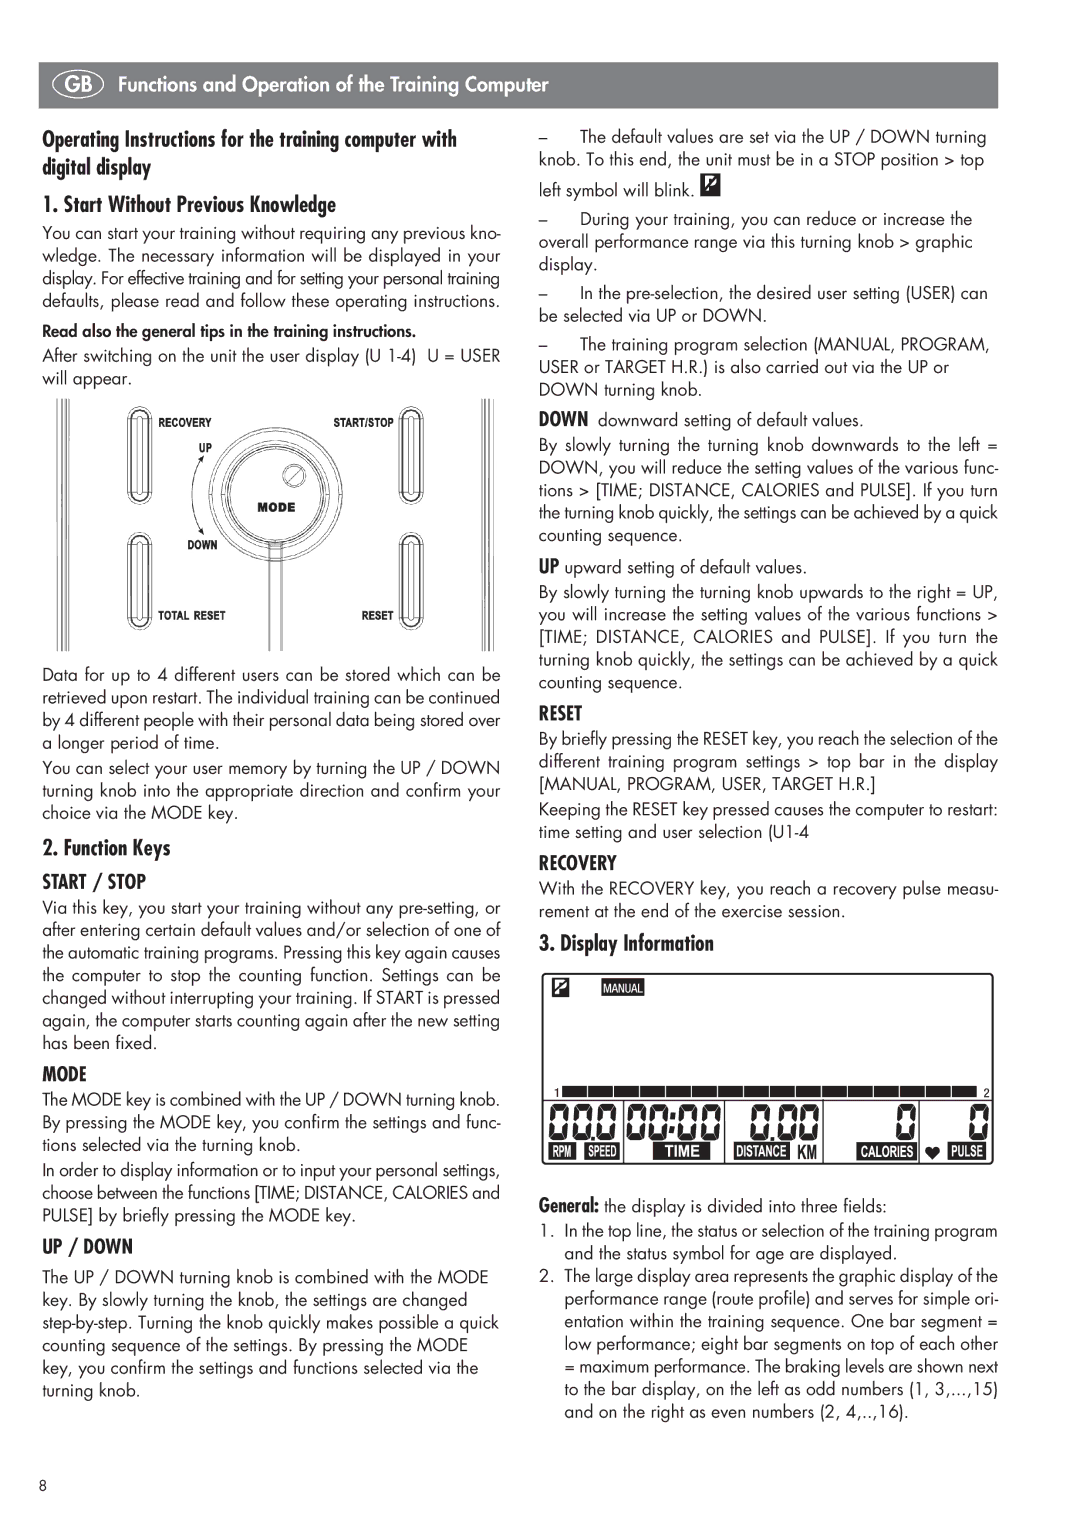
The Kettler SM 2855 incorporates a magnetic resistance system, which provides a smooth and quiet rowing experience. Users can easily adjust the resistance levels, allowing for both beginner and advanced workout sessions. The magnetic resistance also contributes to less wear and tear on the machine, ensuring a longer lifespan.
A standout characteristic of the SM 2855 is its ergonomic seat, which is designed for comfort during extended workout sessions. The seat glides along a solid rail, ensuring a fluid movement that mimics the natural rowing motion. The pedals are also ergonomically designed and come with adjustable straps, ensuring a secure fit and optimal transfer of power during rowing.
Built-in technologies include an easy-to-read LCD display that tracks essential workout metrics such as time, distance, strokes per minute, and calories burned. This real-time feedback allows users to monitor their progress and stay motivated. For those looking to enhance their training, the rowing machine features a variety of pre-set programs that cater to different fitness goals.
The Kettler SM 2855 also offers a folding mechanism for easy storage, making it an ideal choice for users with limited space. The machine is designed to be user-friendly, ensuring that both seasoned rowers and beginners can get started with minimal setup.
Overall, the Kettler SM 2855 combines quality construction, advanced resistance technology, and user-centric features to deliver an exceptional indoor rowing experience. Whether aiming to build strength, improve cardiovascular fitness, or lose weight, this rowing machine is a fantastic addition to any home gym. Its reliability, comfort, and versatility make it a smart investment for achieving fitness goals.