change from blinking to lit, and the D8 will enter record mode. Now you will hear the external input sound. Begin playing, and your playing will be recorded.
6When you wish to stop recording, you can either press the [REC] key once again or press the [PLAY] key to change from recording back to playback. (Manual Punch Out)
The [TRACK STATUS] indicator will blink, the [REC] indicator will go off, and you will hear the track sound once again.
7Press the [STOP] key (the [PLAY] indicator will go off) to stop song playback.
■Listening to the recorded performance (Play- back)
8Move the current time location to a point earlier than where you began
Also, playing back with [TRACK STATUS] set to REC will allow you to hear the sound just as it was recorded, without passing through the fader or EQ.
■Using a foot switch for Manual Punch In/Out
By pressing a foot switch (sold separately), you can switch between playback and recording while you play an instrument, or from a remote location. This method can also be used when you wish to begin recording immediately from the precise beginning of the song.
✧Connect your foot switch to the FOOT SW jack. Press the [SYSTEM] key several times (indicator lit) to access the “Fsw” display. Then rotate the [VALUE] dial to select PncI/O. Now you will be able to press the foot switch instead of pressing the [REC] key in steps 5 and 6 of the above procedure.
Fsw:PncI/O
SYSTEM
E
✧If you wish to start recording from the very begin- ning of the song, press the [REC] key at the begin- ning of the song (the indicator will blink), and press the foot switch to start recording.
Canceling a recording or edit- ing operation (Undo/Redo)
After you have recorded, or performed an editing operation such as track copy or UNDO delete (discussed later in this manual),
you have the option of restoring the data to its origi- nal state. After you have recorded, performed a track editing operation, or used the Redo function, a
“![]() ” symbol will appear in the right of the display. When this is displayed, you have the option of using the Undo function to restore the data to its
” symbol will appear in the right of the display. When this is displayed, you have the option of using the Undo function to restore the data to its
previous state. After the Undo function has been
used, a “ ![]() ” symbol will appear and you can use the Redo function to recover the state prior to using Undo.
” symbol will appear and you can use the Redo function to recover the state prior to using Undo.
■Undo
✧After recording or track editing, or after the Redo
function has been used, the display will show a “ ![]() ” symbol. Press the [UNDO] key to execute Redo, and the data will return to its previous state.
” symbol. Press the [UNDO] key to execute Redo, and the data will return to its previous state.
■Redo
✧After executing the Undo function, the display will
show a “ ![]() ” symbol. Press the [UNDO] key to execute Redo, and the data will return to the state prior to using Undo.
” symbol. Press the [UNDO] key to execute Redo, and the data will return to the state prior to using Undo.
9.Automatically
(Auto Punch In/Out)
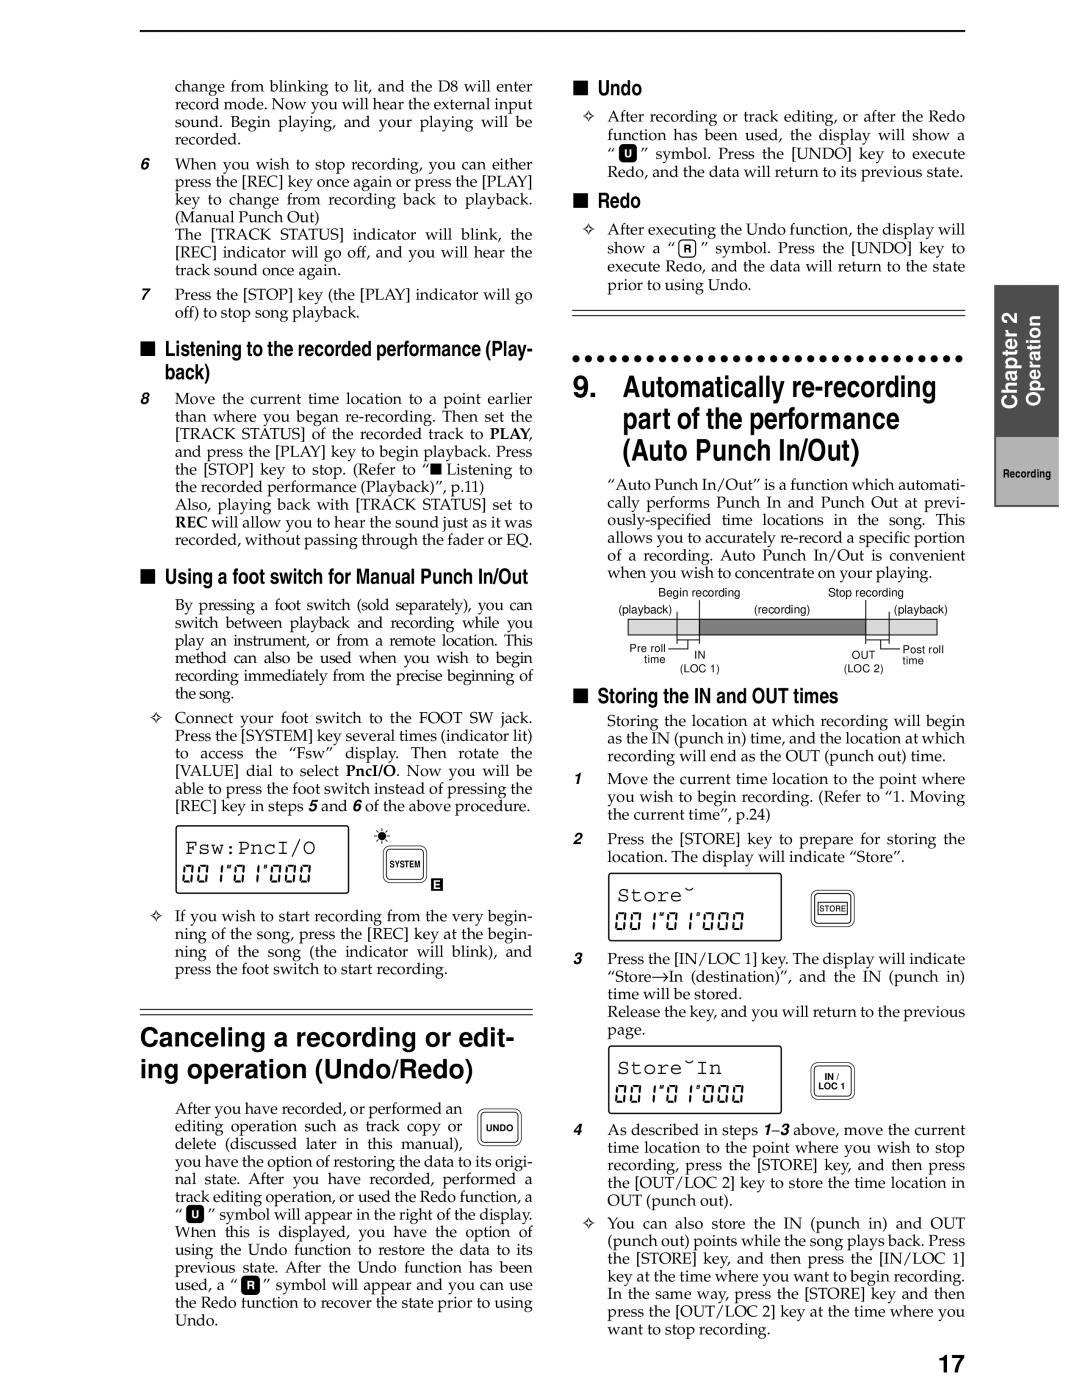
“Auto Punch In/Out” is a function which automati- cally performs Punch In and Punch Out at previ-
| Begin recording |
| Stop recording | |||||||||||
(playback) |
|
|
|
| (recording) |
|
|
|
| (playback) | ||||
|
|
|
|
|
|
|
|
|
|
|
|
|
|
|
| Pre roll |
|
|
|
|
|
|
|
|
|
|
| Post roll | |
|
|
|
| IN |
| OUT |
| |||||||
| time |
|
|
|
| time | ||||||||
| (LOC 1) |
| (LOC 2) |
| ||||||||||
|
|
|
|
|
|
| ||||||||
■Storing the IN and OUT times
Storing the location at which recording will begin as the IN (punch in) time, and the location at which recording will end as the OUT (punch out) time.
1Move the current time location to the point where you wish to begin recording. (Refer to “1. Moving the current time”, p.24)
2Press the [STORE] key to prepare for storing the location. The display will indicate “Store”.
Storeù
3Press the [IN/LOC 1] key. The display will indicate “Store→ In (destination)”, and the IN (punch in) time will be stored.
Release the key, and you will return to the previous page.
StoreùIn
IN /
LOC 1
4As described in steps
✧You can also store the IN (punch in) and OUT (punch out) points while the song plays back. Press the [STORE] key, and then press the [IN/LOC 1] key at the time where you want to begin recording. In the same way, press the [STORE] key and then press the [OUT/LOC 2] key at the time where you want to stop recording.
Chapter 2 | Operation |
|
|
Recording
17