3.Using MMC to control the D8 from a MIDI sequencer
MMC (MIDI Machine Control) messages transmit- ted from a MIDI sequencer can control stop, play- back,
To do this, your MIDI sequencer must support MMC. If your MIDI sequencer does not support MMC, this type of control will not be available.
1Use a MIDI cable to connect the D8’s MIDI IN con- nector to the MIDI OUT connector of the MIDI sequencer.
2Make settings on the MIDI sequencer so that it will transmit MMC to control an external device. (Refer to the owner’s manual for your MIDI sequencer.)
3Press the [EDIT] key, and then press the [SYSTEM] key several times to make the display read “MIDI/ Sync”.
MIDI/SyncÏ 
EDITSYSTEM
E
4Press the [![]() ] key, and then press the [SYSTEM] key several times to make the display read “RcvMMC”.
] key, and then press the [SYSTEM] key several times to make the display read “RcvMMC”.
RcvMMC:o Ï 
5Rotate the [VALUE] dial to select o (On).
6Press the [![]() ] key to move the cursor to “Rvc- MMC”, and press the [SYSTEM] key to make the display read “DevID”.
] key to move the cursor to “Rvc- MMC”, and press the [SYSTEM] key to make the display read “DevID”.
DevID: 01Ï 
7Rotate the [VALUE] dial to set the Device ID of the D8 to the same setting as the MMC Device ID of your MIDI sequencer.
8When you stop, playback,
✧In this setup, MTC (or MIDI Clock) messages can be transmitted from the D8 to synchronize the MIDI sequencer, so that stop, playback,
Using external STEP12 drives
This section explains how an external drive such as a hard disk or removable disk can be connected and initialized, and how you can
backup/restore songs using a removable disk drive.
1.Connecting an external drive
Up to 7 external drives such as hard disks or removable disks* can be connected to the D8. The maximum capacity of each external drive is 4 Gbytes. Use a
*In this manual, the term “removable disk drive” is used to refer collectively to all types of drives from which the disk can be removed.
1Turn off the power of the D8 and of the external drive.
You must turn off the power of the D8 and of the drive before connecting or disconnecting SCSI cables or changing the SCSI ID number of a drive.
2Set the SCSI ID
Select as low a SCSI ID number as possible. If more than one external drive is connected, adjust the set- tings so that the numbers do not overlap. (For details on setting the SCSI ID of an external drive, refer to the owner’s manual for the external drive.)
If two or more drives are set to the same ID num- ber, malfunctions and/or loss of data can occur.
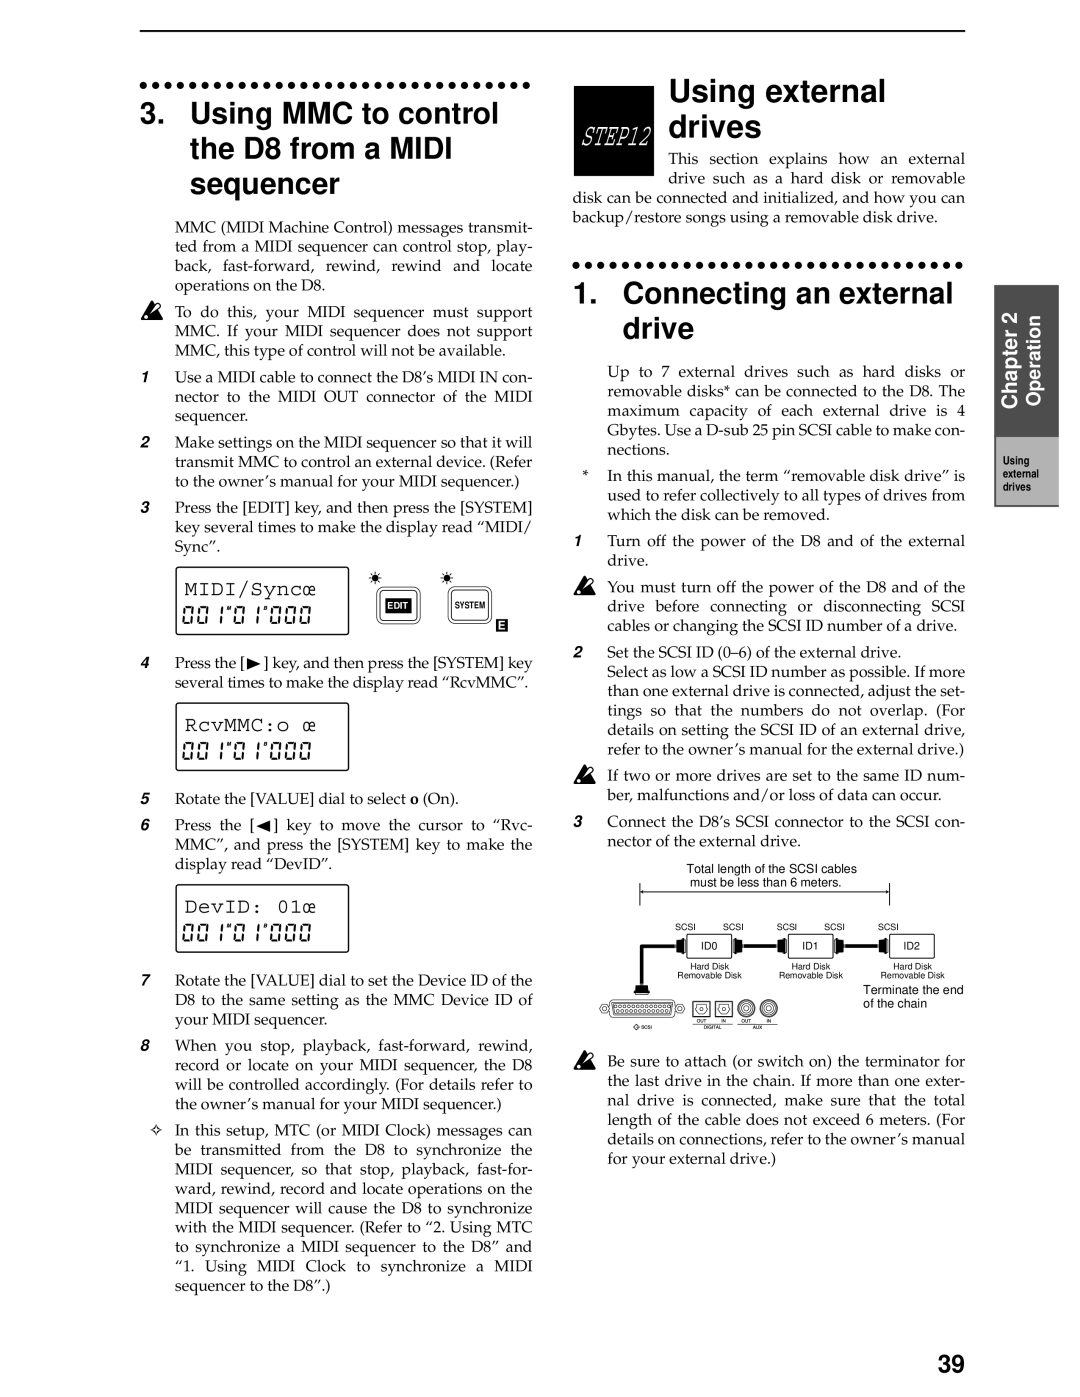
3Connect the D8’s SCSI connector to the SCSI con- nector of the external drive.
Total length of the SCSI cables must be less than 6 meters.
SCSI | SCSI | SCSI | SCSI | SCSI |
| ID0 |
| ID1 | ID2 |
Hard Disk | Hard Disk | Hard Disk | ||
Removable Disk | Removable Disk | Removable Disk | ||
Terminate the end of the chain
Be sure to attach (or switch on) the terminator for the last drive in the chain. If more than one exter- nal drive is connected, make sure that the total length of the cable does not exceed 6 meters. (For details on connections, refer to the owner’s manual for your external drive.)
Chapter 2 | Operation |
|
|
Using external drives
39