disk, or cause malfunctions such as damage to the hard disk or internal mechanism.
■Turning the power on
1Turn on the power of the connected devices.
Set the volume of all devices to the minimum posi- tion, and turn on the power switches starting with the first device in the signal chain. If external drives are connected, refer to p.40.
2Turn down the D8’s master fader. Set
the volume controls of all connected | 9 |
| 10 |
devices to the minimum position. | 8 |
6 | |
| 7 |
5
4
3
2
1
0
MASTER
3Turn on the power of your input devices and mas- ter recorder (DAT etc.).
4Press the [POWER] switch of the D8 to turn on the power.
POWER | ON | OFF |
The display will shown an opening message for a brief time, and then the song which was last selected when the power was turned off will appear.
5Turn on the power of your powered monitor speak- ers, and raise the volume of the connected equip- ment to an appropriate level.
■Turning the power off
Before turning the power off, make sure that all song recording or playback has been completed.
The audio that you record to the D8 will be saved automatically. However, if you edit effect settings or adjust the mixer, these settings will be lost unless they are saved. For the saving procedures, refer to p.13, for saving effect settings, and to p.29 for saving mixer settings (scenes).
1Lower the volume of each connected device to the minimum position and turn the power off starting with the last device in the signal chain. If external drives are connected, refer to p.40.
2If you wish to keep any edits you have made to the effects or to the mixer settings, store them.
3Turn off the power of your amplification system.
4Press the [POWER] switch to turn off the power of the D8.
5Turn off the power of the audio input devices etc.
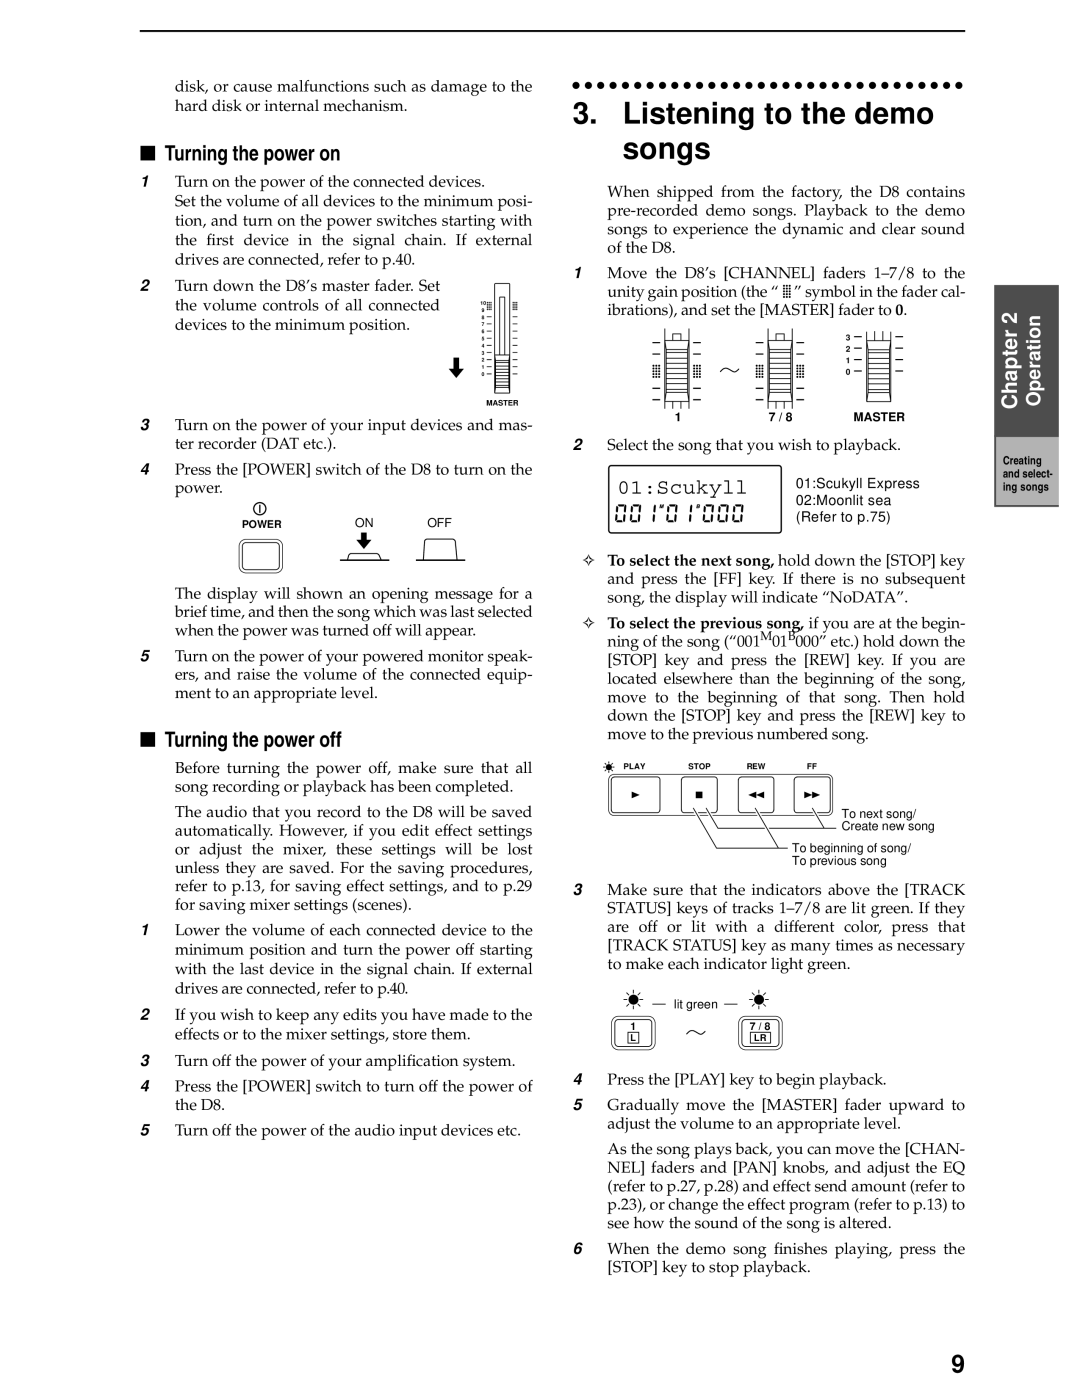
3.Listening to the demo songs
When shipped from the factory, the D8 contains
1Move the D8’s [CHANNEL] faders ![]()
![]() ” symbol in the fader cal- ibrations), and set the [MASTER] fader to 0.
” symbol in the fader cal- ibrations), and set the [MASTER] fader to 0.
|
| 3 |
|
| 2 |
|
| 1 |
|
| 0 |
1 | 7 / 8 | MASTER |
2Select the song that you wish to playback.
01:Scukyll | 01:Scukyll Express |
| 02:Moonlit sea |
| (Refer to p.75) |
✧To select the next song, hold down the [STOP] key and press the [FF] key. If there is no subsequent song, the display will indicate “NoDATA”.
✧To select the previous song, if you are at the begin- ning of the song (“001M01B000” etc.) hold down the [STOP] key and press the [REW] key. If you are located elsewhere than the beginning of the song, move to the beginning of that song. Then hold down the [STOP] key and press the [REW] key to move to the previous numbered song.
PLAY | STOP | REW | FF |
To next song/
Create new song
To beginning of song/
To previous song
3Make sure that the indicators above the [TRACK STATUS] keys of tracks
| lit green |
1 | 7 / 8 |
L | LR |
4Press the [PLAY] key to begin playback.
5Gradually move the [MASTER] fader upward to adjust the volume to an appropriate level.
As the song plays back, you can move the [CHAN- NEL] faders and [PAN] knobs, and adjust the EQ (refer to p.27, p.28) and effect send amount (refer to p.23), or change the effect program (refer to p.13) to see how the sound of the song is altered.
6When the demo song finishes playing, press the [STOP] key to stop playback.
Chapter 2 | Operation |
|
|
Creating and select- ing songs
9
