Configuring Ports
The PORT CONFIG menu enables you to configure individual ports or all ports at one time. You are prompted to enter the password when the console is locked. The ports must be configured to match the devices at the other end of the link. Settings such as speed must be identical. All ports are set to default to AUTO NEGO. When the AUTO NEGO mode is set, the highest speed supported by both ends is negotiated by the port and the device at the other end.
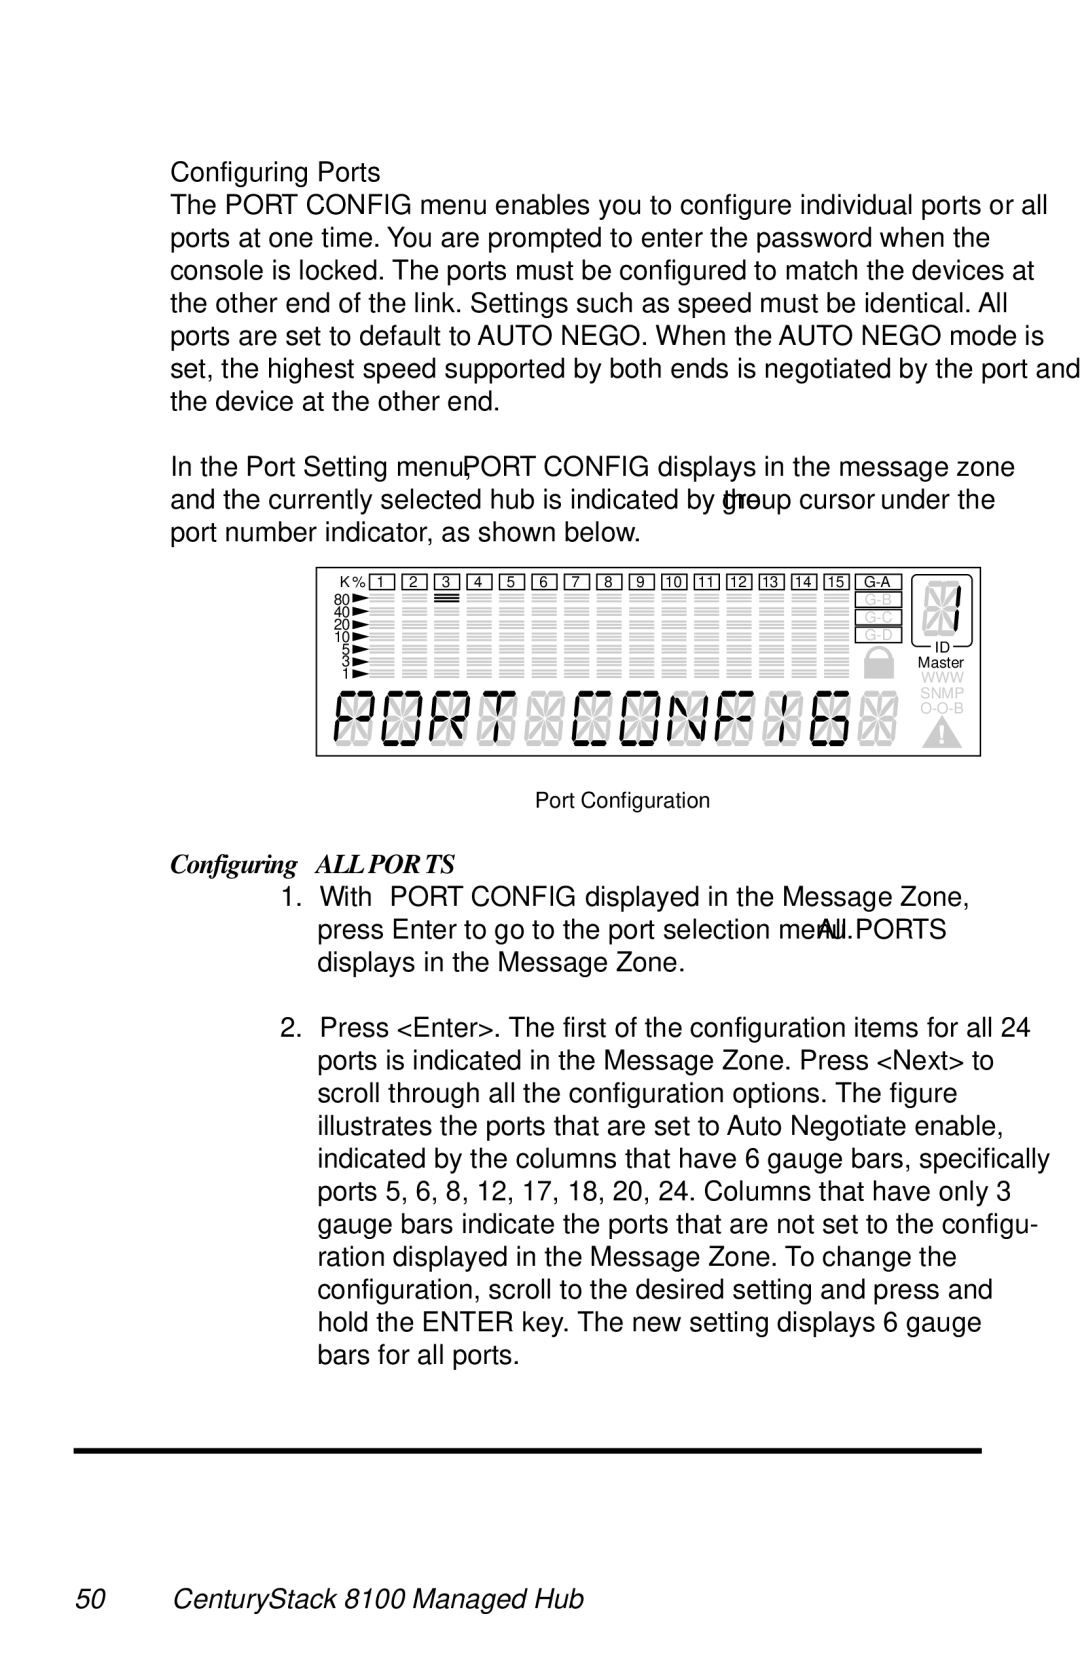
In the Port Setting menu, “PORT CONFIG” displays in the message zone and the currently selected hub is indicated by the “group cursor” under the port number indicator, as shown below.
K % 1 2 3 4 5 6 7 8 9 10 11 12 13 14 15 | ||
80 | ||
40 | ||
20 | ||
10 | ||
5 | ID | |
3 | Master | |
1 | WWW | |
| SNMP | |
| ||
Port Configuration
Configuring ALL POR TS
1.With “PORT CONFIG” displayed in the Message Zone, press Enter to go to the port selection menu. “All PORTS” displays in the Message Zone.
2.Press <Enter>. The first of the configuration items for all 24 ports is indicated in the Message Zone. Press <Next> to scroll through all the configuration options. The figure illustrates the ports that are set to Auto Negotiate enable, indicated by the columns that have 6 gauge bars, specifically ports 5, 6, 8, 12, 17, 18, 20, 24. Columns that have only 3 gauge bars indicate the ports that are not set to the configu- ration displayed in the Message Zone. To change the configuration, scroll to the desired setting and press and hold the ENTER key. The new setting displays 6 gauge bars for all ports.