VisuaLink 128/384 User Guide | Chapter 5 |
|
|
CAMERA CONTROL
ENTER
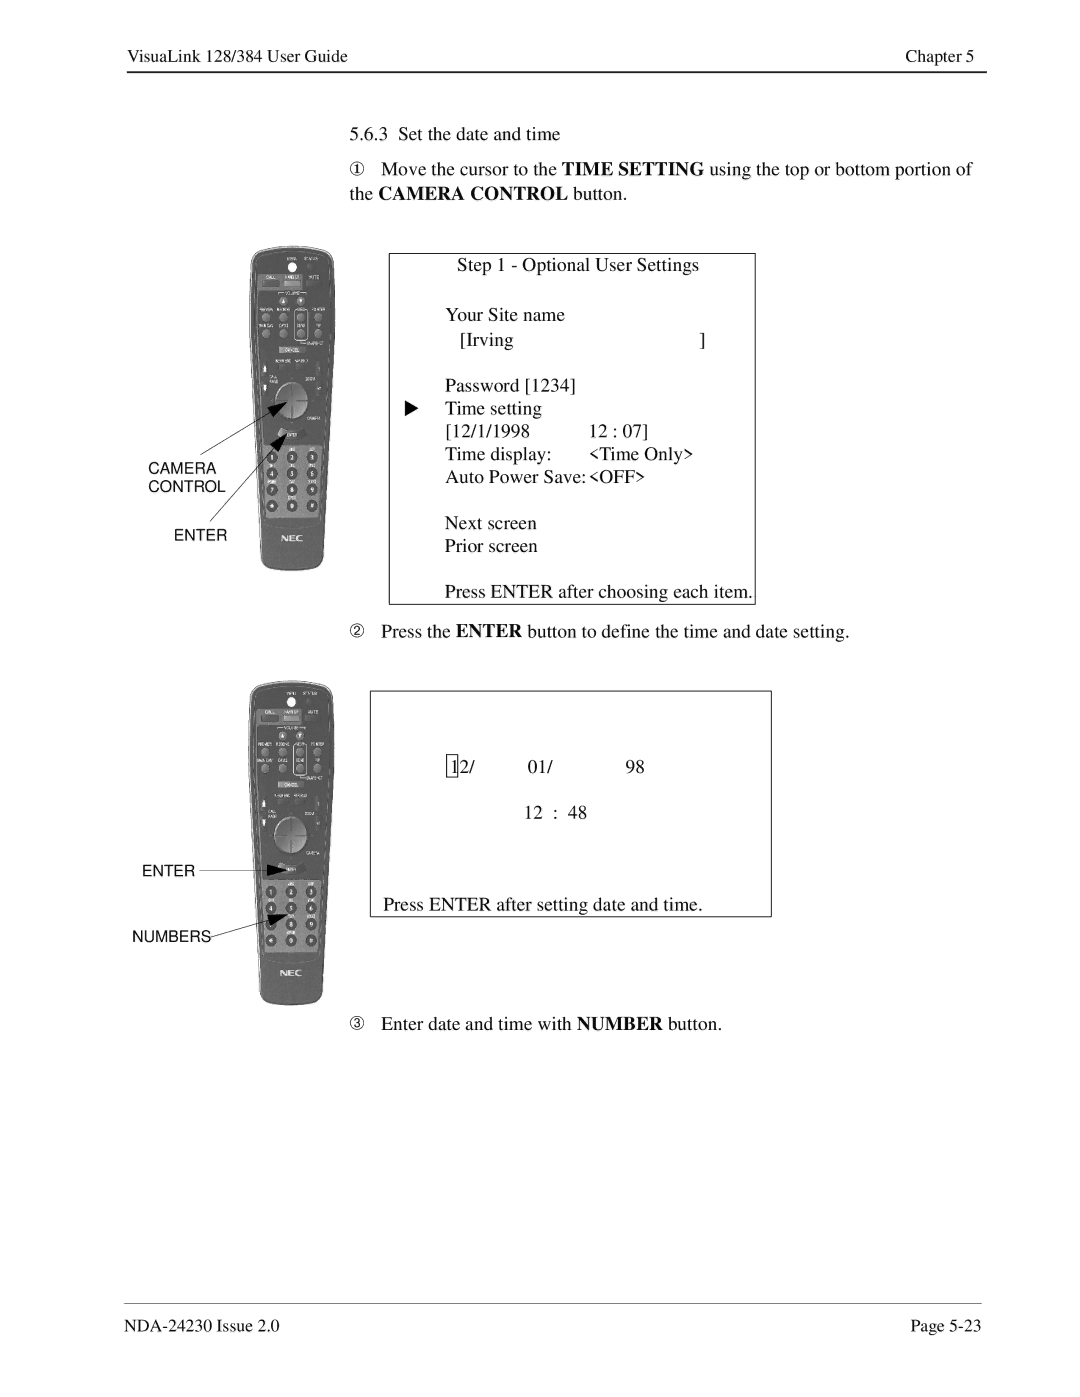
5.6.3 Set the date and time
①Move the cursor to the TIME SETTING using the top or bottom portion of the CAMERA CONTROL button.
Step 1 - Optional User Settings
| Your Site name |
|
| [Irving | ] |
| Password [1234] |
|
▲ | Time setting |
|
| [12/1/1998 | 12 : 07] |
| Time display: | <Time Only> |
Auto Power Save:<OFF>
Next screen
Prior screen
Press ENTER after choosing each item.
➁ Press the ENTER button to define the time and date setting.
ENTER
NUMBERS
➂
12/ | 01/ | 98 |
12 : 48
Press ENTER after setting date and time.
Enter date and time with NUMBER button.
Page |
