Chapter 2 Installation 61
Installing shelf alarm cables
Note: The BIP ships from the factory with default alarm configurations set for a single chassis in the lower shelf of the rack. If you install a second chassis, you must configure the jumpers on the alarm module to support that configuration. See “Accessing the alarm module” on page 30 if you need to modify the shelf alarm jumpers.
1To install the shelf alarm cable for a single chassis in the lower shelf: a Locate the shelf alarm cables in the shipping container.
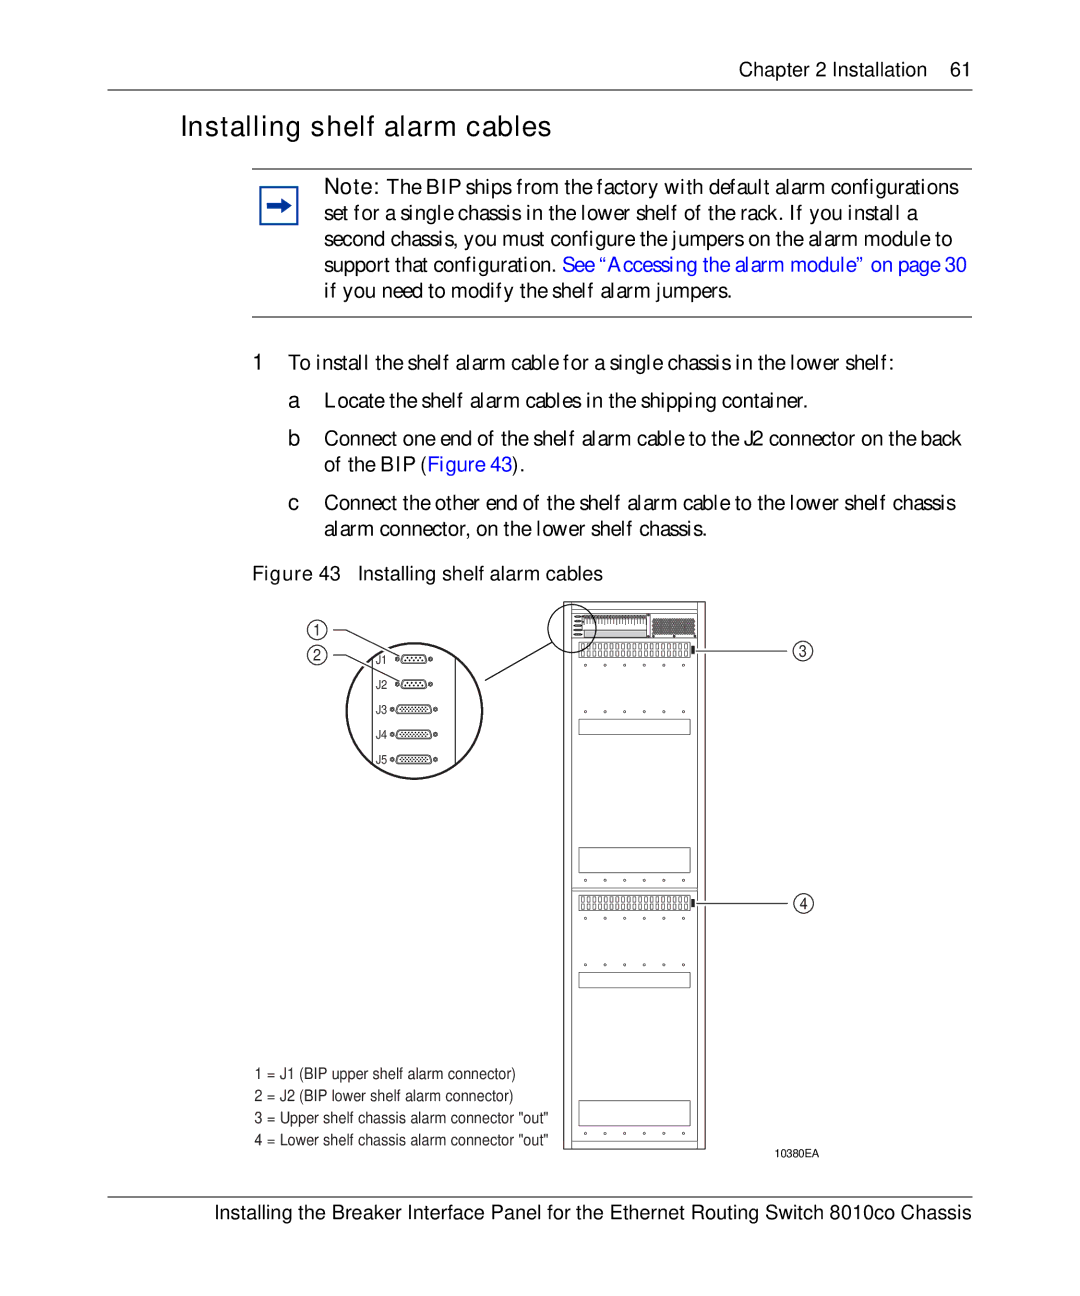
b Connect one end of the shelf alarm cable to the J2 connector on the back of the BIP (Figure 43).
c Connect the other end of the shelf alarm cable to the lower shelf chassis alarm connector, on the lower shelf chassis.
Figure 43 Installing shelf alarm cables
1
2 J1
J2
J3 ![]()
![]()
![]()
J4 ![]()
![]()
![]()
J5 ![]()
![]()
![]()
1 = J1 (BIP upper shelf alarm connector)
2 = J2 (BIP lower shelf alarm connector)
3 = Upper shelf chassis alarm connector "out"
4 = Lower shelf chassis alarm connector "out"
3
4
10380EA
Installing the Breaker Interface Panel for the Ethernet Routing Switch 8010co Chassis
