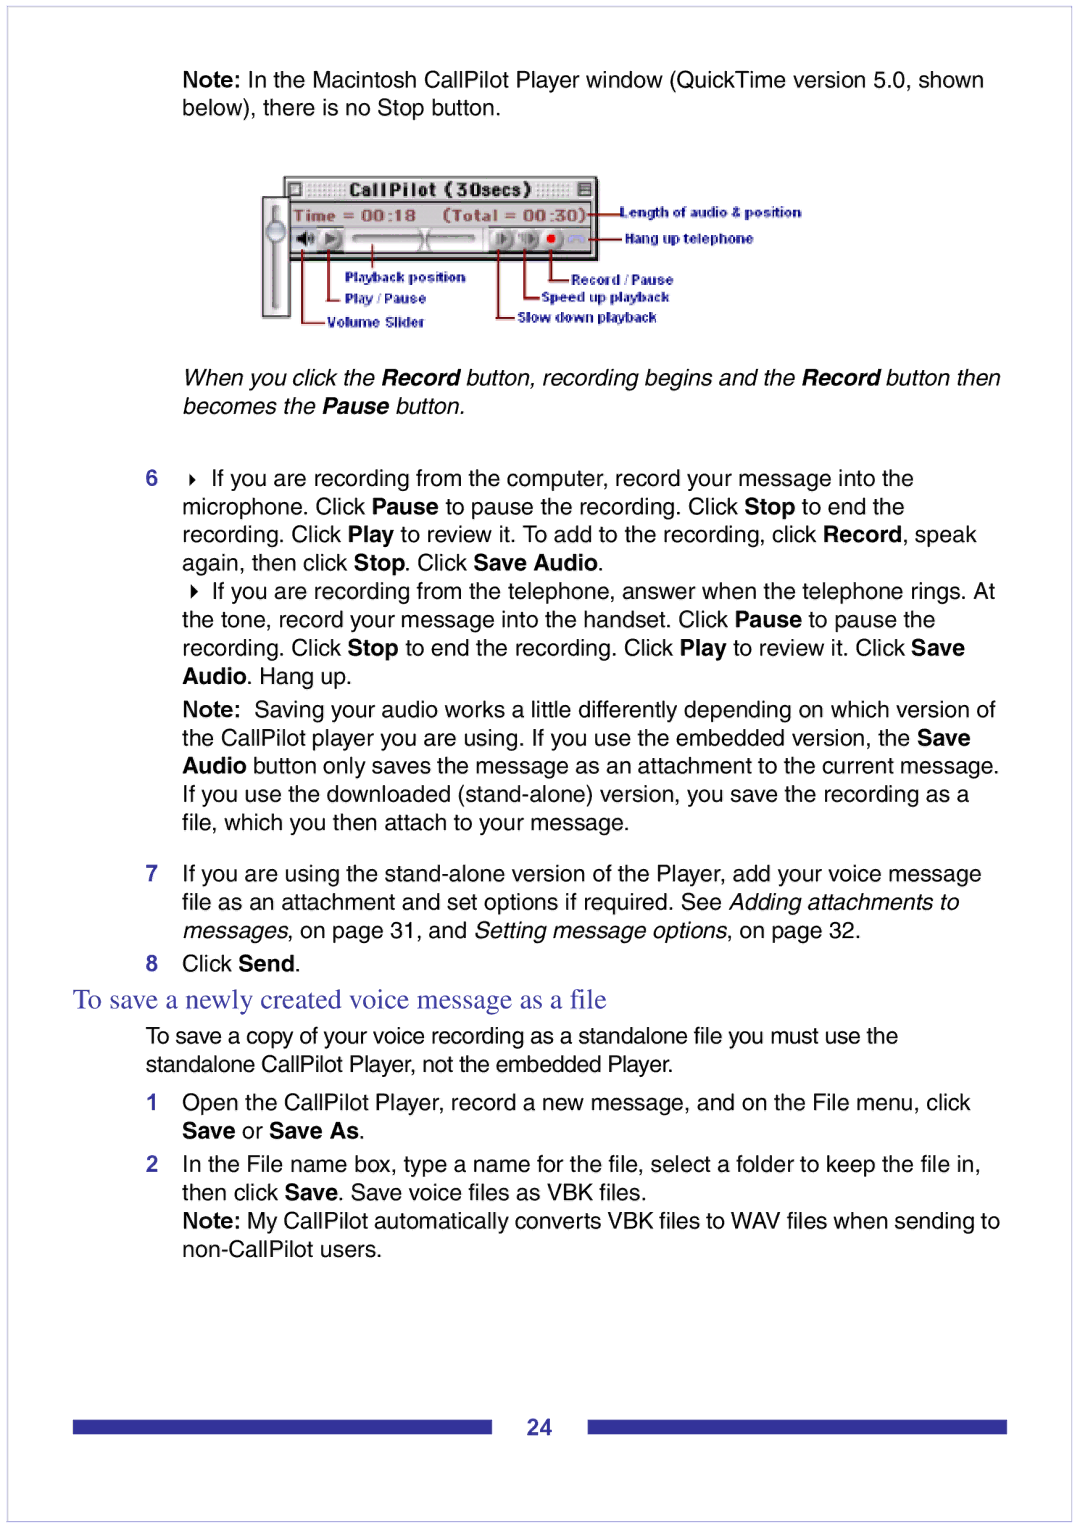
Note: In the Macintosh CallPilot Player window (QuickTime version 5.0, shown below), there is no Stop button.
When you click the Record button, recording begins and the Record button then becomes the Pause button.
6If you are recording from the computer, record your message into the microphone. Click Pause to pause the recording. Click Stop to end the recording. Click Play to review it. To add to the recording, click Record, speak again, then click Stop. Click Save Audio.
If you are recording from the telephone, answer when the telephone rings. At the tone, record your message into the handset. Click Pause to pause the recording. Click Stop to end the recording. Click Play to review it. Click Save Audio. Hang up.
Note: Saving your audio works a little differently depending on which version of the CallPilot player you are using. If you use the embedded version, the Save Audio button only saves the message as an attachment to the current message. If you use the downloaded
7If you are using the
8Click Send.
To save a newly created voice message as a file
To save a copy of your voice recording as a standalone file you must use the standalone CallPilot Player, not the embedded Player.
1Open the CallPilot Player, record a new message, and on the File menu, click Save or Save As.
2In the File name box, type a name for the file, select a folder to keep the file in,
then click Save. Save voice files as VBK files.
Note: My CallPilot automatically converts VBK files to WAV files when sending to
24