3 SafeCom Controller
5.Change External Account Control to Enable.
6.Check Enable Authentication by External Server.
7.In Application Name enter SafeCom Go Sharp.
8.In Address for Application UI enter the reference to a specific file on the connected SafeCom Controller. The address is:
http://<ip address>/soapsharp/safecom.scx
where <ip address> should be replaced with the IP address of the SafeCom Controller.
9.In Address for Application Web Service enter the reference to a specific folder on the connected SafeCom Controller. The address is:
http://<ip address>/soapsharp/
where <ip address> should be replaced with the IP address of the SafeCom Controller.
10.Leave Timeout on 20 seconds.
11.Click Submit.
12.If Standard Applications4 appears as a link go to step 13. Otherwise power down and restart the Sharp MFP.
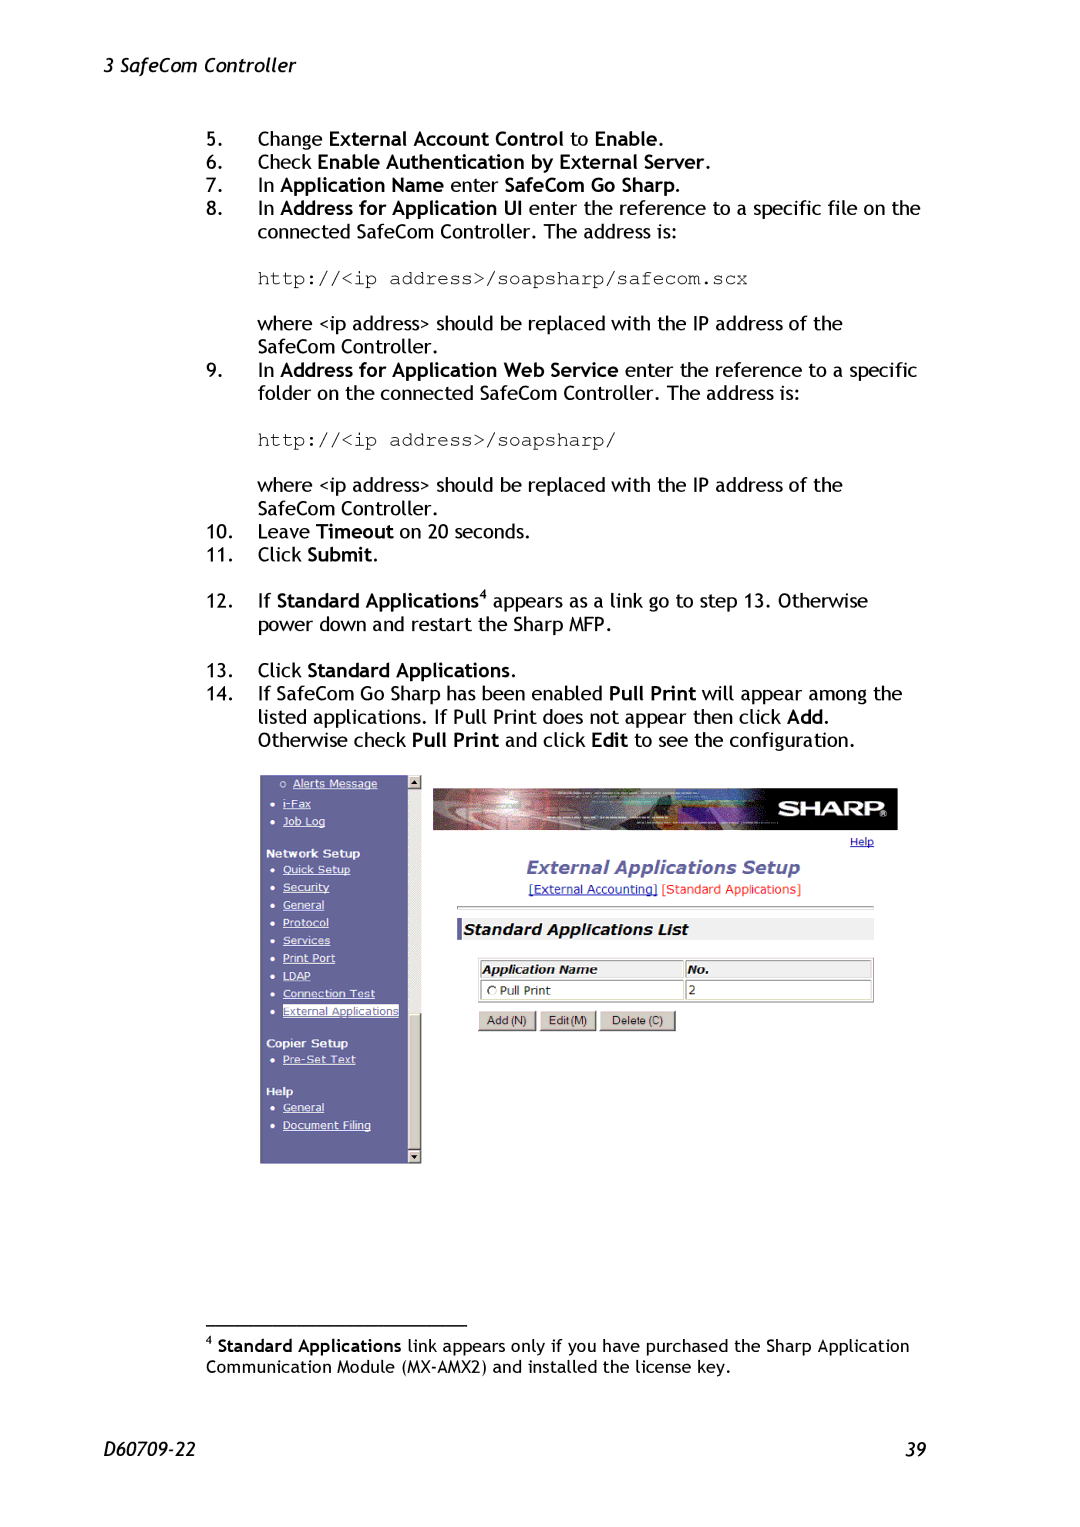
13.Click Standard Applications.
14.If SafeCom Go Sharp has been enabled Pull Print will appear among the listed applications. If Pull Print does not appear then click Add. Otherwise check Pull Print and click Edit to see the configuration.
4Standard Applications link appears only if you have purchased the Sharp Application Communication Module
39 |
