3 SafeCom Controller
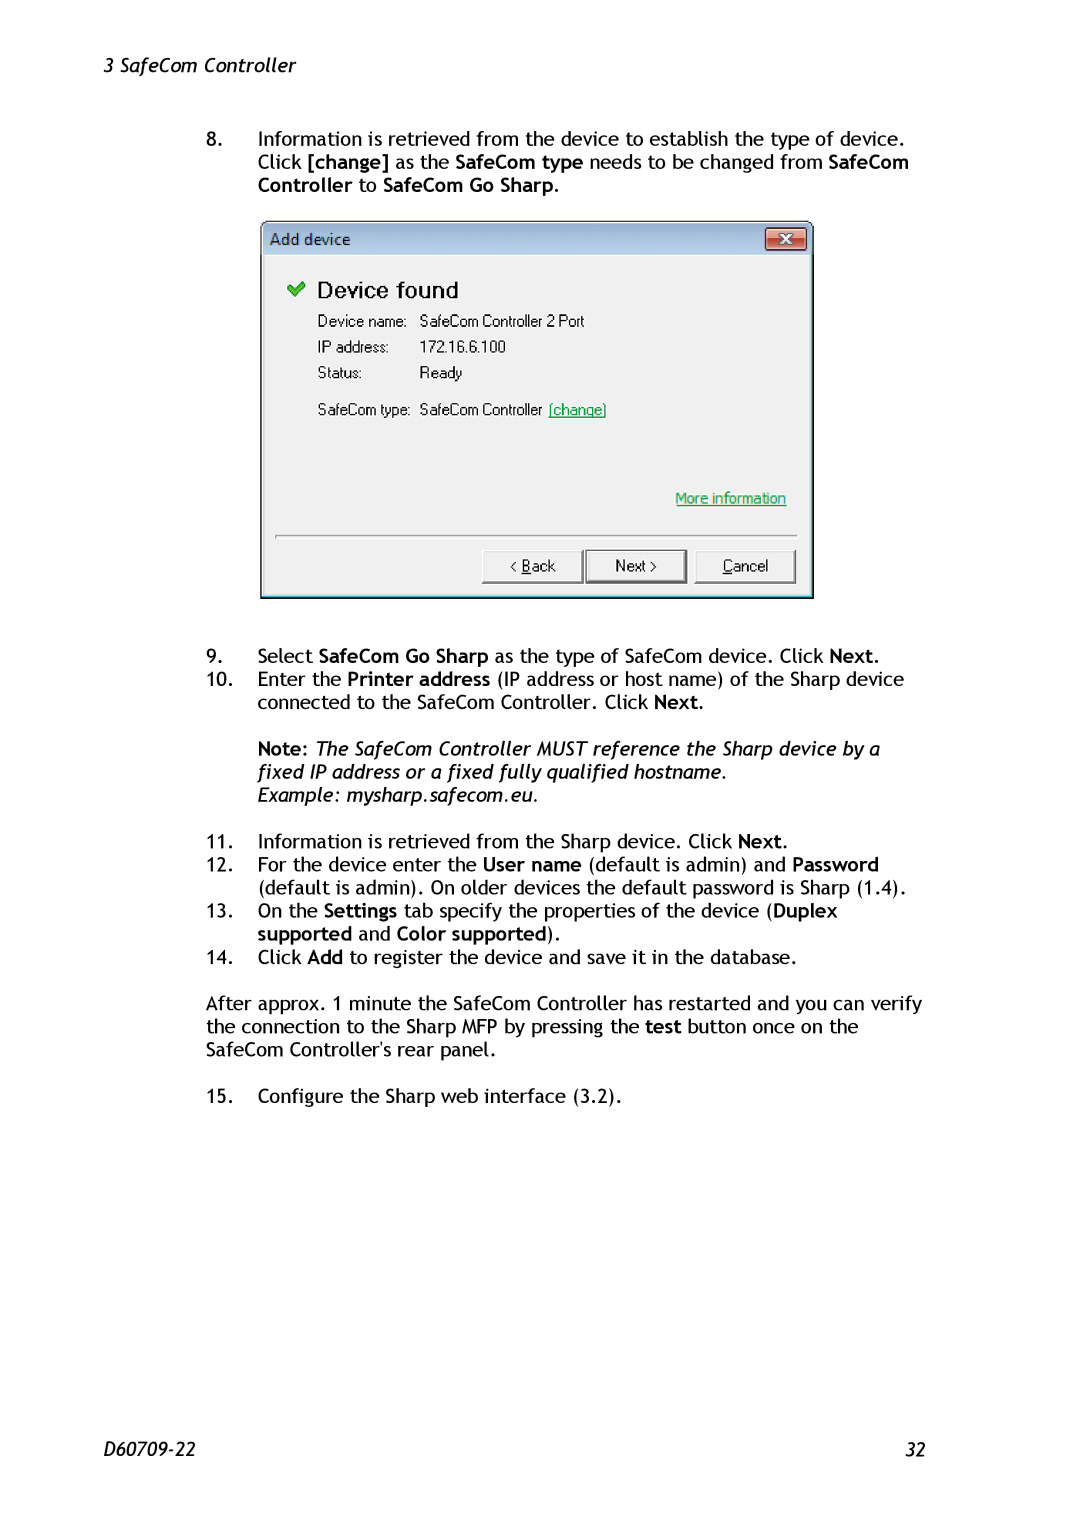
8.Information is retrieved from the device to establish the type of device. Click [change] as the SafeCom type needs to be changed from SafeCom Controller to SafeCom Go Sharp.
9.Select SafeCom Go Sharp as the type of SafeCom device. Click Next.
10.Enter the Printer address (IP address or host name) of the Sharp device connected to the SafeCom Controller. Click Next.
Note: The SafeCom Controller MUST reference the Sharp device by a fixed IP address or a fixed fully qualified hostname.
Example: mysharp.safecom.eu.
11.Information is retrieved from the Sharp device. Click Next.
12.For the device enter the User name (default is admin) and Password (default is admin). On older devices the default password is Sharp (1.4).
13.On the Settings tab specify the properties of the device (Duplex supported and Color supported).
14.Click Add to register the device and save it in the database.
After approx. 1 minute the SafeCom Controller has restarted and you can verify the connection to the Sharp MFP by pressing the test button once on the SafeCom Controller's rear panel.
15.Configure the Sharp web interface (3.2).
32 |