2. Preparation
2.6 Date and time
The date and time can be set using either the cordless handset or the base unit.
LThe other party’s fax machine will print the date and time on the top of each page you send according to your unit’s date and time setting.
2.6.1 With the cordless handset
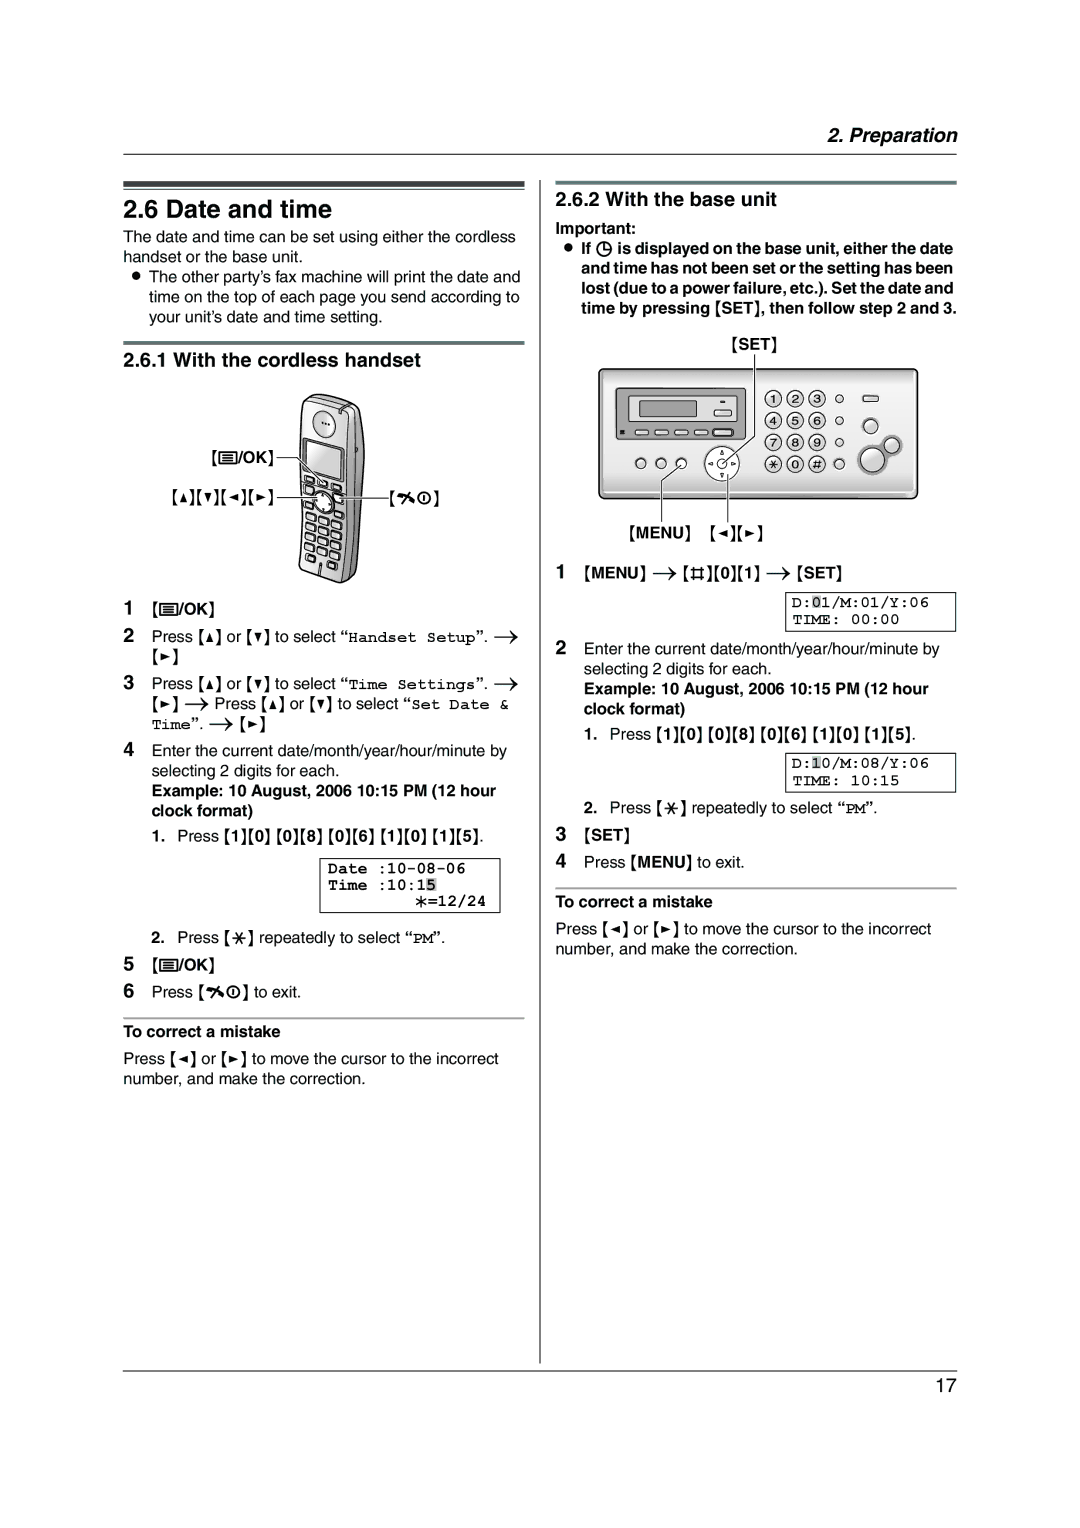
{j/OK}![]()
{^}{V}{<}{>}![]()
![]() {ih}
{ih}
1{j/OK}
2Press {^} or {V} to select “Handset Setup”. i
{>}
3Press {^} or {V} to select “Time Settings”. i {>} iPress {^} or {V} to select “Set Date & Time”. i{>}
4Enter the current date/month/year/hour/minute by selecting 2 digits for each.
Example: 10 August, 2006 10:15 PM (12 hour clock format)
1. Press {1}{0} {0}{8} {0}{6} {1}{0} {1}{5}.
Time :10:15
;=12/24
2.Press {*} repeatedly to select “PM”.
5{j/OK}
6Press {ih} to exit.
To correct a mistake
Press {<} or {>} to move the cursor to the incorrect number, and make the correction.
2.6.2 With the base unit
Important:
LIf eis displayed on the base unit, either the date and time has not been set or the setting has been lost (due to a power failure, etc.). Set the date and time by pressing {SET}, then follow step 2 and 3.
{SET}
{MENU} {<}{>}
1{MENU} i{#}{0}{1} i{SET}
D:01/M:01/Y:06
TIME: 00:00
2Enter the current date/month/year/hour/minute by selecting 2 digits for each.
Example: 10 August, 2006 10:15 PM (12 hour clock format)
1. Press {1}{0} {0}{8} {0}{6} {1}{0} {1}{5}.
D:10/M:08/Y:06
TIME: 10:15
2.Press {*} repeatedly to select “PM”.
3{SET}
4Press {MENU} to exit.
To correct a mistake
Press {<} or {>} to move the cursor to the incorrect number, and make the correction.
17
