INSTALLATION
●Warning
This installation should be made by qualified service personnel or system installers.
●Notes
Places to avoid
•Direct exposure to sunlight or near a source of heat such as a radiator.
•Very dirty and dusty places. Places subject to strong vibrations.
•Near a transformer, dimmer, video player, radio or monitor. These may cause humming noise, etc.
About mounting
•Do not block the ventilation openings or slots in the cover to prevent the appliance from overheating.
•Always keep the temperature in the rack within +45 °C (113 °F).
•Secure the rear of the appliance to the rack with additional mounting brackets (procured locally), if the rack is subject to vibration.
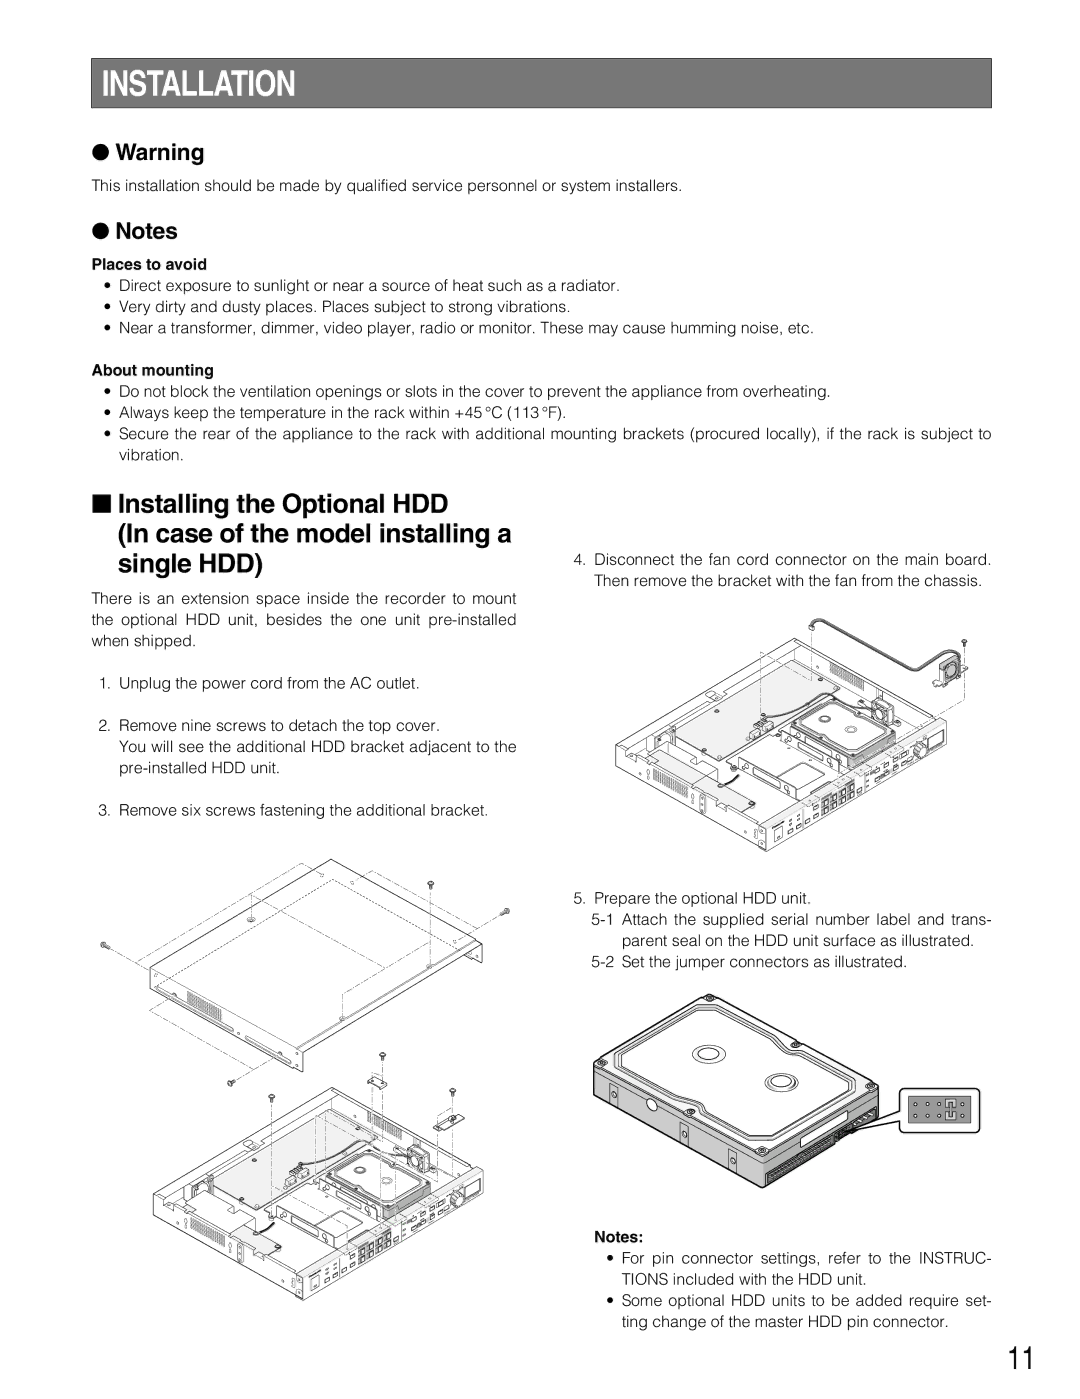
■Installing the Optional HDD
(In case of the model installing a single HDD)
There is an extension space inside the recorder to mount the optional HDD unit, besides the one unit
1.Unplug the power cord from the AC outlet.
2.Remove nine screws to detach the top cover.
You will see the additional HDD bracket adjacent to the
3.Remove six screws fastening the additional bracket.
4.Disconnect the fan cord connector on the main board. Then remove the bracket with the fan from the chassis.
|
|
|
|
|
|
| 208 | |
|
|
|
|
|
| WJ |
| |
|
|
|
| ecor | der |
|
|
|
|
|
| k R |
|
|
|
| |
|
| Dis |
|
|
|
|
| |
Dig | ital |
|
|
|
|
|
|
|
|
|
|
|
|
|
|
|
4
![]() 3
3 ![]() 8
8 ![]() 2
2 ![]() 7 1
7 1 ![]() 6
6
5
5. Prepare the optional HDD unit.
|
|
|
|
|
|
| 208 | |
|
|
|
|
|
| WJ |
| |
|
|
|
| ecor | der |
|
|
|
|
|
| k R |
|
|
|
| |
|
| Dis |
|
|
|
|
| |
Digi | tal |
|
|
|
|
|
| |
|
|
|
|
|
|
|
|
4
![]() 3
3 ![]() 8
8 ![]() 2
2 ![]() 7 1
7 1 ![]() 6
6
5
Notes:
•For pin connector settings, refer to the INSTRUC- TIONS included with the HDD unit.
•Some optional HDD units to be added require set- ting change of the master HDD pin connector.
11