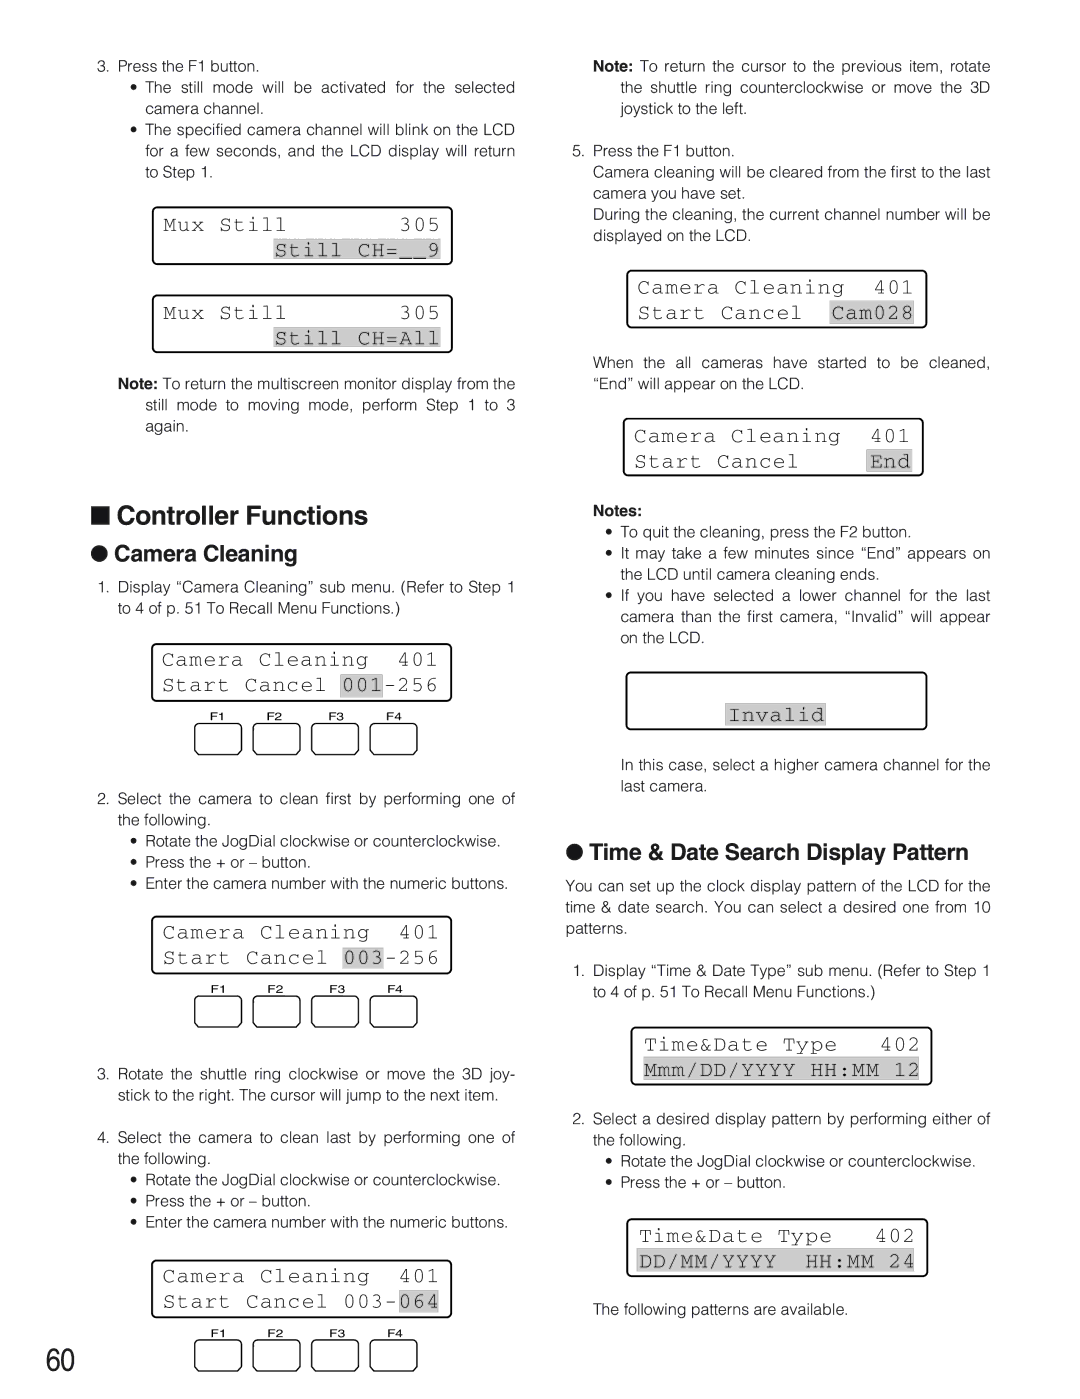
3.Press the F1 button.
•The still mode will be activated for the selected camera channel.
•The specified camera channel will blink on the LCD for a few seconds, and the LCD display will return to Step 1.
Mux | Still | 305 | |
|
| Still | CH=__9 |
Mux | Still | 305 | |
|
|
|
|
|
| Still | CH=All |
Note: To return the multiscreen monitor display from the still mode to moving mode, perform Step 1 to 3 again.
■Controller Functions
●Camera Cleaning
1.Display “Camera Cleaning” sub menu. (Refer to Step 1 to 4 of p. 51 To Recall Menu Functions.)
Camera Cleaning 401
Start Cancel 001-256
F1 F2 F3 F4
Note: To return the cursor to the previous item, rotate the shuttle ring counterclockwise or move the 3D joystick to the left.
5.Press the F1 button.
Camera cleaning will be cleared from the first to the last camera you have set.
During the cleaning, the current channel number will be displayed on the LCD.
Camera Cleaning 401
Start Cancel Cam028
When the all cameras have started to be cleaned, “End” will appear on the LCD.
Camera | Cleaning | 401 |
Start | Cancel | End |
Notes:
•To quit the cleaning, press the F2 button.
•It may take a few minutes since “End” appears on the LCD until camera cleaning ends.
•If you have selected a lower channel for the last camera than the first camera, “Invalid” will appear on the LCD.
Invalid
2.Select the camera to clean first by performing one of the following.
•Rotate the JogDial clockwise or counterclockwise.
•Press the + or – button.
•Enter the camera number with the numeric buttons.
Camera Cleaning 401
Start Cancel
F1 | F2 | F3 | F4 |
3.Rotate the shuttle ring clockwise or move the 3D joy- stick to the right. The cursor will jump to the next item.
4.Select the camera to clean last by performing one of the following.
•Rotate the JogDial clockwise or counterclockwise.
•Press the + or – button.
•Enter the camera number with the numeric buttons.
Camera Cleaning 401
Start Cancel
F1 | F2 | F3 | F4 |
60
In this case, select a higher camera channel for the last camera.
●Time & Date Search Display Pattern
You can set up the clock display pattern of the LCD for the time & date search. You can select a desired one from 10 patterns.
1.Display “Time & Date Type” sub menu. (Refer to Step 1 to 4 of p. 51 To Recall Menu Functions.)
Time&Date Type 402
Mmm/DD/YYYY HH:MM 12
2.Select a desired display pattern by performing either of the following.
•Rotate the JogDial clockwise or counterclockwise.
•Press the + or – button.
Time&Date Type 402
DD/MM/YYYY HH:MM 24
The following patterns are available.
