4. Service procedures
(1)Check before and after Troubleshooting
Many problems may happen because of wiring or power supply problems, so you should check these areas first. Problems here can cause false results in some of the other tests, and so should be corrected first.
1. Check power supply wiring
❑Check the power supply wires are correctly connected between terminal No. 1 & 2 on the 5P terminal plates in the indoor unit and the outdoor unit.
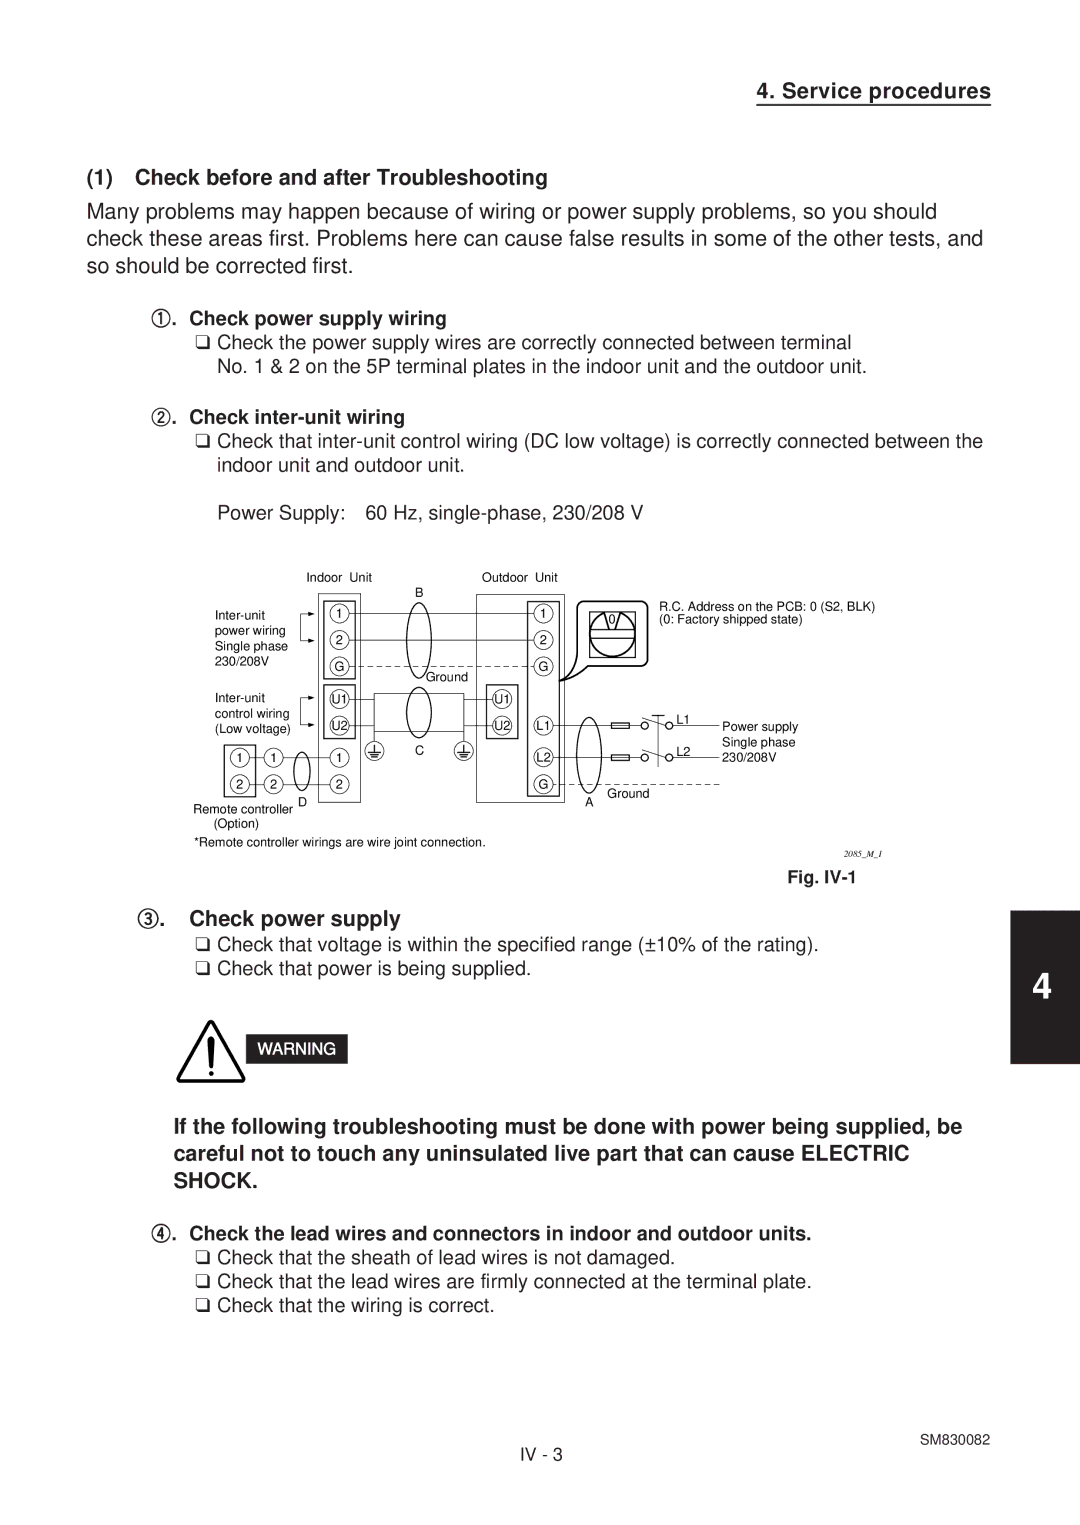
2. Check inter-unit wiring
❑Check that
Power Supply: 60 Hz,
| Indoor Unit | Outdoor | Unit |
|
| B |
|
1 |
| 1 | |
power wiring | 2 |
| 2 |
Single phase |
| ||
|
|
| |
230/208V | G |
| G |
| Ground | ||
|
|
| |
U1 | U1 |
| |
control wiring | U2 | U2 | L1 |
(Low voltage) |
R.C. Address on the PCB: 0 (S2, BLK) ![]() 0 (0: Factory shipped state)
0 (0: Factory shipped state)
L1
Power supply
Single phase
1 | 1 | 1 | C | L2 |
| ||||
2 | 2 | 2 |
| G |
Remote controller D (Option)
*Remote controller wirings are wire joint connection.
A
L2 230/208V
Ground
2085_M_I
Fig.
3. Check power supply
❑Check that voltage is within the specified range (±10% of the rating).
❑Check that power is being supplied.
If the following troubleshooting must be done with power being supplied, be careful not to touch any uninsulated live part that can cause ELECTRIC SHOCK.
4. Check the lead wires and connectors in indoor and outdoor units.
❑Check that the sheath of lead wires is not damaged.
❑Check that the lead wires are firmly connected at the terminal plate.
❑Check that the wiring is correct.
4
SM830082
IV - 3