PARTS REMOVAL AND REPLACEMENT
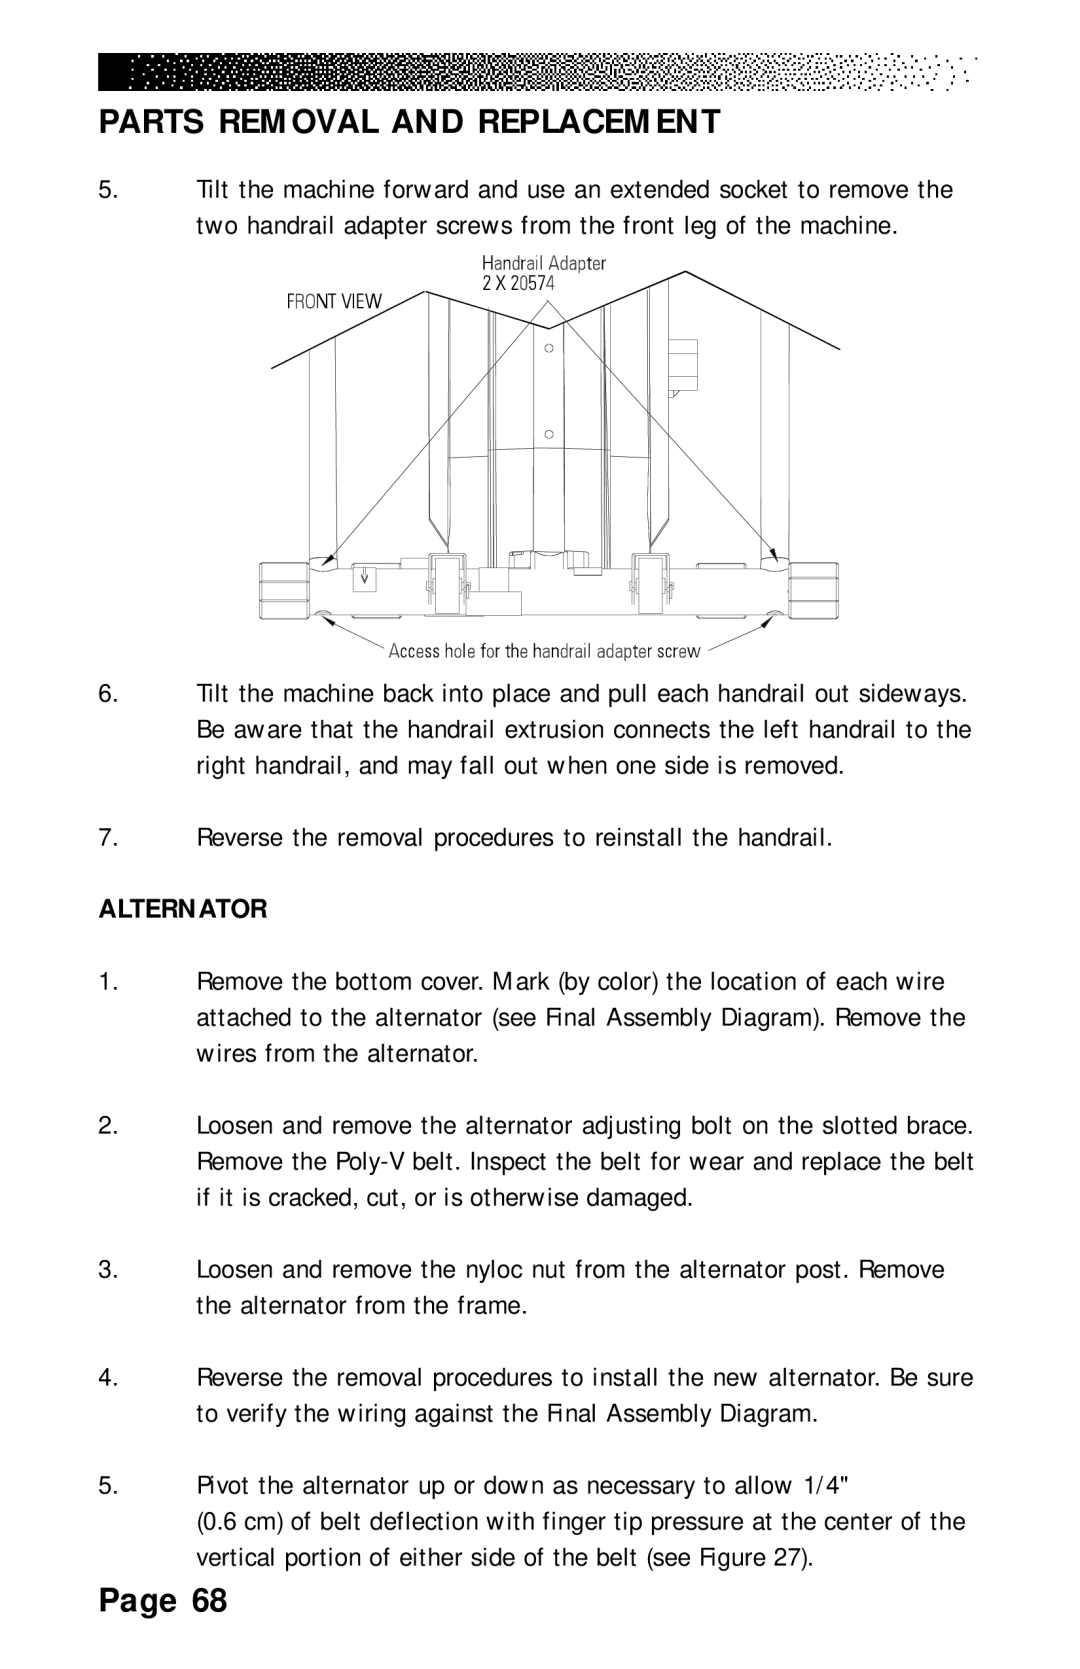
5.Tilt the machine forward and use an extended socket to remove the two handrail adapter screws from the front leg of the machine.
6.Tilt the machine back into place and pull each handrail out sideways. Be aware that the handrail extrusion connects the left handrail to the right handrail, and may fall out when one side is removed.
7.Reverse the removal procedures to reinstall the handrail.
ALTERNATOR
1.Remove the bottom cover. Mark (by color) the location of each wire attached to the alternator (see Final Assembly Diagram). Remove the wires from the alternator.
2.Loosen and remove the alternator adjusting bolt on the slotted brace. Remove the
3.Loosen and remove the nyloc nut from the alternator post. Remove the alternator from the frame.
4.Reverse the removal procedures to install the new alternator. Be sure to verify the wiring against the Final Assembly Diagram.
5.Pivot the alternator up or down as necessary to allow 1/4"
(0.6 cm) of belt deflection with finger tip pressure at the center of the vertical portion of either side of the belt (see Figure 27).
Page 68
