CHAPTER 6
For an adjustment to make the Print Head parallel to the Platen Roller, continue as follows:
Step 8. Unlatch and raise the Print Head.
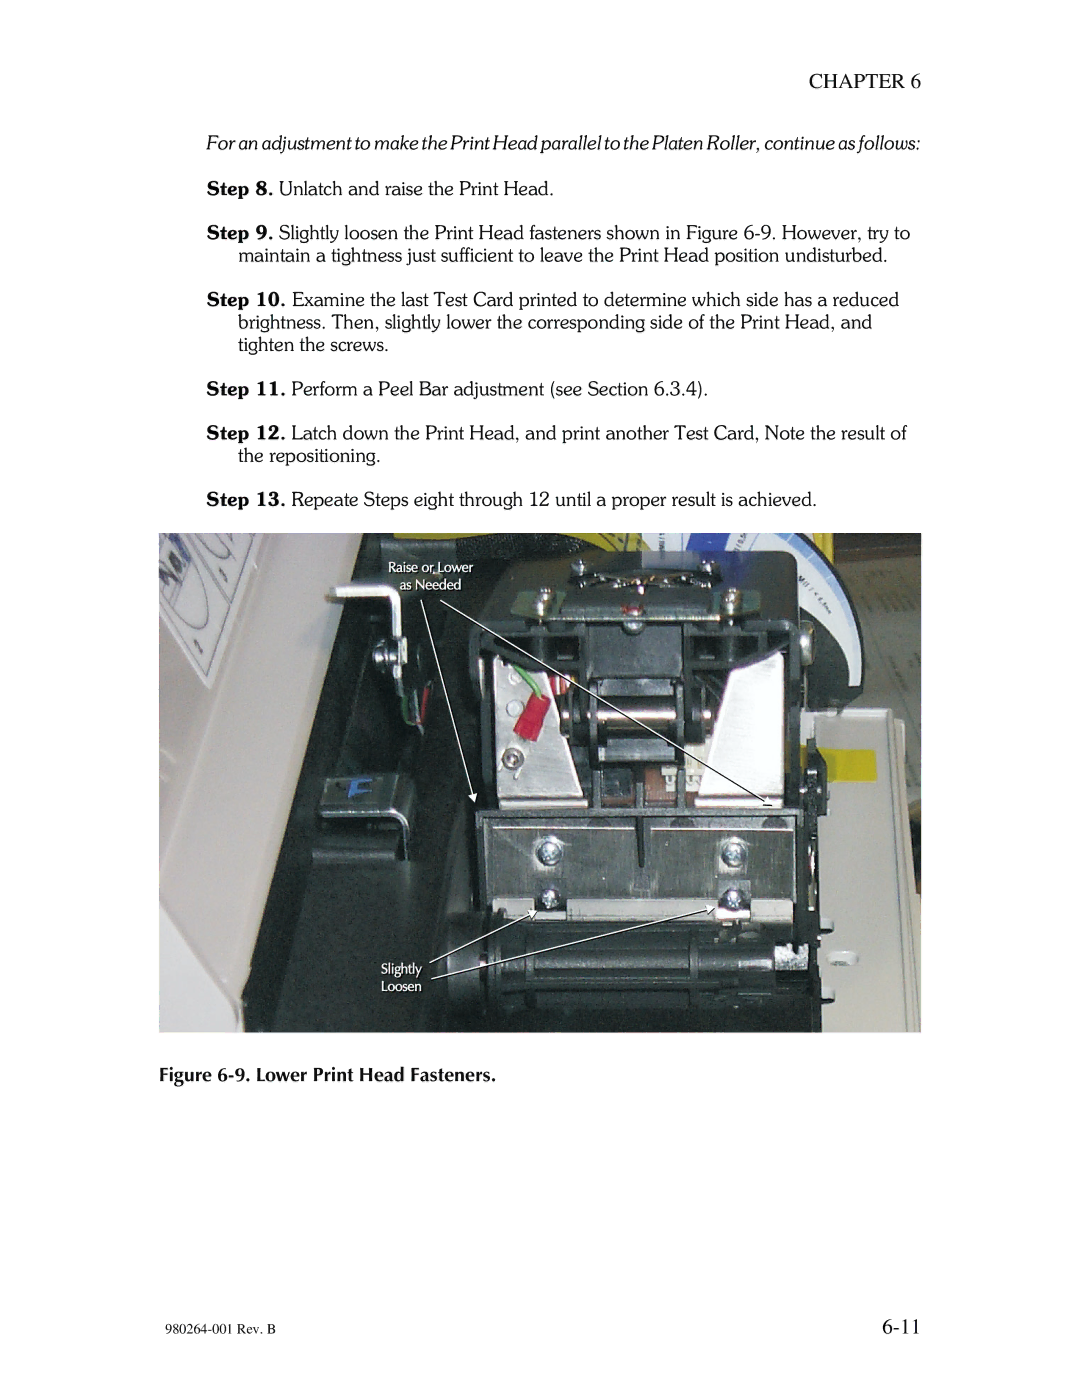
Step 9. Slightly loosen the Print Head fasteners shown in Figure
Step 10. Examine the last Test Card printed to determine which side has a reduced brightness. Then, slightly lower the corresponding side of the Print Head, and tighten the screws.
Step 11. Perform a Peel Bar adjustment (see Section 6.3.4).
Step 12. Latch down the Print Head, and print another Test Card, Note the result of the repositioning.
Step 13. Repeate Steps eight through 12 until a proper result is achieved.
