CHAPTER 6
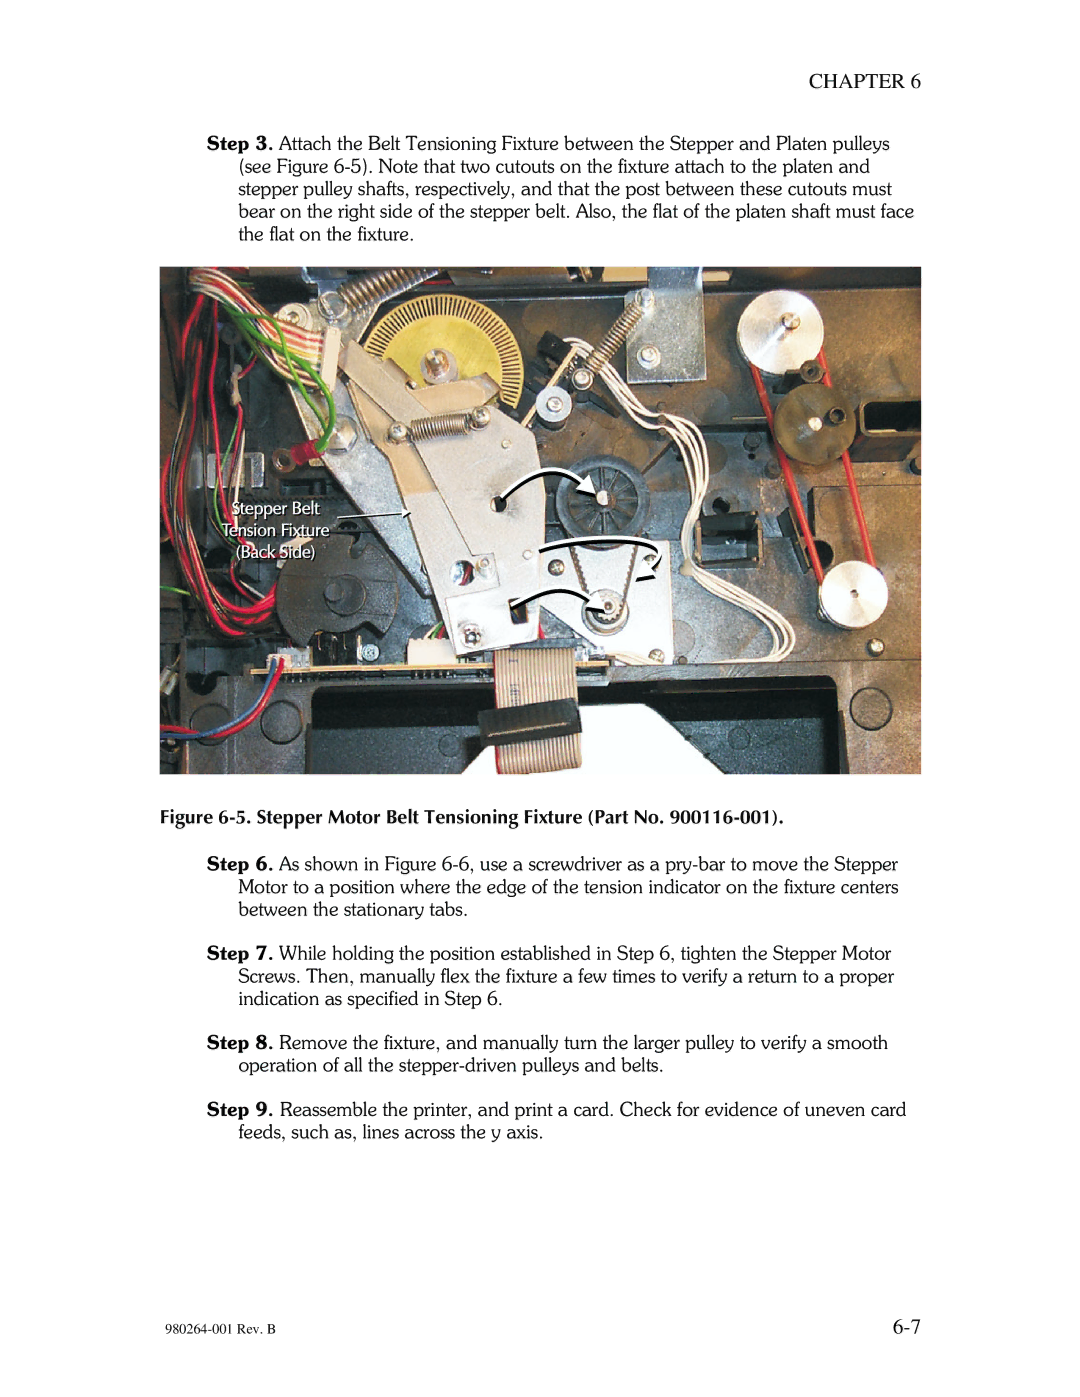
Step 3. Attach the Belt Tensioning Fixture between the Stepper and Platen pulleys (see Figure
Figure 6-5. Stepper Motor Belt Tensioning Fixture (Part No. 900116-001).
Step 6. As shown in Figure
Step 7. While holding the position established in Step 6, tighten the Stepper Motor Screws. Then, manually flex the fixture a few times to verify a return to a proper indication as specified in Step 6.
Step 8. Remove the fixture, and manually turn the larger pulley to verify a smooth operation of all the
Step 9. Reassemble the printer, and print a card. Check for evidence of uneven card feeds, such as, lines across the y axis.
