Introduction
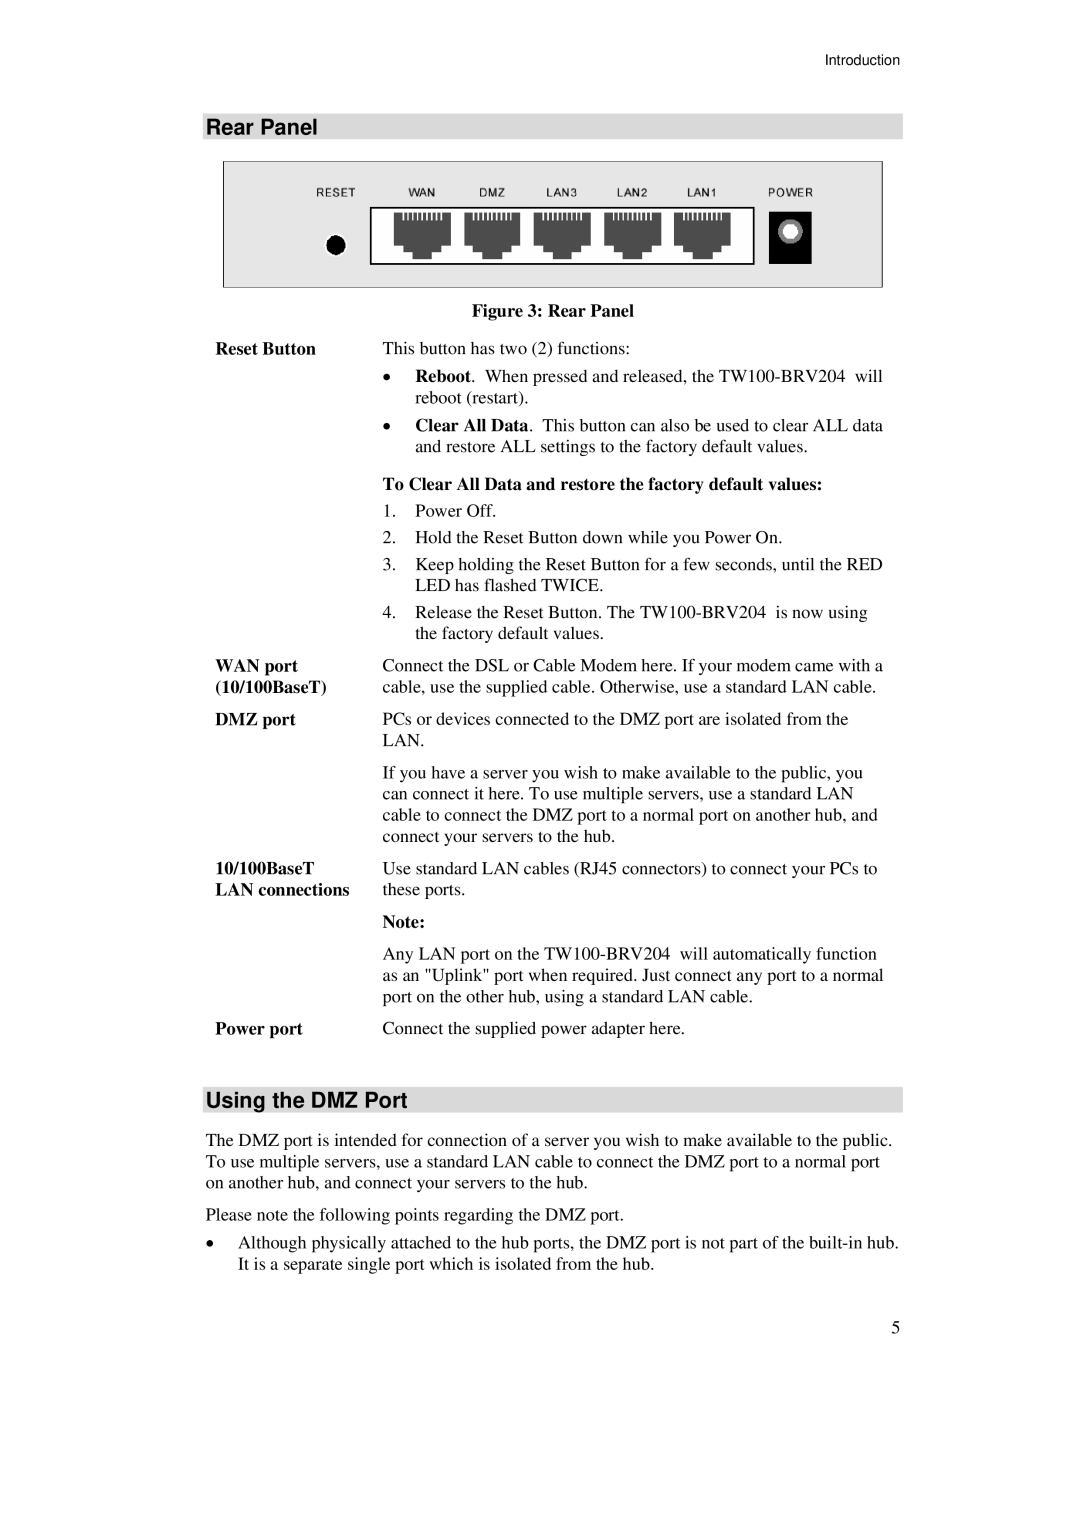
Rear Panel
|
| Figure 3: Rear Panel |
Reset Button | This button has two (2) functions: | |
| • | Reboot. When pressed and released, the |
|
| reboot (restart). |
| • Clear All Data. This button can also be used to clear ALL data | |
|
| and restore ALL settings to the factory default values. |
| To Clear All Data and restore the factory default values: | |
| 1. | Power Off. |
| 2. Hold the Reset Button down while you Power On. | |
| 3. Keep holding the Reset Button for a few seconds, until the RED | |
|
| LED has flashed TWICE. |
| 4. | Release the Reset Button. The |
|
| the factory default values. |
WAN port | Connect the DSL or Cable Modem here. If your modem came with a | |
(10/100BaseT) | cable, use the supplied cable. Otherwise, use a standard LAN cable. | |
DMZ port | PCs or devices connected to the DMZ port are isolated from the | |
| LAN. | |
| If you have a server you wish to make available to the public, you | |
| can connect it here. To use multiple servers, use a standard LAN | |
| cable to connect the DMZ port to a normal port on another hub, and | |
| connect your servers to the hub. | |
10/100BaseT | Use standard LAN cables (RJ45 connectors) to connect your PCs to | |
LAN connections | these ports. | |
| Note: | |
| Any LAN port on the | |
| as an "Uplink" port when required. Just connect any port to a normal | |
| port on the other hub, using a standard LAN cable. | |
Power port | Connect the supplied power adapter here. | |
Using the DMZ Port
The DMZ port is intended for connection of a server you wish to make available to the public. To use multiple servers, use a standard LAN cable to connect the DMZ port to a normal port on another hub, and connect your servers to the hub.
Please note the following points regarding the DMZ port.
•Although physically attached to the hub ports, the DMZ port is not part of the
5