3.Screw the lock nut down to within 1/2 inch of the base of the leg. (Fig. 1-5)
Fig. 1-5
4.Tilt the washer forward off the floor and set back down to adjust the rear self-leveling legs.
5.Check the washer for level, both side-to-side and front-to-back. Adjust the front legs as necessary. Tighten the locking nuts to the base of the washer with a wrench. If the nuts are not tightened, the washer may vibrate excessively.
6.Cut the shipping strap at the words “CUT HERE” and slide it off the power supply plug.
(Fig. 1-6)
Fig. 1-6
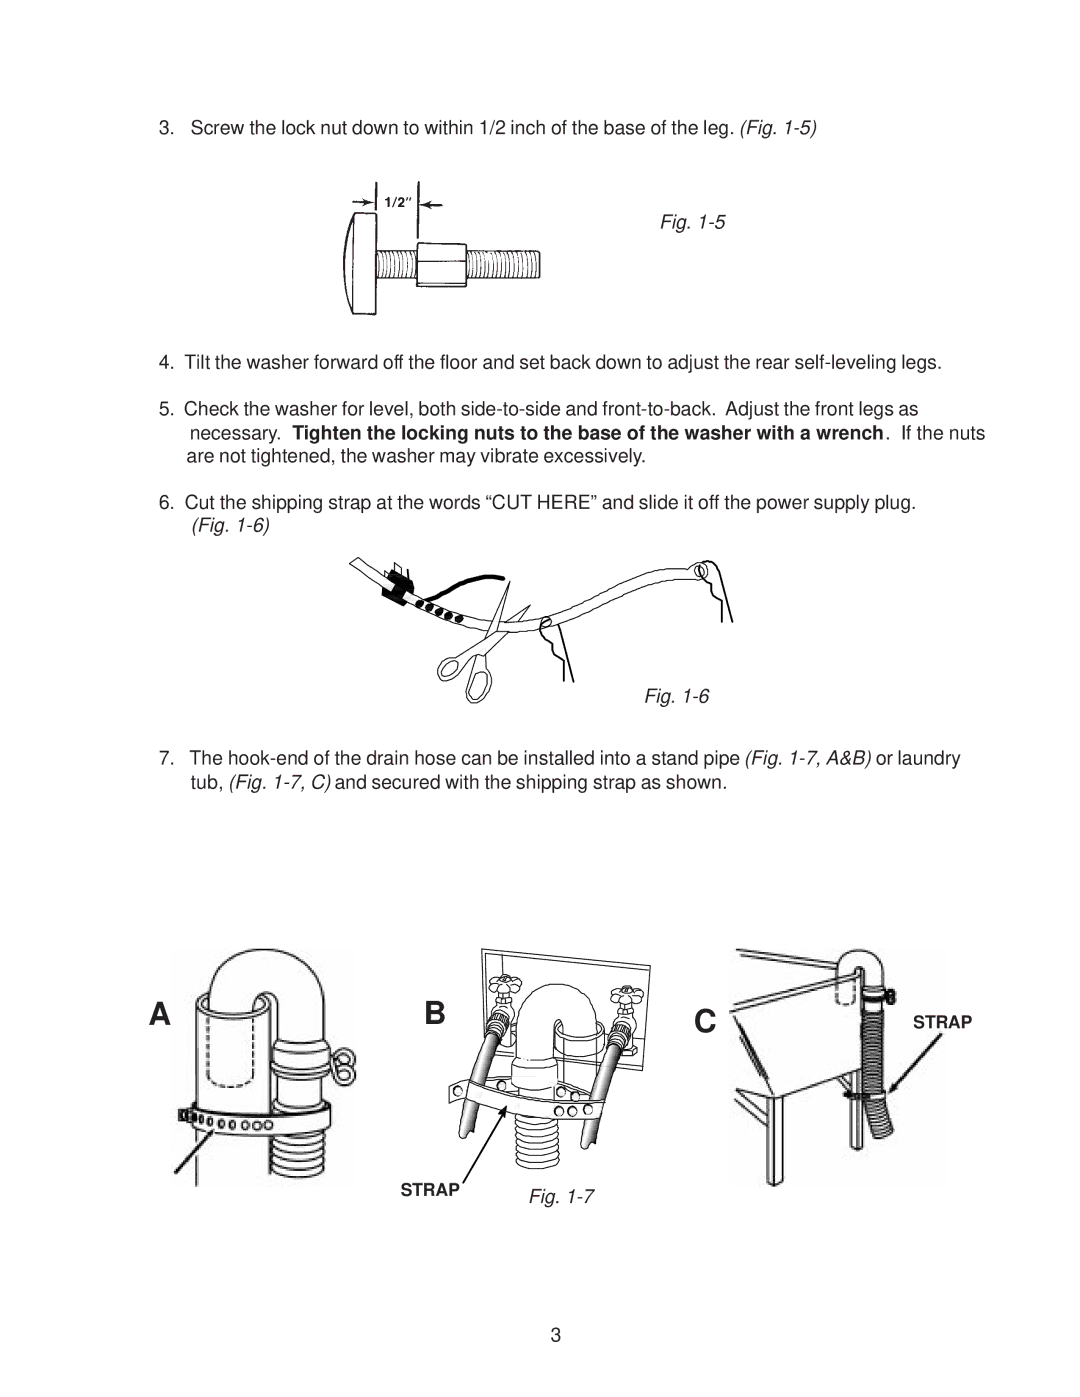
7.The hook-end of the drain hose can be installed into a stand pipe (Fig. 1-7, A&B) or laundry tub, (Fig. 1-7, C) and secured with the shipping strap as shown.