1.Disconnect the water and drain hoses from the washer.
2.Lay the washer on its front on a soft surface to protect the cabinet finish.
3.Remove the end of the brake arm spring from the slot in the brake arm assembly.
4.Use your thumb to push up on the bottom of the brake arm lock so it unsnaps from the brake arm connector and remove it.
5.Press in on both sides of the brake arm connector and slide the pins out of the solenoid bracket holes.
6.Pull the two wire connectors located under the slot in the terminal cover from the solenoid terminals with a pair of needle nose pliers.
7.Remove the four hex head screws securing the solenoid to the motor mounting plate and
remove the solenoid and the cover.
8.Mount the new solenoid to the motor mounting plate with the four hex head screws. Press the protective cover over the ends of the screws with the cutout over the wire terminals.
9.Reconnect the blue and white wires to the solenoid terminals.
10.Snap the two connector pins on the brake arm connector into the solenoid bracket holes.
11.Press the brake arm lock into the top of the brake arm connector and snap it into place. Slide the lock toward the solenoid as far as it will go.
12.Reconnect the end of the brake arm spring to the slot in the brake arm.
13.Stand the washer upright.
14.Reconnect the water and drain hoses and check for proper operation.
Drive Belt Replacement
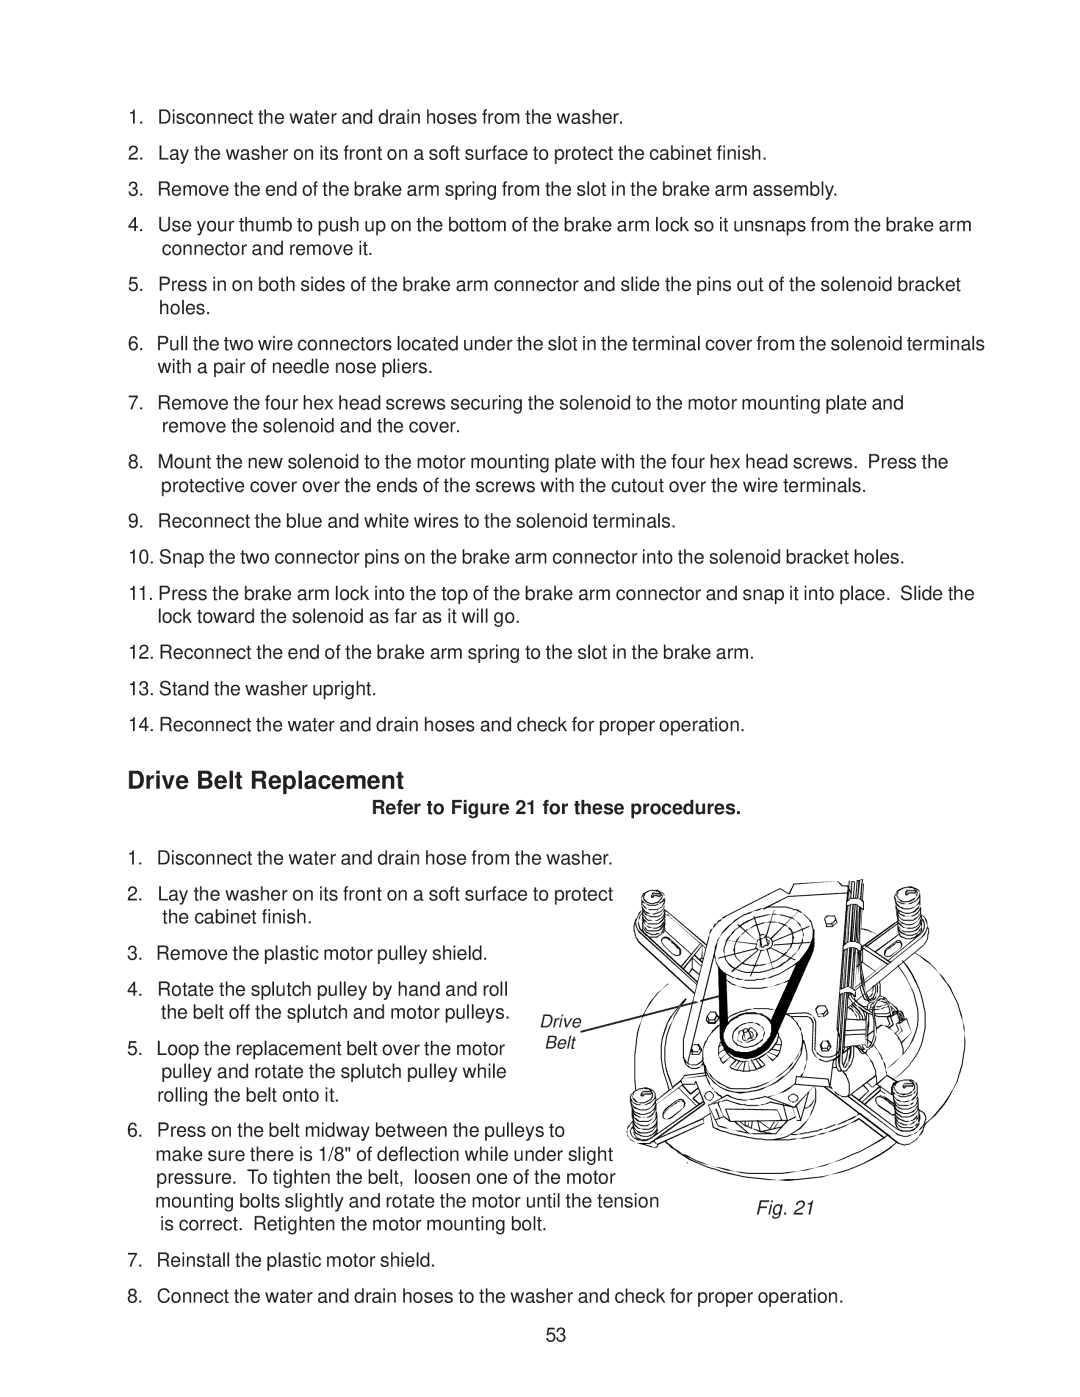
Refer to Figure 21 for these procedures.
1. | Disconnect the water and drain hose from the washer. | |
2. | Lay the washer on its front on a soft surface to protect | |
| the cabinet finish. |
|
3. | Remove the plastic motor pulley shield. |
|
4. | Rotate the splutch pulley by hand and roll |
|
| the belt off the splutch and motor pulleys. | Drive |
|
| |
5. | Loop the replacement belt over the motor | Belt |
| pulley and rotate the splutch pulley while |
|
| rolling the belt onto it. |
|
6. | Press on the belt midway between the pulleys to | |
| make sure there is 1/8" of deflection while under slight | |
| pressure. To tighten the belt, loosen one of the motor | |
mounting bolts slightly and rotate the motor until the tension | Fig. 21 | |
is correct. Retighten the motor mounting bolt. | ||
|
7.Reinstall the plastic motor shield.
8.Connect the water and drain hoses to the washer and check for proper operation.
53
