CABINET COMPONENTS
Water Inlet Components Removal
Refer to Figures 11 and 12 for these procedures.
1.Remove the washer top.
2.Remove the hose clamp from each end of the water inlet hose. The hose can be removed from the cabinet by slipping the two wire ties from their holes in the cabinet back.
3.Remove the wiring connectors from the solenoid valve terminals.
4.Remove the two mounting screws from the water inlet valve and remove the valve.
5.Remove the hose clamp from the corrugated hose at the bottom of the vacuum break reservoir.
6.Remove the mounting screw from the vacuum break reservoir and remove the reservoir.
7.Remove the hose clamp from the lower end of the corrugated hose and remove the hose.
8.The lower inlet fitting is a serviceable assembly on early production models only. The entire tub assembly must be replaced on later production models.
Water Inlet Components Replacement
Refer to Figures 11 and 12 for these procedures.
1.The lower inlet fitting comes preassembled to the tub.
2.Install the corrugated hose onto the top end of the inlet fitting with a hose clamp. Position the tangs as shown in figure 11.
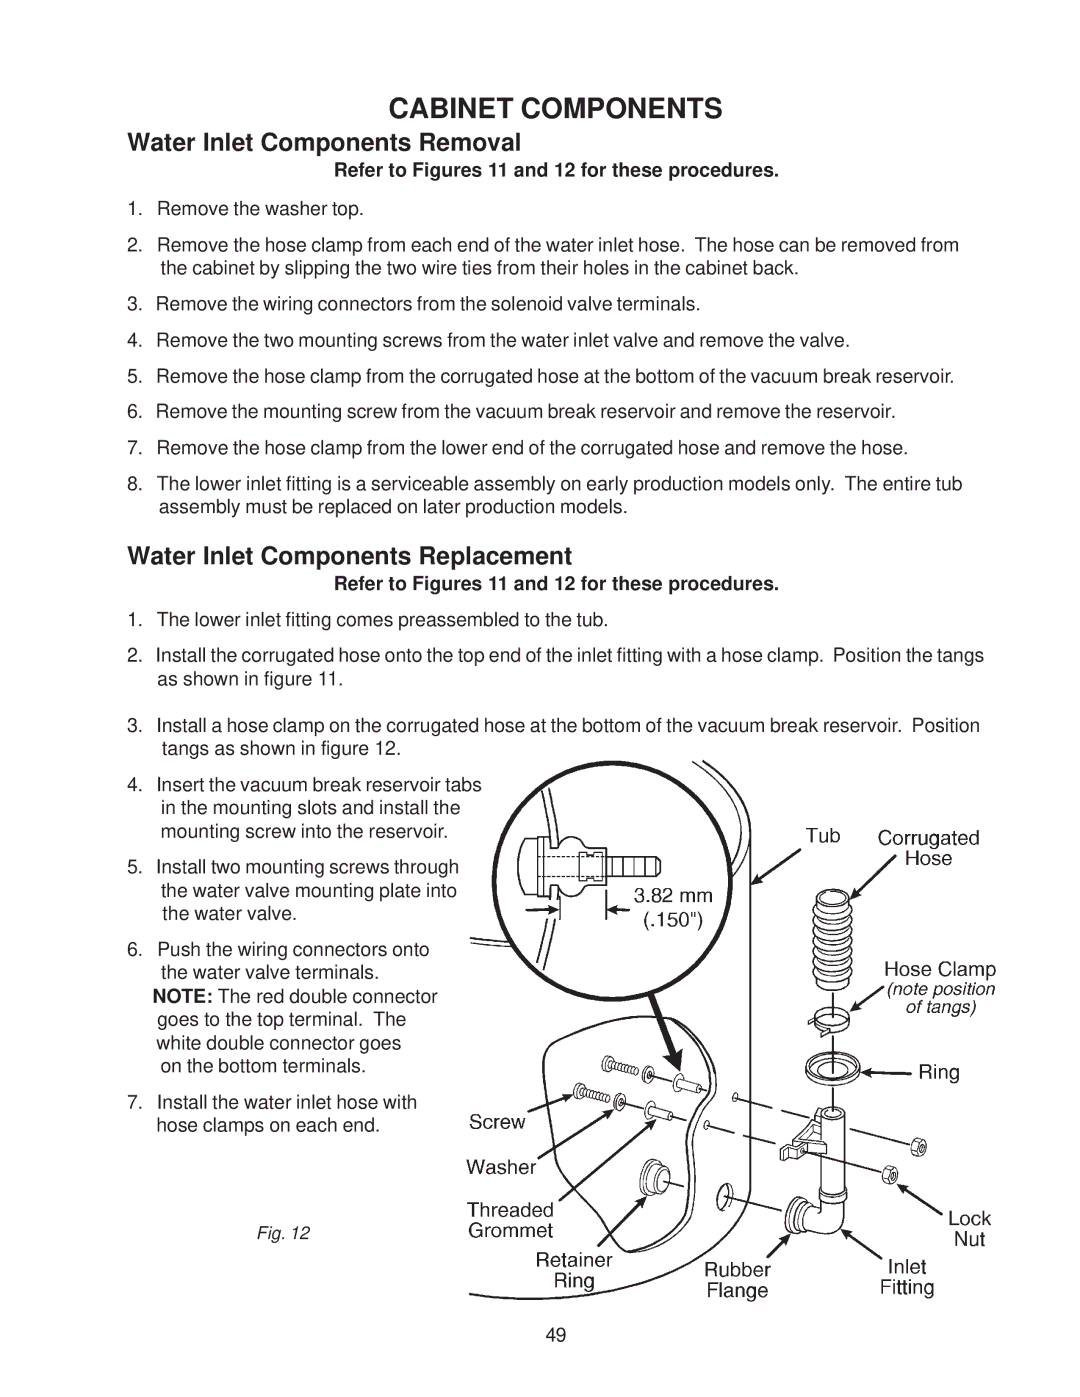
3.Install a hose clamp on the corrugated hose at the bottom of the vacuum break reservoir. Position tangs as shown in figure 12.
4.Insert the vacuum break reservoir tabs
in the mounting slots and install the mounting screw into the reservoir.
5.Install two mounting screws through the water valve mounting plate into the water valve.
6.Push the wiring connectors onto the water valve terminals.
NOTE: The red double connector goes to the top terminal. The white double connector goes on the bottom terminals.
7.Install the water inlet hose with hose clamps on each end.
Fig. 12
49