Splutch Assembly Removal
Refer to Figure 22 for these procedures.
1.Disconnect the water and drain hoses from the washer.
2.Lay the washer on its front on a soft surface to
protect the cabinet finish. | Splutch Pulley |
|
3.Remove the nuts securing the plastic motor pulley shield and remove the shield.
4. Remove the
5.Pull the splutch pulley off the splined gearcase shaft and then remove the pulley and the drive belt.
6.The splutch housing is held to the motor plate by four tabs. while pulling out on the housing until it is free.
Fig. 22
Work each tab loose by pressing in
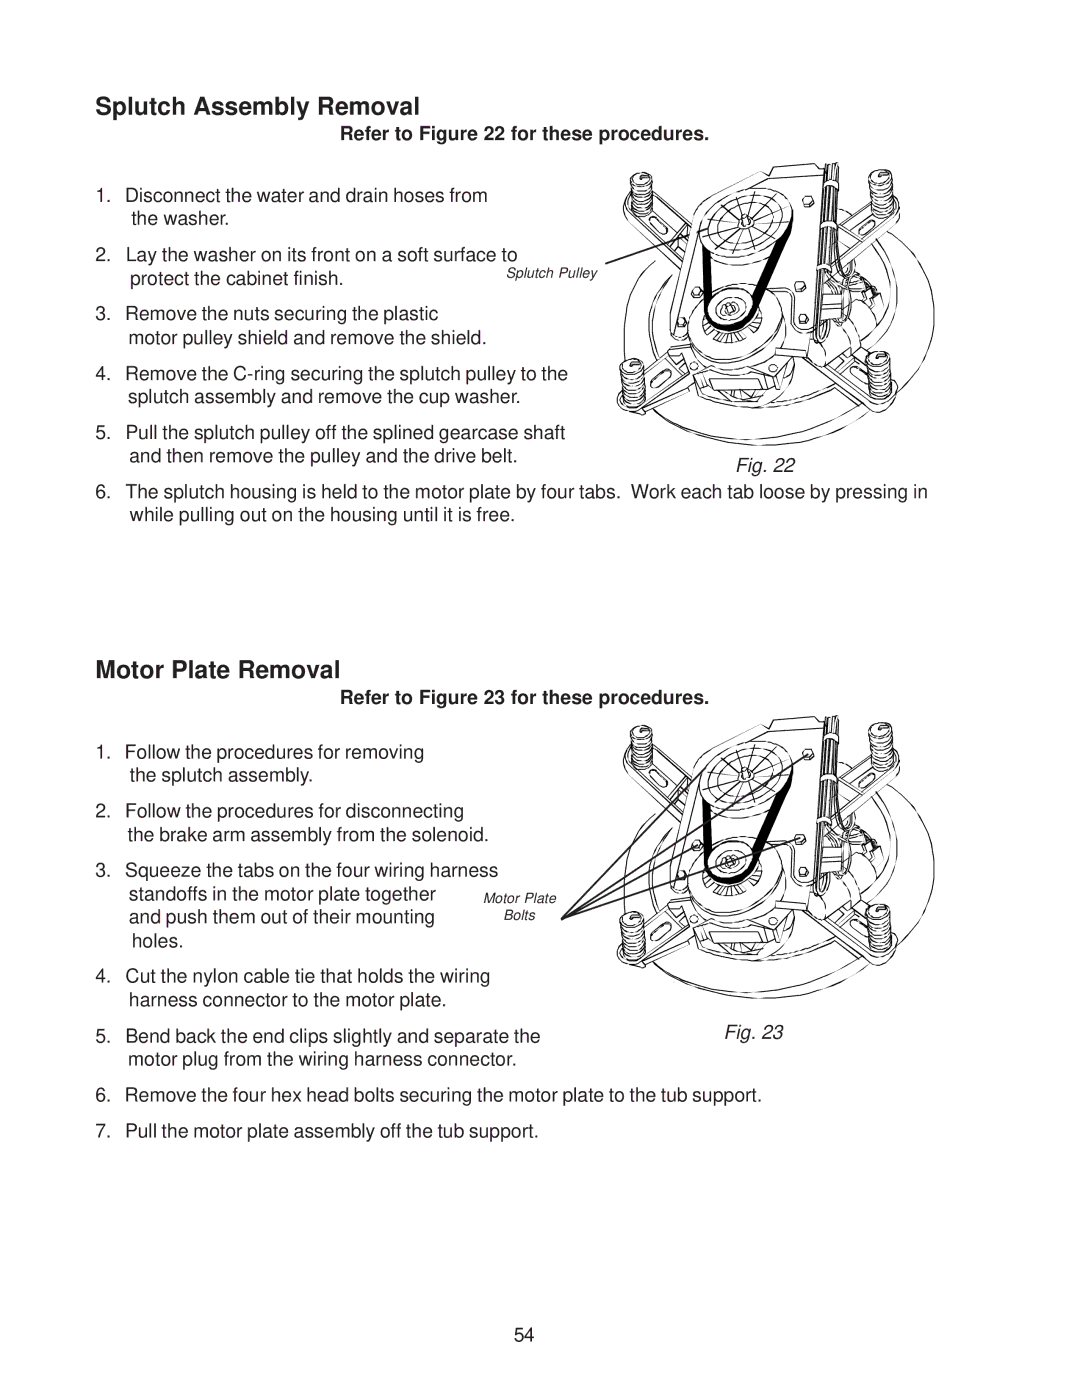
Motor Plate Removal
Refer to Figure 23 for these procedures.
1. | Follow the procedures for removing |
|
|
|
|
|
|
|
|
|
|
| the splutch assembly. |
|
|
|
|
|
|
|
|
|
|
2. | Follow the procedures for disconnecting |
|
|
|
|
|
|
|
|
|
|
| the brake arm assembly from the solenoid. |
|
|
|
|
|
|
|
|
| |
3. | Squeeze the tabs on the four wiring harness |
|
|
|
|
|
|
|
|
| |
|
|
|
|
|
|
|
|
| |||
|
|
|
|
|
|
|
|
| |||
| standoffs in the motor plate together | Motor Plate |
|
|
|
|
|
|
|
|
|
| and push them out of their mounting | Bolts |
|
|
|
|
|
|
|
|
|
|
|
|
|
|
|
|
|
|
| ||
|
|
|
|
|
|
|
|
|
| ||
| holes. |
|
|
|
|
|
|
|
|
|
|
4. | Cut the nylon cable tie that holds the wiring |
|
|
|
|
|
|
|
|
| |
| harness connector to the motor plate. |
|
|
|
|
|
|
|
|
|
|
5. | Bend back the end clips slightly and separate the |
|
|
|
|
| Fig. 23 | ||||
| motor plug from the wiring harness connector. |
|
|
|
|
|
|
|
|
| |
6.Remove the four hex head bolts securing the motor plate to the tub support.
7.Pull the motor plate assembly off the tub support.
54