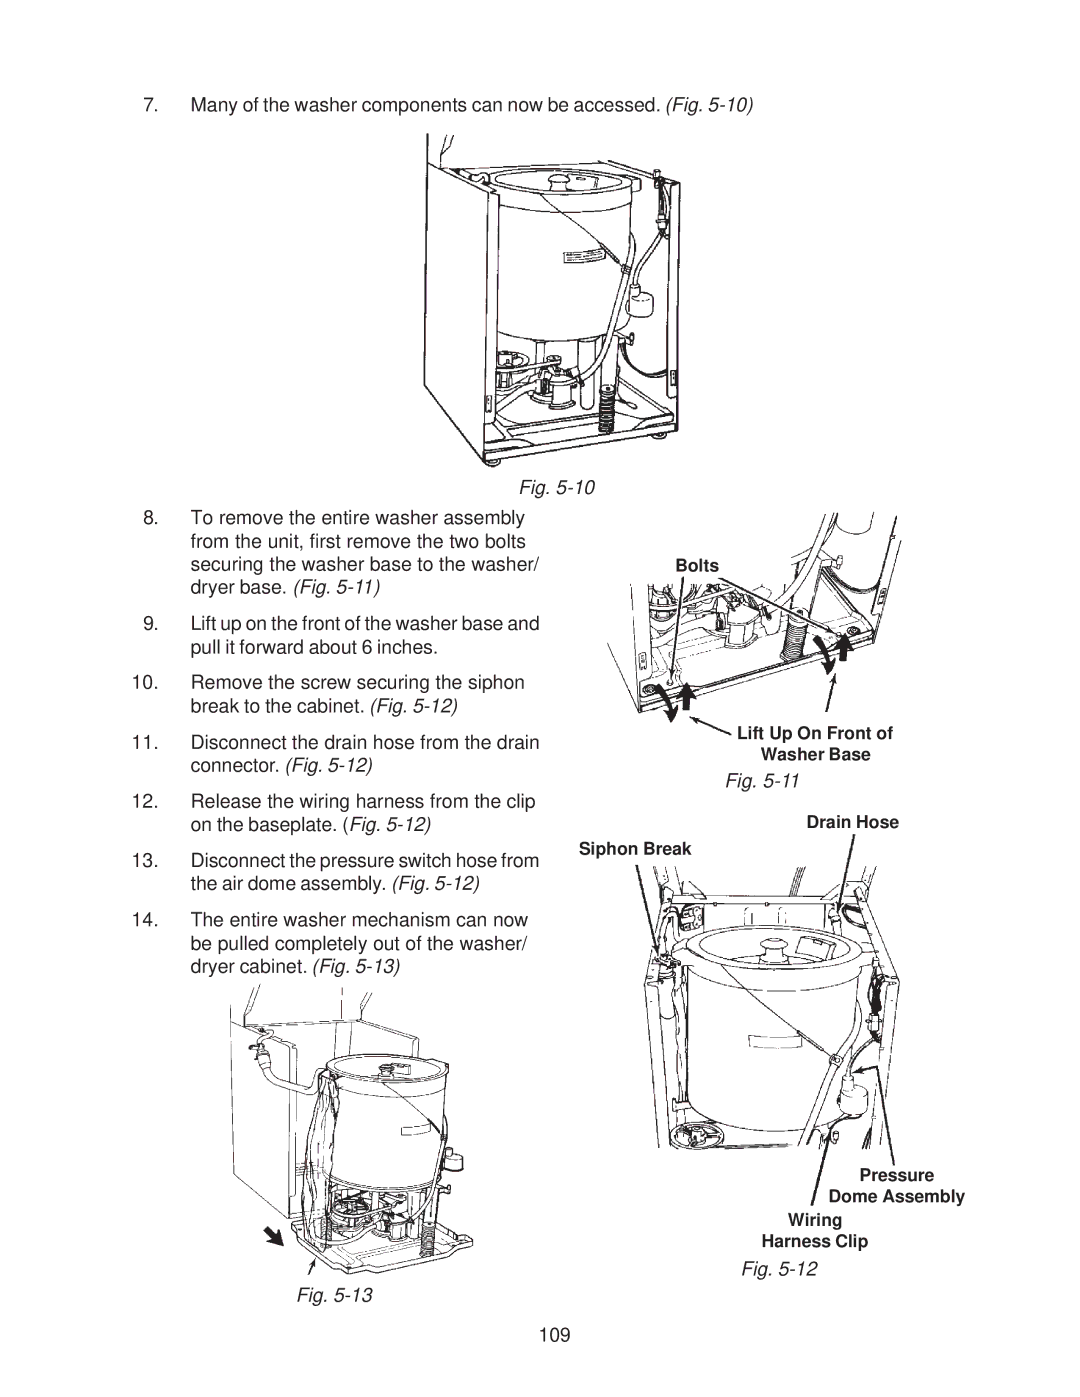
7.Many of the washer components can now be accessed. (Fig.
Fig.
8.To remove the entire washer assembly from the unit, first remove the two bolts securing the washer base to the washer/ dryer base. (Fig.
9.Lift up on the front of the washer base and pull it forward about 6 inches.
10.Remove the screw securing the siphon break to the cabinet. (Fig.
11.Disconnect the drain hose from the drain connector. (Fig.
12.Release the wiring harness from the clip on the baseplate. (Fig.
13.Disconnect the pressure switch hose from the air dome assembly. (Fig.
14.The entire washer mechanism can now be pulled completely out of the washer/ dryer cabinet. (Fig.
Fig.
Bolts
Lift Up On Front of
Washer Base
Fig.
Drain Hose
Siphon Break
Pressure
Dome Assembly
Wiring
Harness Clip
Fig.