Servicing the Drain Pump
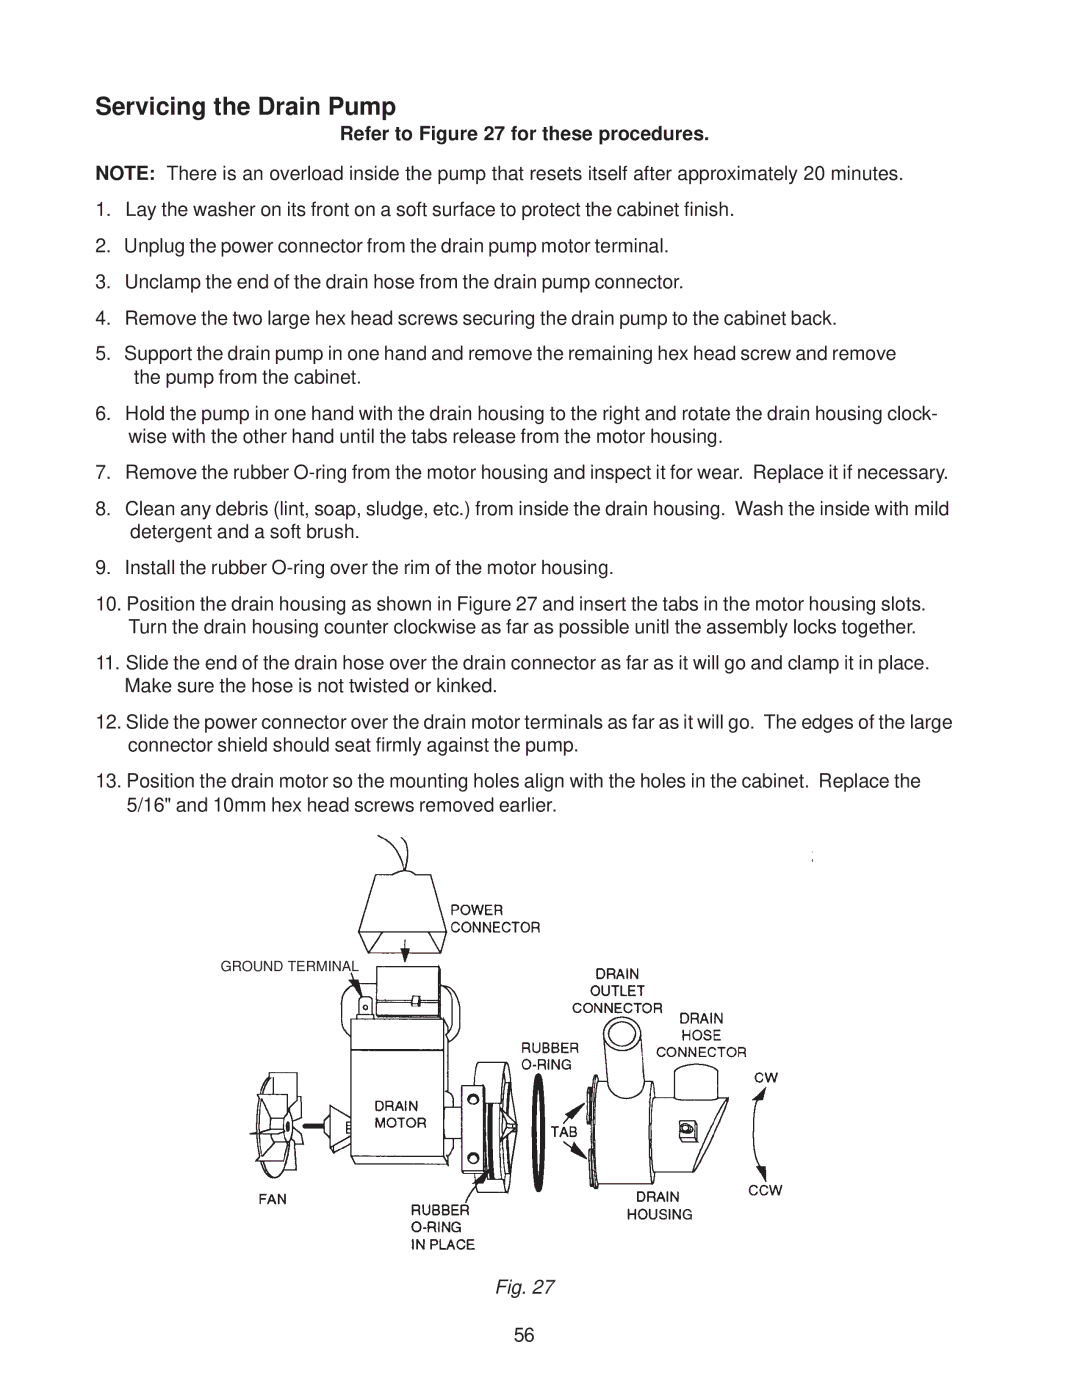
Refer to Figure 27 for these procedures.
NOTE: There is an overload inside the pump that resets itself after approximately 20 minutes.
1.Lay the washer on its front on a soft surface to protect the cabinet finish.
2.Unplug the power connector from the drain pump motor terminal.
3.Unclamp the end of the drain hose from the drain pump connector.
4.Remove the two large hex head screws securing the drain pump to the cabinet back.
5.Support the drain pump in one hand and remove the remaining hex head screw and remove the pump from the cabinet.
6.Hold the pump in one hand with the drain housing to the right and rotate the drain housing clock- wise with the other hand until the tabs release from the motor housing.
7.Remove the rubber
8.Clean any debris (lint, soap, sludge, etc.) from inside the drain housing. Wash the inside with mild detergent and a soft brush.
9.Install the rubber
10.Position the drain housing as shown in Figure 27 and insert the tabs in the motor housing slots. Turn the drain housing counter clockwise as far as possible unitl the assembly locks together.
11.Slide the end of the drain hose over the drain connector as far as it will go and clamp it in place. Make sure the hose is not twisted or kinked.
12.Slide the power connector over the drain motor terminals as far as it will go. The edges of the large connector shield should seat firmly against the pump.
13.Position the drain motor so the mounting holes align with the holes in the cabinet. Replace the 5/16" and 10mm hex head screws removed earlier.
GROUND TERMINAL
Fig. 27
56