Metal Body
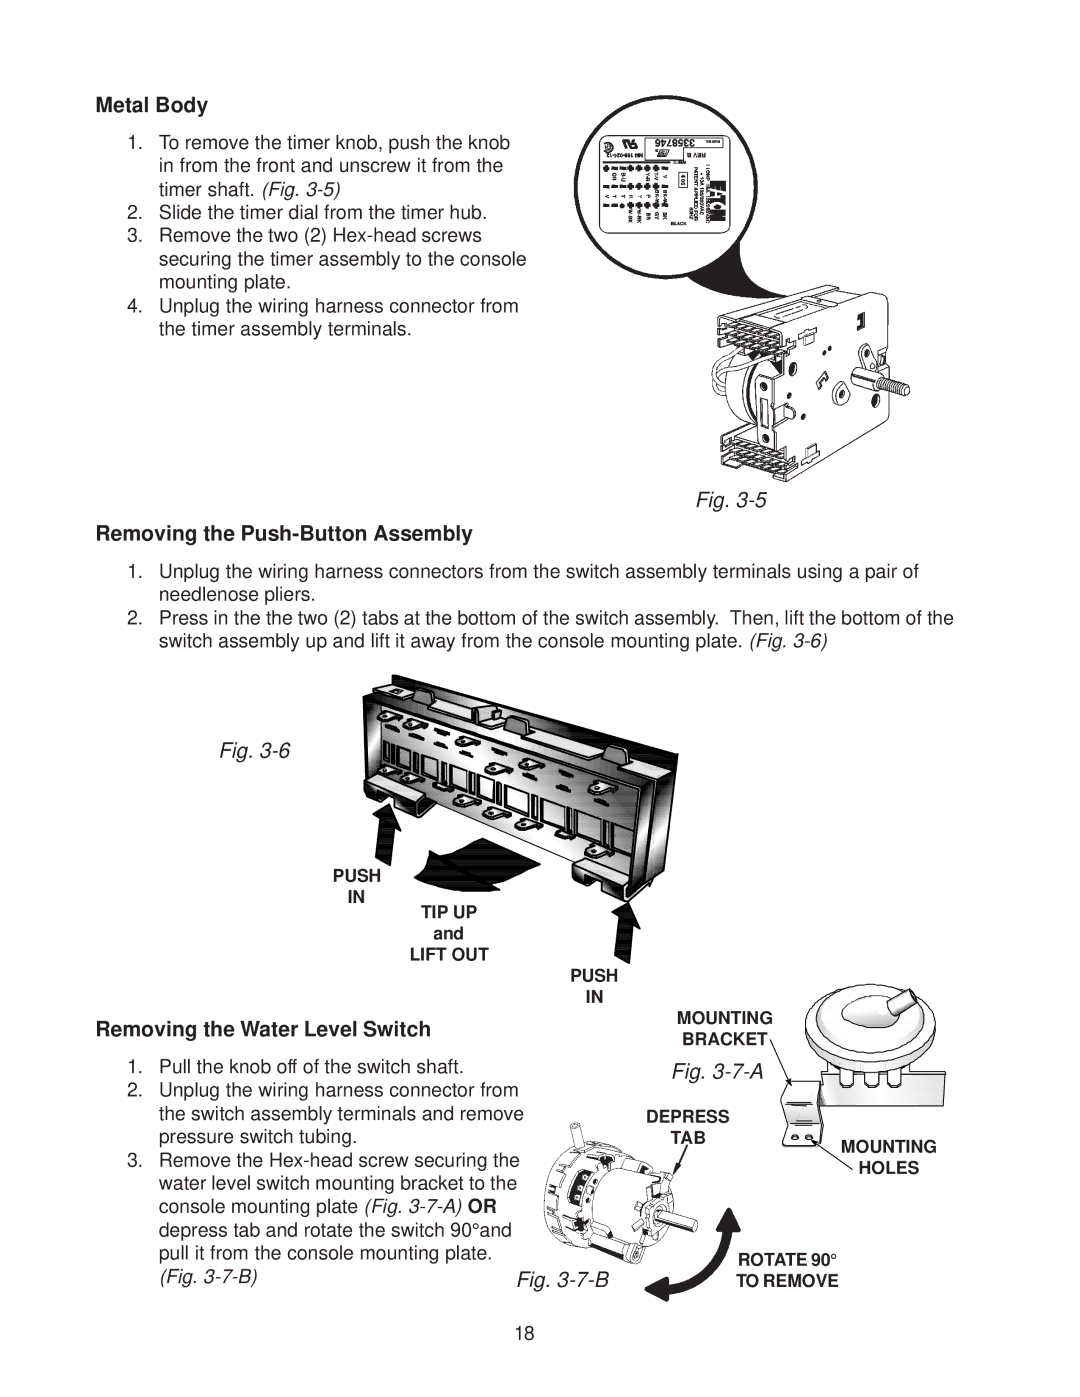
1.To remove the timer knob, push the knob in from the front and unscrew it from the timer shaft. (Fig.
2.Slide the timer dial from the timer hub.
3.Remove the two (2)
4.Unplug the wiring harness connector from the timer assembly terminals.
Fig.
Removing the Push-Button Assembly
1.Unplug the wiring harness connectors from the switch assembly terminals using a pair of needlenose pliers.
2.Press in the the two (2) tabs at the bottom of the switch assembly. Then, lift the bottom of the switch assembly up and lift it away from the console mounting plate. (Fig.
Fig.
PUSH |
IN |
TIP UP and
LIFT OUT![]() PUSH
PUSH
IN
Removing the Water Level Switch
1. | Pull the knob off of the switch shaft. |
2. | Unplug the wiring harness connector from |
| the switch assembly terminals and remove |
MOUNTING
BRACKET
Fig. 3-7-A
DEPRESS
pressure switch tubing. |
3. Remove the |
water level switch mounting bracket to the |
console mounting plate (Fig. |
depress tab and rotate the switch 90°and |
pull it from the console mounting plate. |
TAB
MOUNTING
HOLES
(Fig. | Fig. |
ROTATE 90°
TO REMOVE
18
