Drum | Fig. |
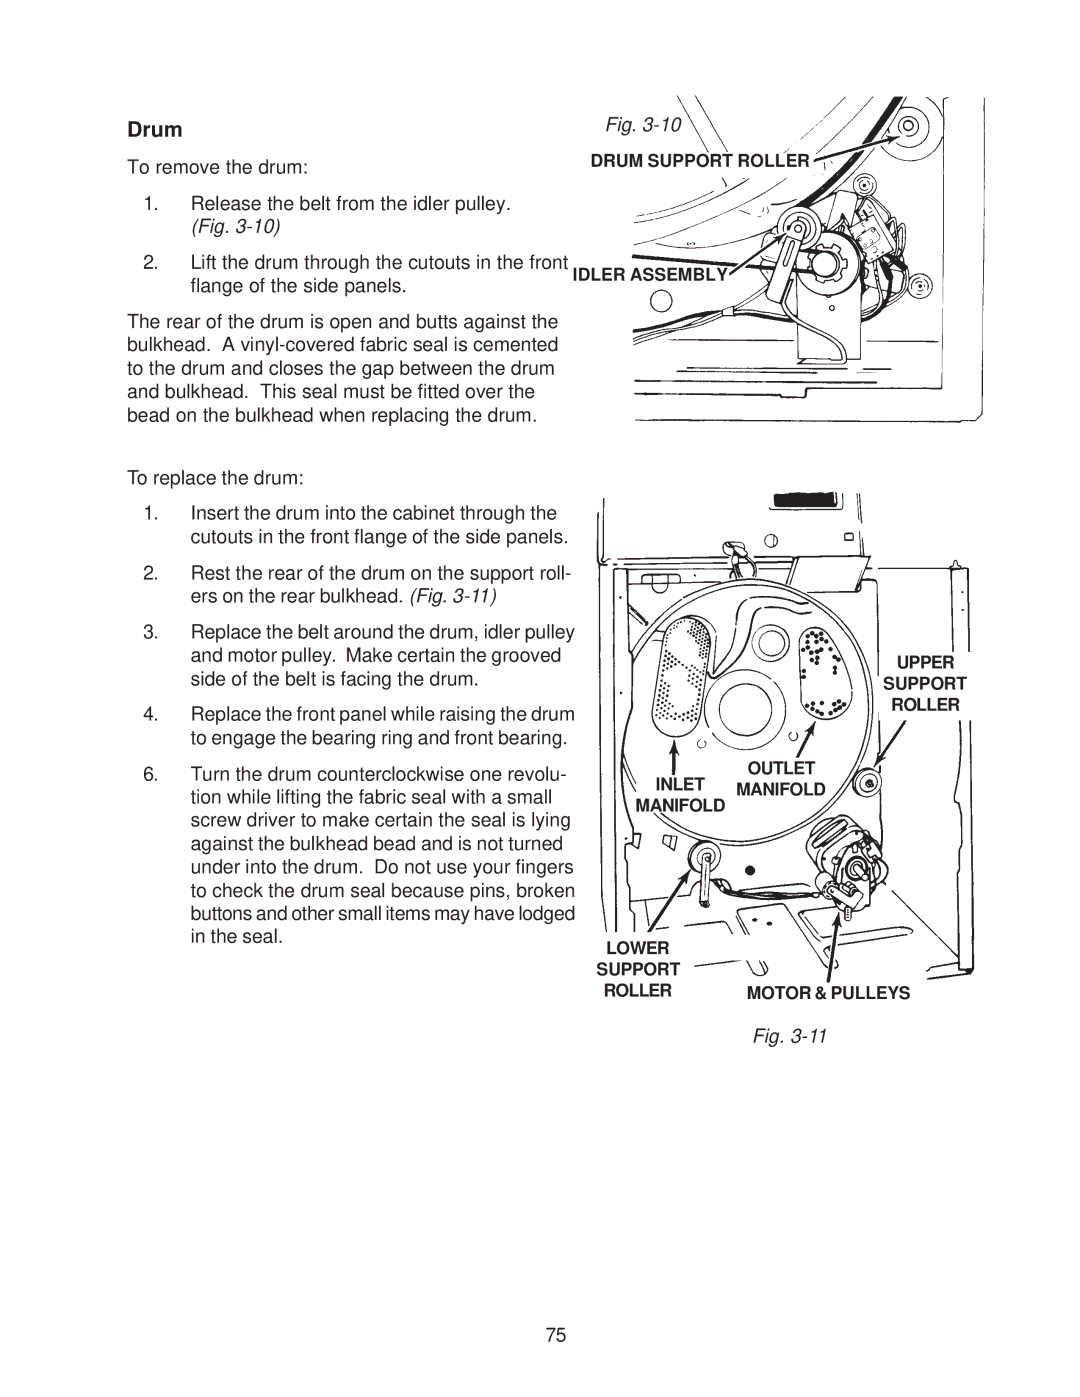
To remove the drum: | DRUM SUPPORT ROLLER |
|
1.Release the belt from the idler pulley. (Fig.
2.Lift the drum through the cutouts in the front IDLER ASSEMBLY flange of the side panels.
The rear of the drum is open and butts against the bulkhead. A
To replace the drum:
1.Insert the drum into the cabinet through the cutouts in the front flange of the side panels.
2.Rest the rear of the drum on the support roll- ers on the rear bulkhead. (Fig.
3.Replace the belt around the drum, idler pulley and motor pulley. Make certain the grooved side of the belt is facing the drum.
4.Replace the front panel while raising the drum to engage the bearing ring and front bearing.
6.Turn the drum counterclockwise one revolu- tion while lifting the fabric seal with a small screw driver to make certain the seal is lying against the bulkhead bead and is not turned under into the drum. Do not use your fingers to check the drum seal because pins, broken buttons and other small items may have lodged in the seal.
UPPER
SUPPORT
ROLLER
OUTLET
INLET MANIFOLD
MANIFOLD
LOWER |
|
SUPPORT |
|
ROLLER | MOTOR & PULLEYS |
Fig.
75