Overview Installation Troubleshooting Contact FAQ Specifications Glossary License
Configuration: Basic Gateway TCP/IP Wireless Print Server USB
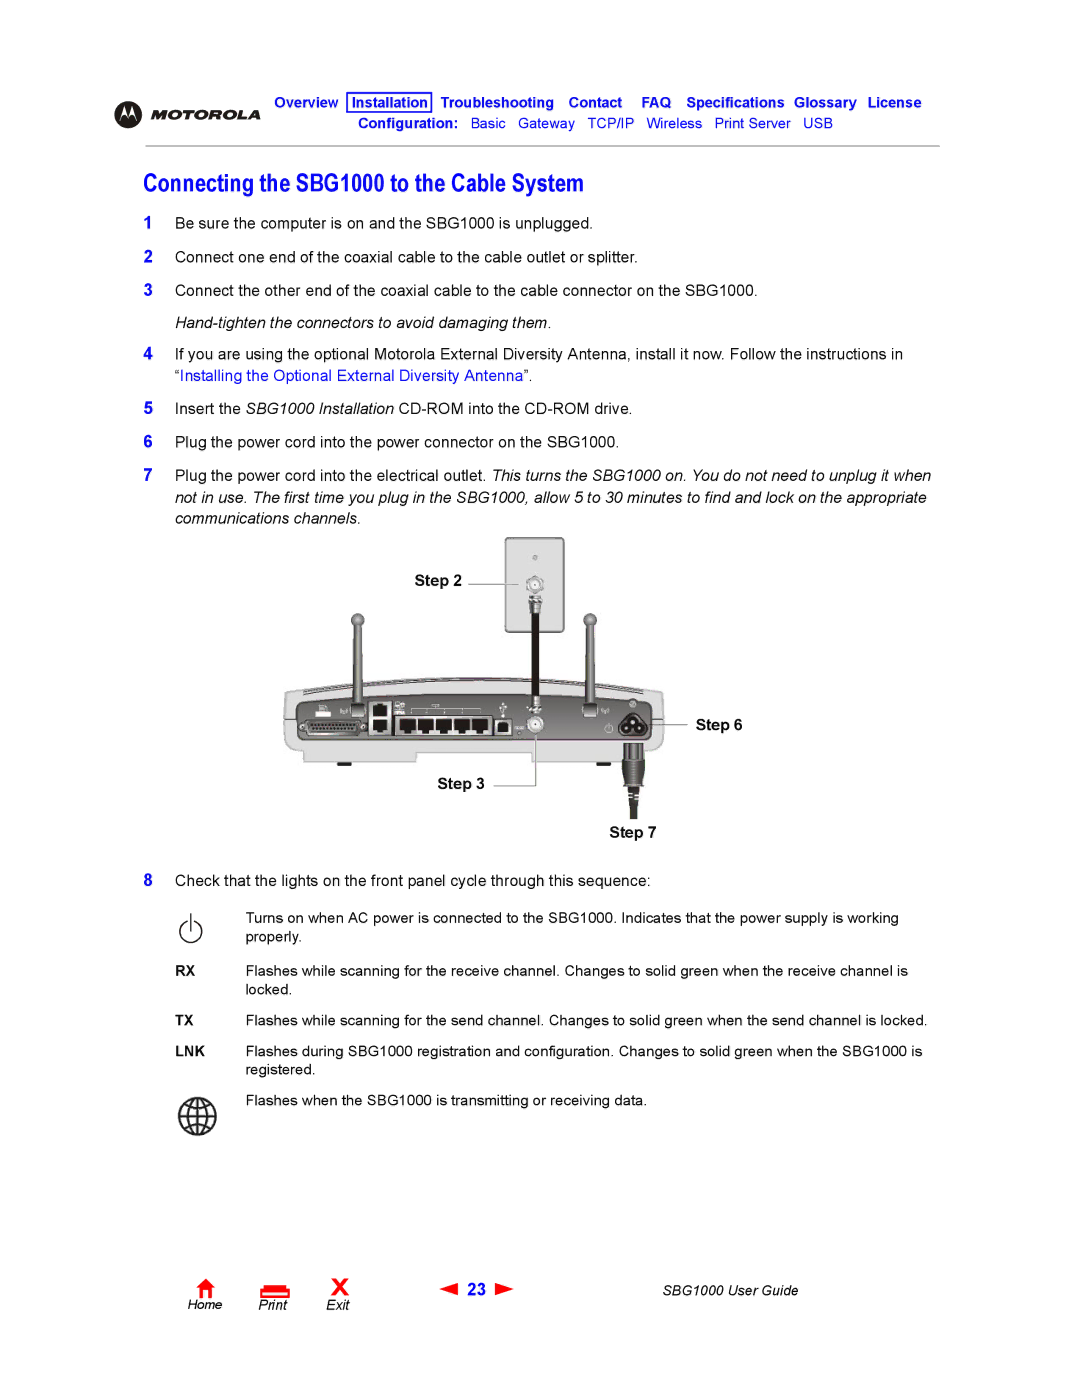
Connecting the SBG1000 to the Cable System
1Be sure the computer is on and the SBG1000 is unplugged.
2Connect one end of the coaxial cable to the cable outlet or splitter.
3Connect the other end of the coaxial cable to the cable connector on the SBG1000.
4If you are using the optional Motorola External Diversity Antenna, install it now. Follow the instructions in “Installing the Optional External Diversity Antenna”.
5Insert the SBG1000 Installation
6Plug the power cord into the power connector on the SBG1000.
7Plug the power cord into the electrical outlet. This turns the SBG1000 on. You do not need to unplug it when not in use. The first time you plug in the SBG1000, allow 5 to 30 minutes to find and lock on the appropriate communications channels.
Step 2
Step 6
Step 3
Step 7
8Check that the lights on the front panel cycle through this sequence:
Turns on when AC power is connected to the SBG1000. Indicates that the power supply is working properly.
RX Flashes while scanning for the receive channel. Changes to solid green when the receive channel is locked.
TX Flashes while scanning for the send channel. Changes to solid green when the send channel is locked.
LNK Flashes during SBG1000 registration and configuration. Changes to solid green when the SBG1000 is registered.
Flashes when the SBG1000 is transmitting or receiving data.
Home |
X | 23 | SBG1000 User Guide |
Exit |
|
|