Utility or the Virtual Dub website). If you have placed the Virtual Dub program in a folder other than the default, it will ask you to locate the file.
Select Source & Destination Files
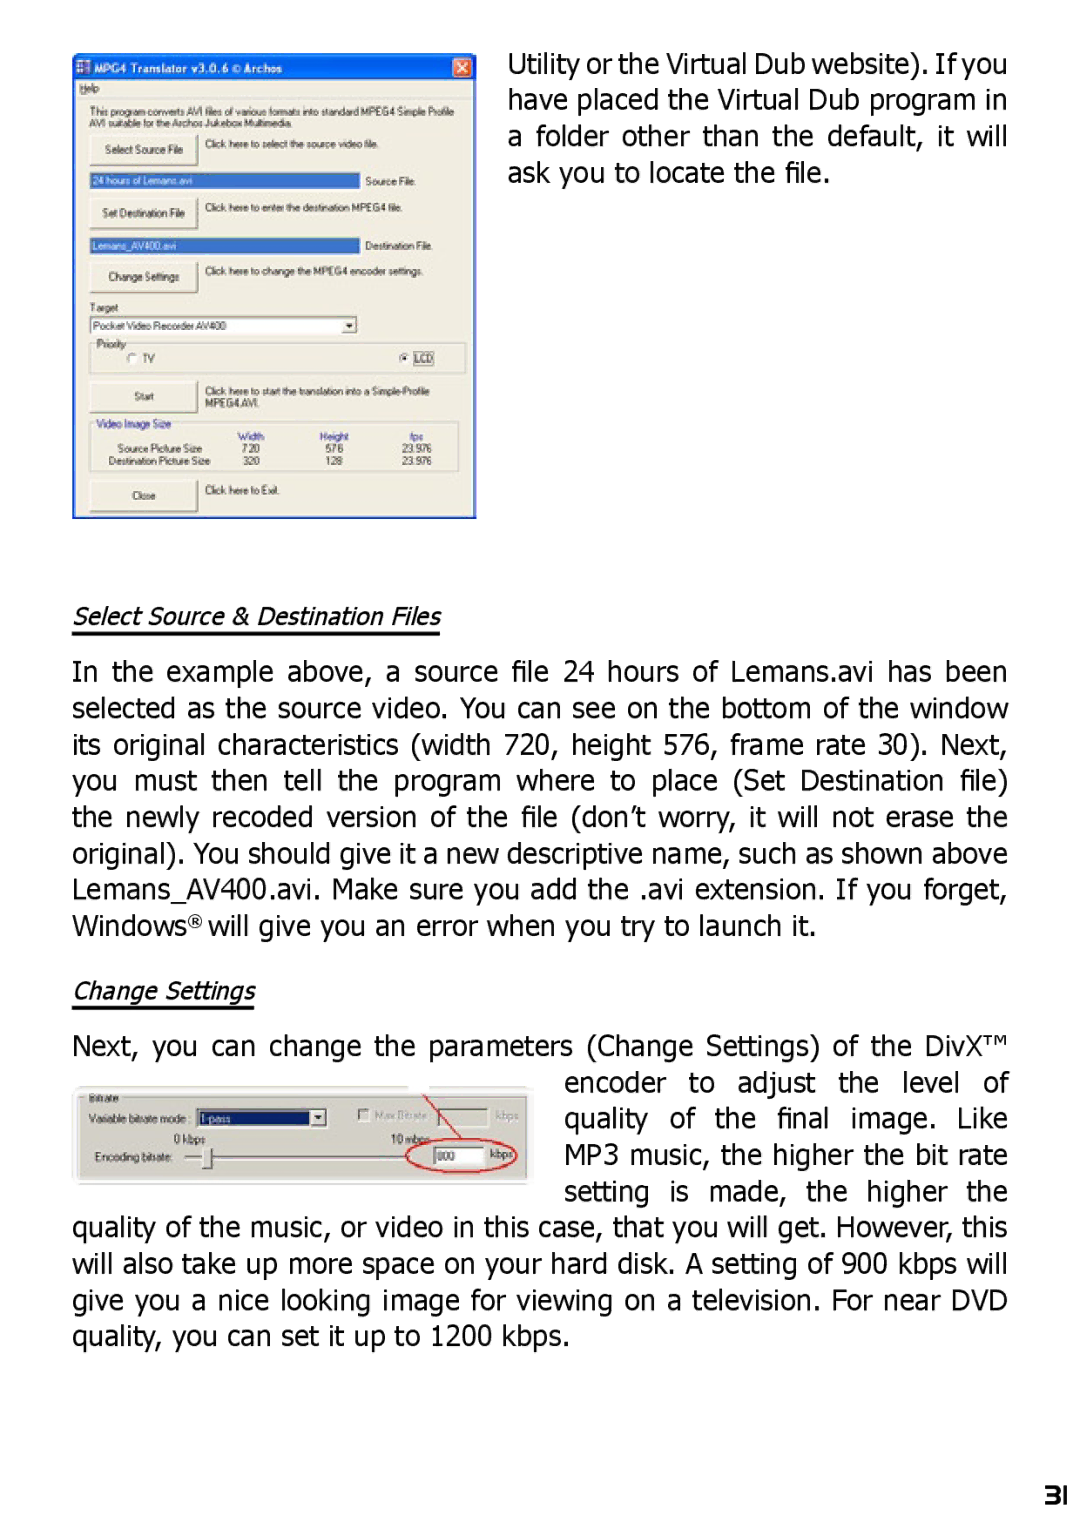
In the example above, a source file 24 hours of Lemans.avi has been selected as the source video. You can see on the bottom of the window its original characteristics (width 720, height 576, frame rate 30). Next, you must then tell the program where to place (Set Destination file) the newly recoded version of the file (don’t worry, it will not erase the original). You should give it a new descriptive name, such as shown above Lemans_AV400.avi. Make sure you add the .avi extension. If you forget, Windows® will give you an error when you try to launch it.
Change Settings
Next, you can change the parameters (Change Settings) of the DivX™ encoder to adjust the level of quality of the final image. Like MP3 music, the higher the bit rate setting is made, the higher the
quality of the music, or video in this case, that you will get. However, this will also take up more space on your hard disk. A setting of 900 kbps will give you a nice looking image for viewing on a television. For near DVD quality, you can set it up to 1200 kbps.
31