CHAPTER 3: Installing
3.Installing
IMPORTANT NOTE
If you are installing a cascaded ServSwitch Multi system, you should make sure your Expansion Cards and Cables are installed properly before you begin installing other types of Cards or attaching devices to the system. Refer to Chapter 6 and (if your cascaded system includes any ServSwitch Multi Hubs) Chapter 7.
3.1 Connecting Local-Console Equipment to a Base Unit or MX
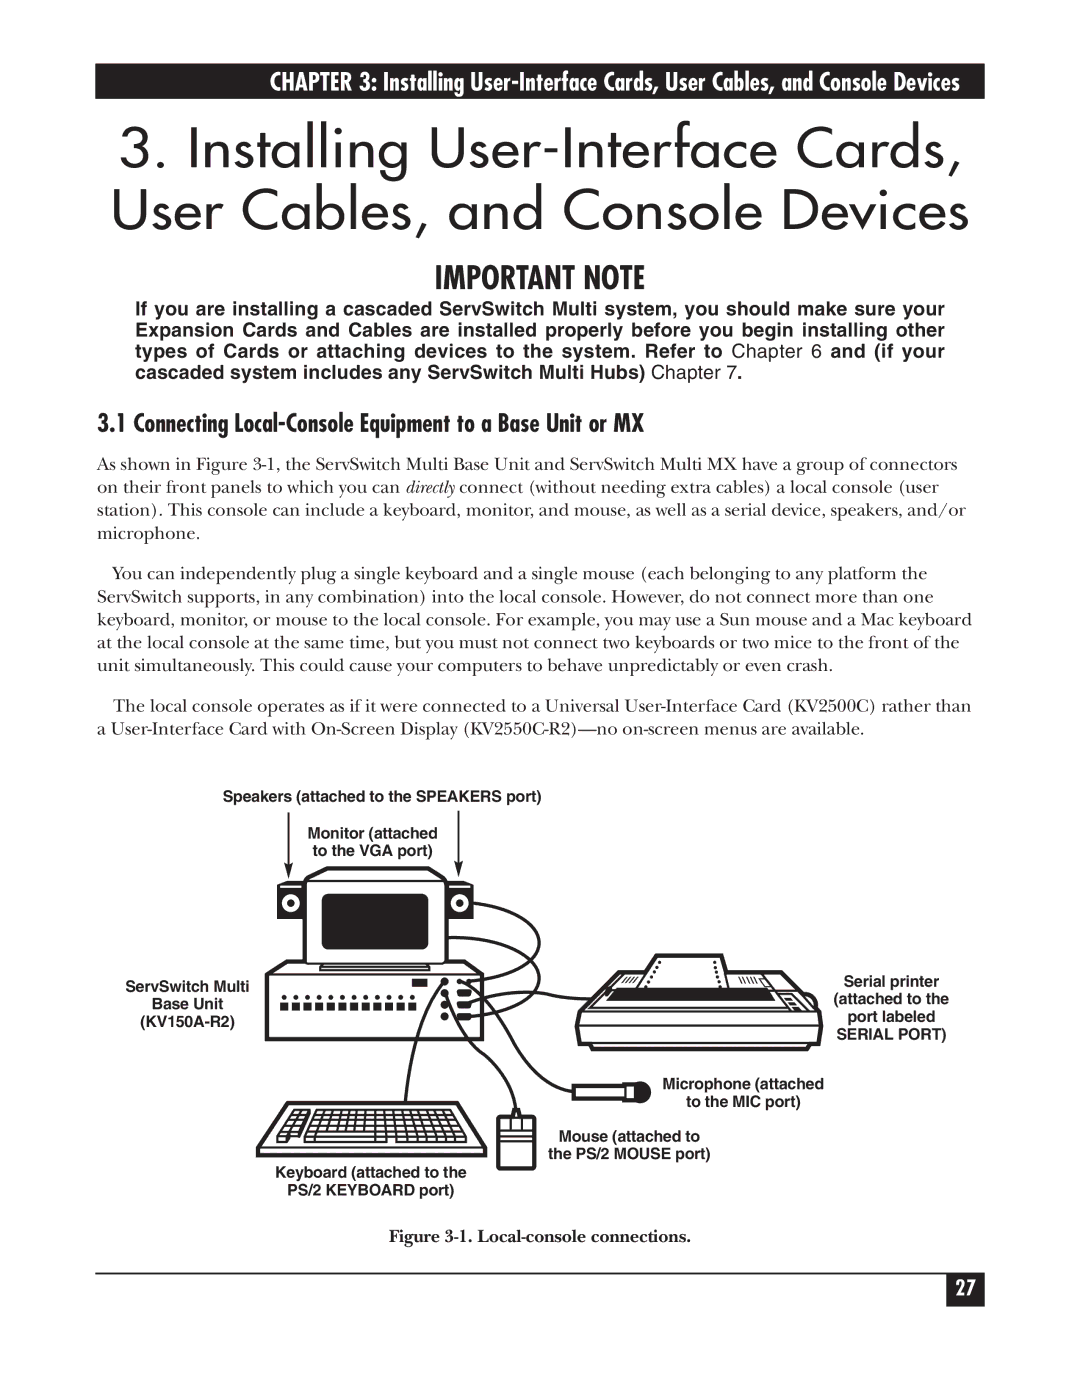
As shown in Figure
You can independently plug a single keyboard and a single mouse (each belonging to any platform the ServSwitch supports, in any combination) into the local console. However, do not connect more than one keyboard, monitor, or mouse to the local console. For example, you may use a Sun mouse and a Mac keyboard at the local console at the same time, but you must not connect two keyboards or two mice to the front of the unit simultaneously. This could cause your computers to behave unpredictably or even crash.
The local console operates as if it were connected to a Universal
Speakers (attached to the SPEAKERS port)
Monitor (attached to the VGA port)
ServSwitch Multi
Base Unit
Microphone (attached
to the MIC port)
Mouse (attached to the PS/2 MOUSE port)
Keyboard (attached to the
PS/2 KEYBOARD port)
Serial printer
(attached to the
port labeled
SERIAL PORT)
Figure 3-1. Local-console connections.
27