POPIT Labels
Four sheets of
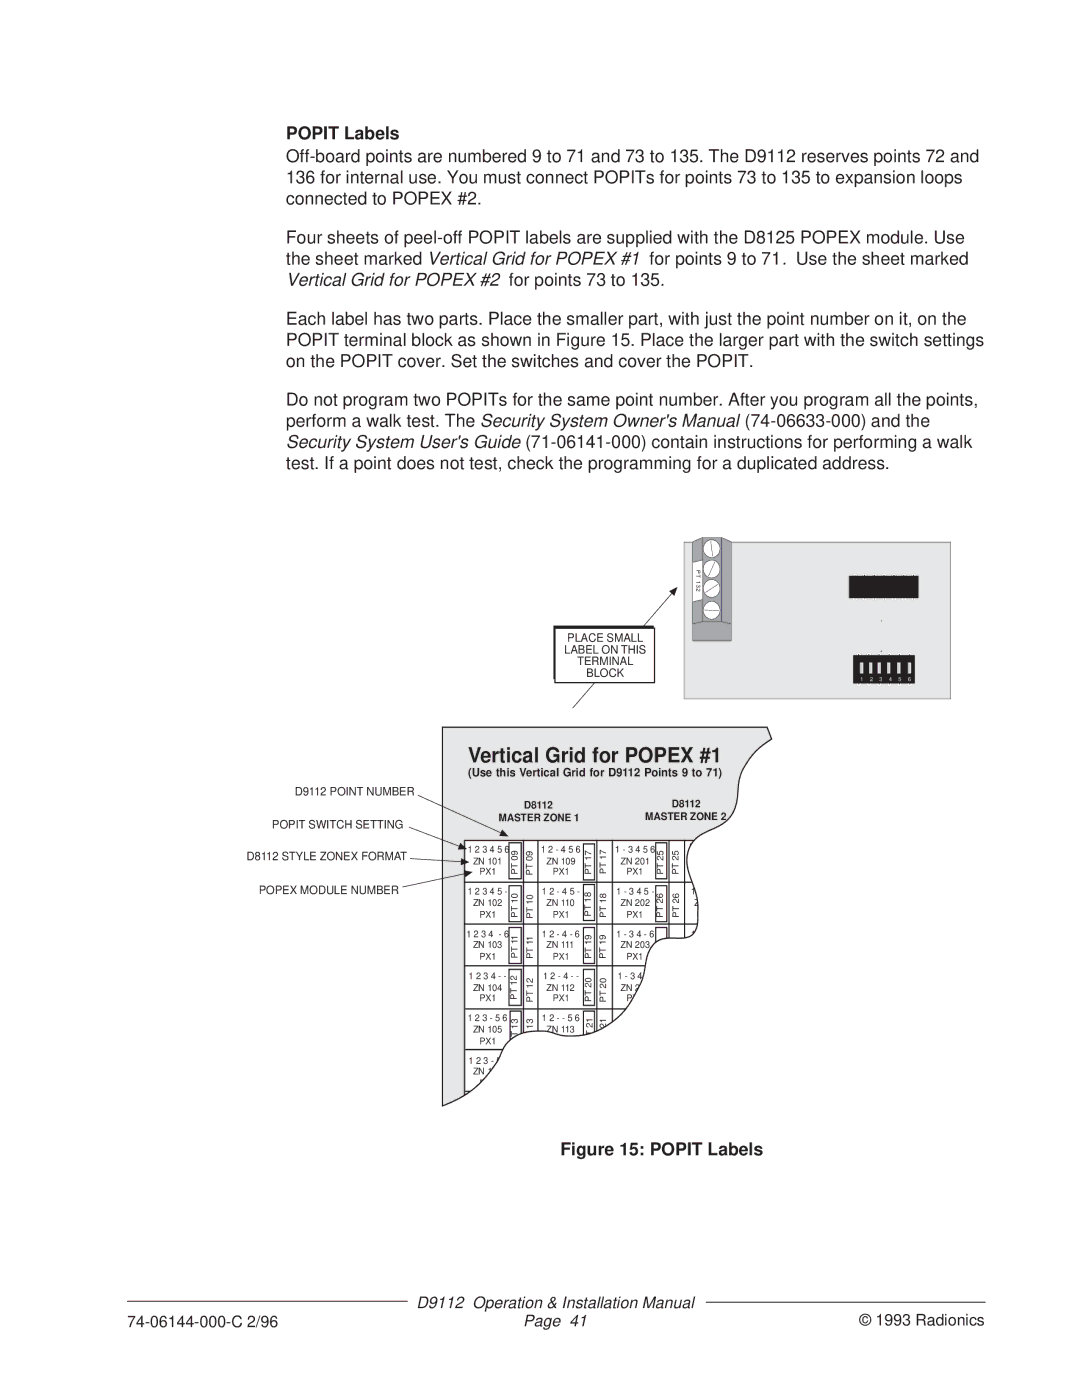
Each label has two parts. Place the smaller part, with just the point number on it, on the POPIT terminal block as shown in Figure 15. Place the larger part with the switch settings on the POPIT cover. Set the switches and cover the POPIT.
Do not program two POPITs for the same point number. After you program all the points, perform a walk test. The Security System Owner's Manual
PLACE SMALL LABEL ON THIS TERMINAL BLOCK
PT 132 |
|
|
|
|
|
1 | 2 | 3 | 4 | 5 | 6 |
Vertical Grid for POPEX #1
(Use this Vertical Grid for D9112 Points 9 to 71)
D9112 POINT NUMBER |
| D8112 |
| D8112 | |
POPIT SWITCH SETTING | MASTER ZONE 1 | MASTER ZONE 2 |
|
|
D8112 STYLE ZONEX FORMAT
POPEX MODULE NUMBER
![]() 1 2 3 4 5 6
1 2 3 4 5 6
![]() ZN 101 PX1
ZN 101 PX1
1 2 3 4 5 -
ZN 102
PX1
1 2 3 4 - 6
ZN 103
PX1
1 2 3 4 - -
ZN 104
PX1
1 2 3 - 5 6
ZN 105
PX1
1 2 3 - 5 -
ZN 106
PX1
PT 13 PT 12 PT 11 PT 10 PT 09![]()
![]()
PT 13 PT 12 PT 11 PT 10 PT 09
1 2 - 4 5 6
ZN 109
PX1
1 2 - 4 5 - ZN 110 PX1
1 2 - 4 - 6 ZN 111 PX1
1 2 - 4 - - ZN 112 PX1
1 2 - - 5 6 ZN 113 PX1
PT 17 | PT 17 |
|
|
|
|
PT 18 | PT 18 |
| PT 19 |
PT 19 | |
|
|
|
|
PT 20 | PT 20 |
|
|
|
|
PT 21 | PT 21 |
|
|
|
|
1 - 3 4 5 6
ZN 201
PX1
1 - 3 4 5 -
ZN 202
PX1
1 - 3 4 - 6
ZN 203
PX1
1 - 3 4 - - ZN 204 PX1
PT 26 PT 25![]()
PT 26 PT 25
127 | - - 4 5 6 |
PTZN 209
PX1
1 - - 4 5 - ZN 210 PX1
1 - - 4 - 6 ZN 211 PX1
1 - - 4 - - ZN 212 PX1
Figure 15: POPIT Labels
| D9112 | Operation & Installation Manual |
|
| © 1993 Radionics | ||
Page 41 | |||