CHAPTER 7 TROUBLESHOOTING
CHAPTER 7
TROUBLE SHOOTING
TROUBLESHOOTING
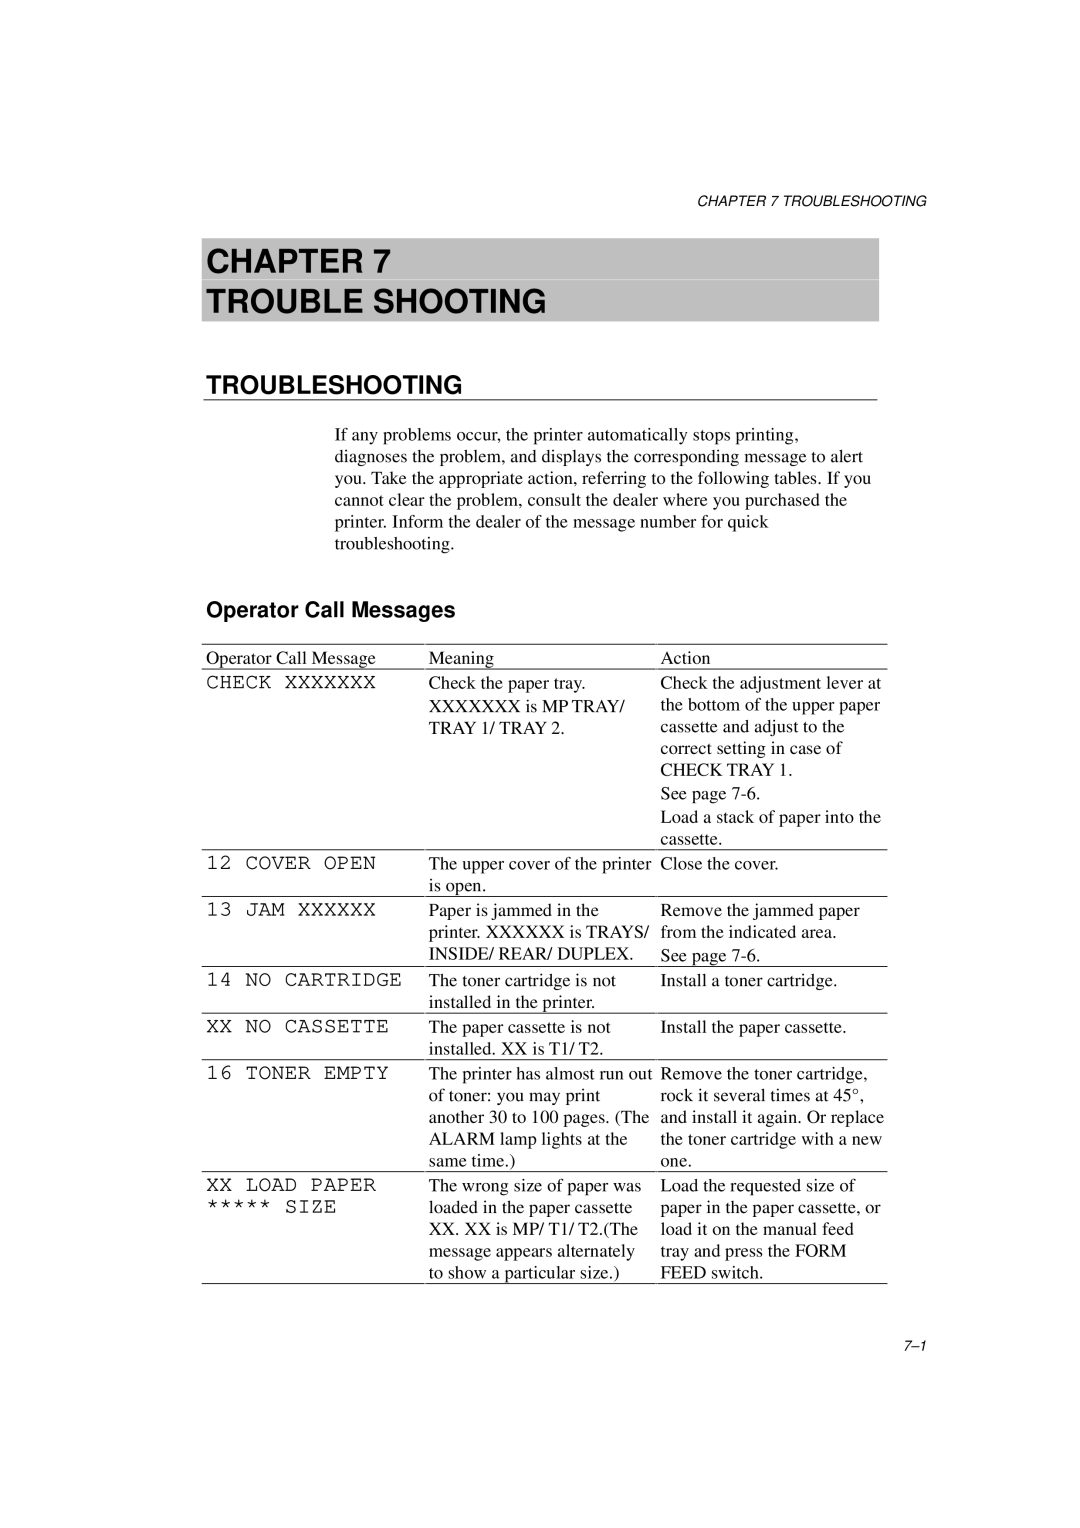
If any problems occur, the printer automatically stops printing, diagnoses the problem, and displays the corresponding message to alert you. Take the appropriate action, referring to the following tables. If you cannot clear the problem, consult the dealer where you purchased the printer. Inform the dealer of the message number for quick troubleshooting.
Operator Call Messages
Operator Call Message
CHECK XXXXXXX
Meaning
Check the paper tray.
XXXXXXXis MP TRAY/
TRAY 1/ TRAY 2.
Action
Check the adjustment lever at the bottom of the upper paper cassette and adjust to the correct setting in case of
CHECK TRAY 1. See page
Load a stack of paper into the cassette.
12 COVER OPEN
13 JAM XXXXXX
14 NO CARTRIDGE
XX NO CASSETTE |
The upper cover of the printer | Close the cover. |
is open. |
|
Paper is jammed in the | Remove the jammed paper |
printer. XXXXXX is TRAYS/ | from the indicated area. |
INSIDE/ REAR/ DUPLEX. | See page |
The toner cartridge is not | Install a toner cartridge. |
installed in the printer. |
|
The paper cassette is not | Install the paper cassette. |
installed. XX is T1/ T2. |
|
16 TONER EMPTY |
XXLOAD PAPER
***** SIZE
The printer has almost run out of toner: you may print another 30 to 100 pages. (The ALARM lamp lights at the same time.)
The wrong size of paper was loaded in the paper cassette
XX.XX is MP/ T1/ T2.(The message appears alternately to show a particular size.)
Remove the toner cartridge, rock it several times at 45°, and install it again. Or replace the toner cartridge with a new one.
Load the requested size of paper in the paper cassette, or load it on the manual feed tray and press the FORM FEED switch.