Dell E26S Series owner manual Removing a hard drive from a hard-drive carrier

Models: E26S Series

1 161
Download 161 pages 59.21 Kb
Page 73
Image 73

Steps

1.If a hard-drive blank is installed in the hard-drive slot, remove it.

2.Install a hard drive in the hard-drive carrier. For more information, see Installing a hard drive into a hard-drive carrier.

3.Press the release button on the front of the hard-drive carrier and open the hard-drive carrier handle.

4.Insert the hard-drive carrier into the hard-drive slot until the carrier connects with the backplane.

5.Close the hard-drive carrier handle to lock the hard drive in place.

Next steps

Install the optional front bezel.

Removing a hard drive from a hard-drive carrier

Prerequisites

1.Keep the #1 Phillips screwdriver handy.

2.Remove the hard-drive carrier from the system.

Steps

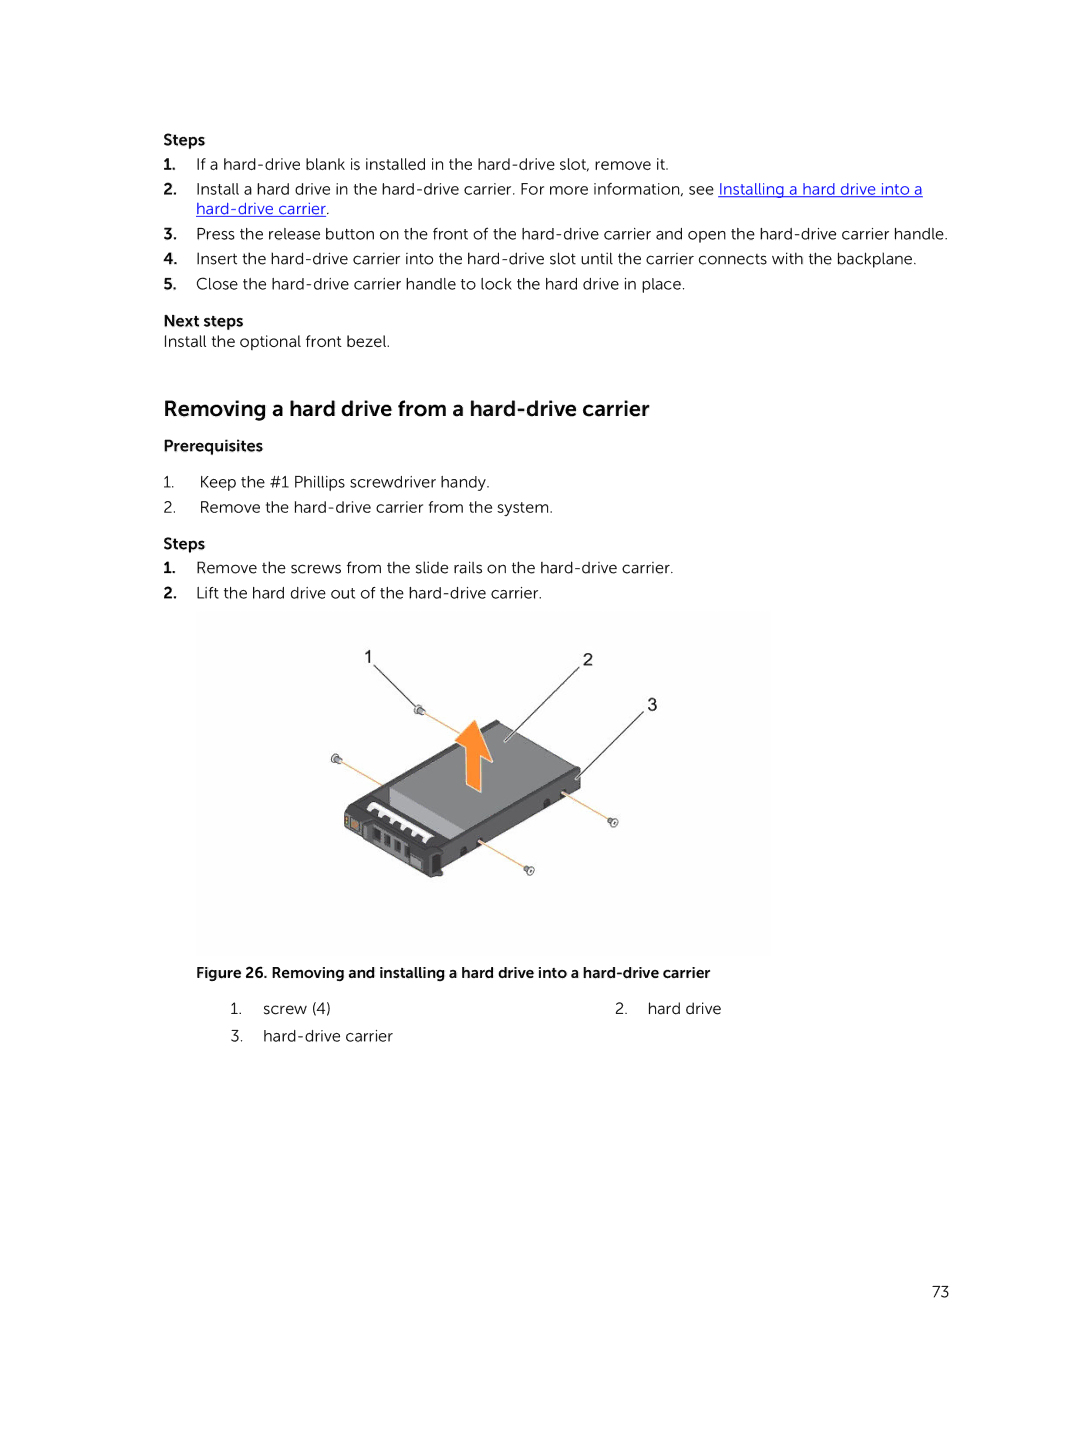
1.Remove the screws from the slide rails on the hard-drive carrier.

2.Lift the hard drive out of the hard-drive carrier.

Figure 26. Removing and installing a hard drive into a hard-drive carrier

1. screw (4)

2. hard drive

3.hard-drive carrier

73

Page 73
Image 73
Dell E26S Series owner manual Removing a hard drive from a hard-drive carrier