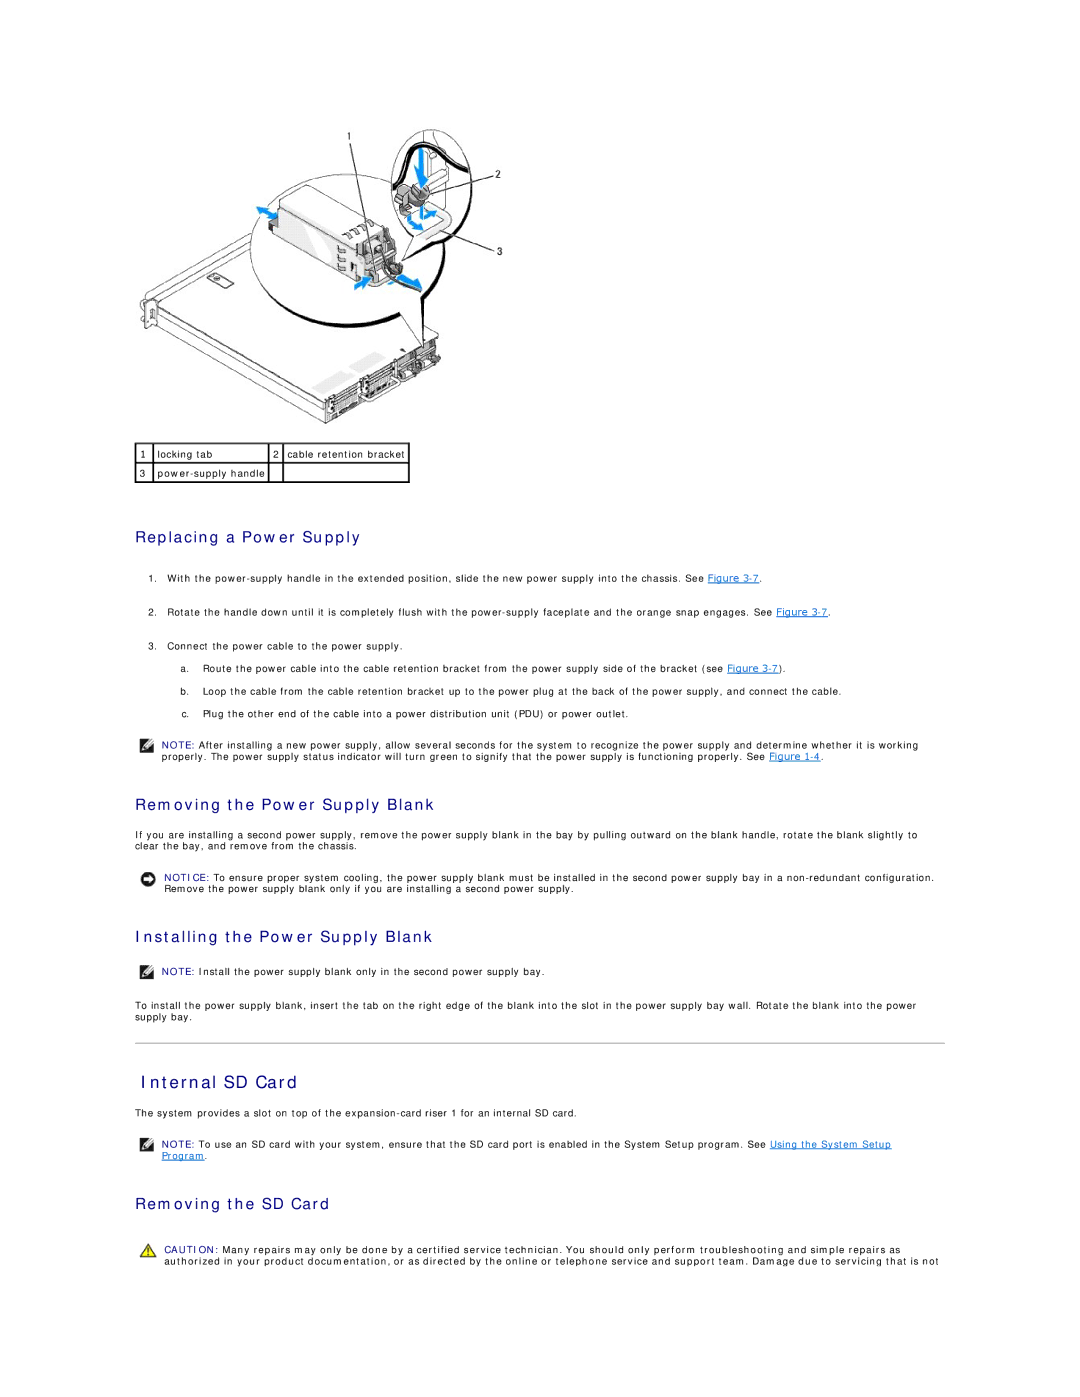
1 | locking tab | 2 | cable retention bracket |
|
|
|
|
3 |
|
| |
|
|
|
|
Replacing a Power Supply
1.With the
2.Rotate the handle down until it is completely flush with the
3.Connect the power cable to the power supply.
a.Route the power cable into the cable retention bracket from the power supply side of the bracket (see Figure
b.Loop the cable from the cable retention bracket up to the power plug at the back of the power supply, and connect the cable.
c.Plug the other end of the cable into a power distribution unit (PDU) or power outlet.
NOTE: After installing a new power supply, allow several seconds for the system to recognize the power supply and determine whether it is working properly. The power supply status indicator will turn green to signify that the power supply is functioning properly. See Figure
Removing the Power Supply Blank
If you are installing a second power supply, remove the power supply blank in the bay by pulling outward on the blank handle, rotate the blank slightly to clear the bay, and remove from the chassis.
NOTICE: To ensure proper system cooling, the power supply blank must be installed in the second power supply bay in a
Installing the Power Supply Blank
NOTE: Install the power supply blank only in the second power supply bay.
To install the power supply blank, insert the tab on the right edge of the blank into the slot in the power supply bay wall. Rotate the blank into the power supply bay.
Internal SD Card
The system provides a slot on top of the
NOTE: To use an SD card with your system, ensure that the SD card port is enabled in the System Setup program. See Using the System Setup Program.
Removing the SD Card
CAUTION: Many repairs may only be done by a certified service technician. You should only perform troubleshooting and simple repairs as authorized in your product documentation, or as directed by the online or telephone service and support team. Damage due to servicing that is not