Stylus C40UX/C40SX/C20UX/C20SX | Revision A |
5.1.3 Adjustment Program feature
The adjustment program enables you to set various values correctly to prevent malfunction and fluctuation of printing quality and printing function caused by difference in components and assembly when the printer components are replaced during repair. Basic adjustment items by using this program are shown as fellows.
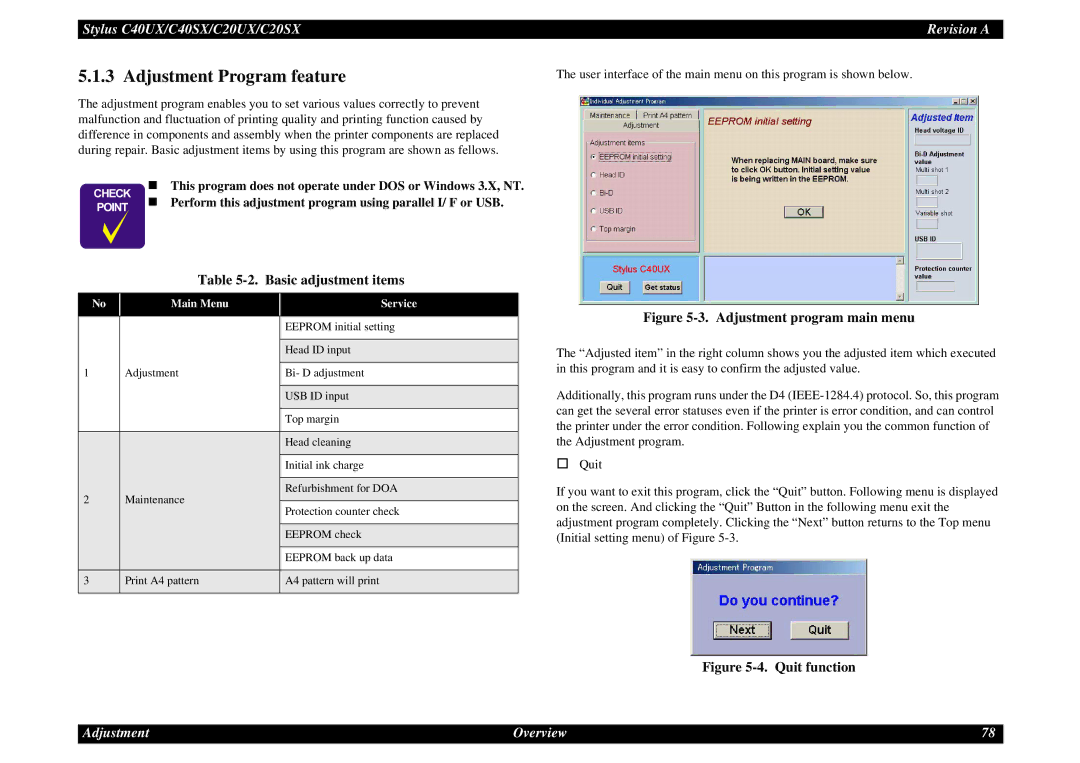
The user interface of the main menu on this program is shown below.
CHECK | | This program does not operate under DOS or Windows 3.X, NT. |
POINT | | Perform this adjustment program using parallel I/ F or USB. |
Table 5-2. Basic adjustment items
No | Main Menu | Service | |
|
|
| |
|
| EEPROM initial setting | |
|
|
| |
|
| Head ID input | |
|
|
| |
1 | Adjustment | Bi- D adjustment | |
|
|
| |
|
| USB ID input | |
|
|
| |
|
| Top margin | |
|
|
| |
|
| Head cleaning | |
|
|
| |
|
| Initial ink charge | |
|
|
| |
2 | Maintenance | Refurbishment for DOA | |
| |||
Protection counter check | |||
|
| ||
|
|
| |
|
| EEPROM check | |
|
|
| |
|
| EEPROM back up data | |
|
|
| |
3 | Print A4 pattern | A4 pattern will print | |
|
|
|
Figure 5-3. Adjustment program main menu
The “Adjusted item” in the right column shows you the adjusted item which executed in this program and it is easy to confirm the adjusted value.
Additionally, this program runs under the D4
Quit
If you want to exit this program, click the “Quit” button. Following menu is displayed on the screen. And clicking the “Quit” Button in the following menu exit the adjustment program completely. Clicking the “Next” button returns to the Top menu (Initial setting menu) of Figure
Figure 5-4. Quit function
Adjustment | Overview | 78 |
