Maintenance
Print Head Installation
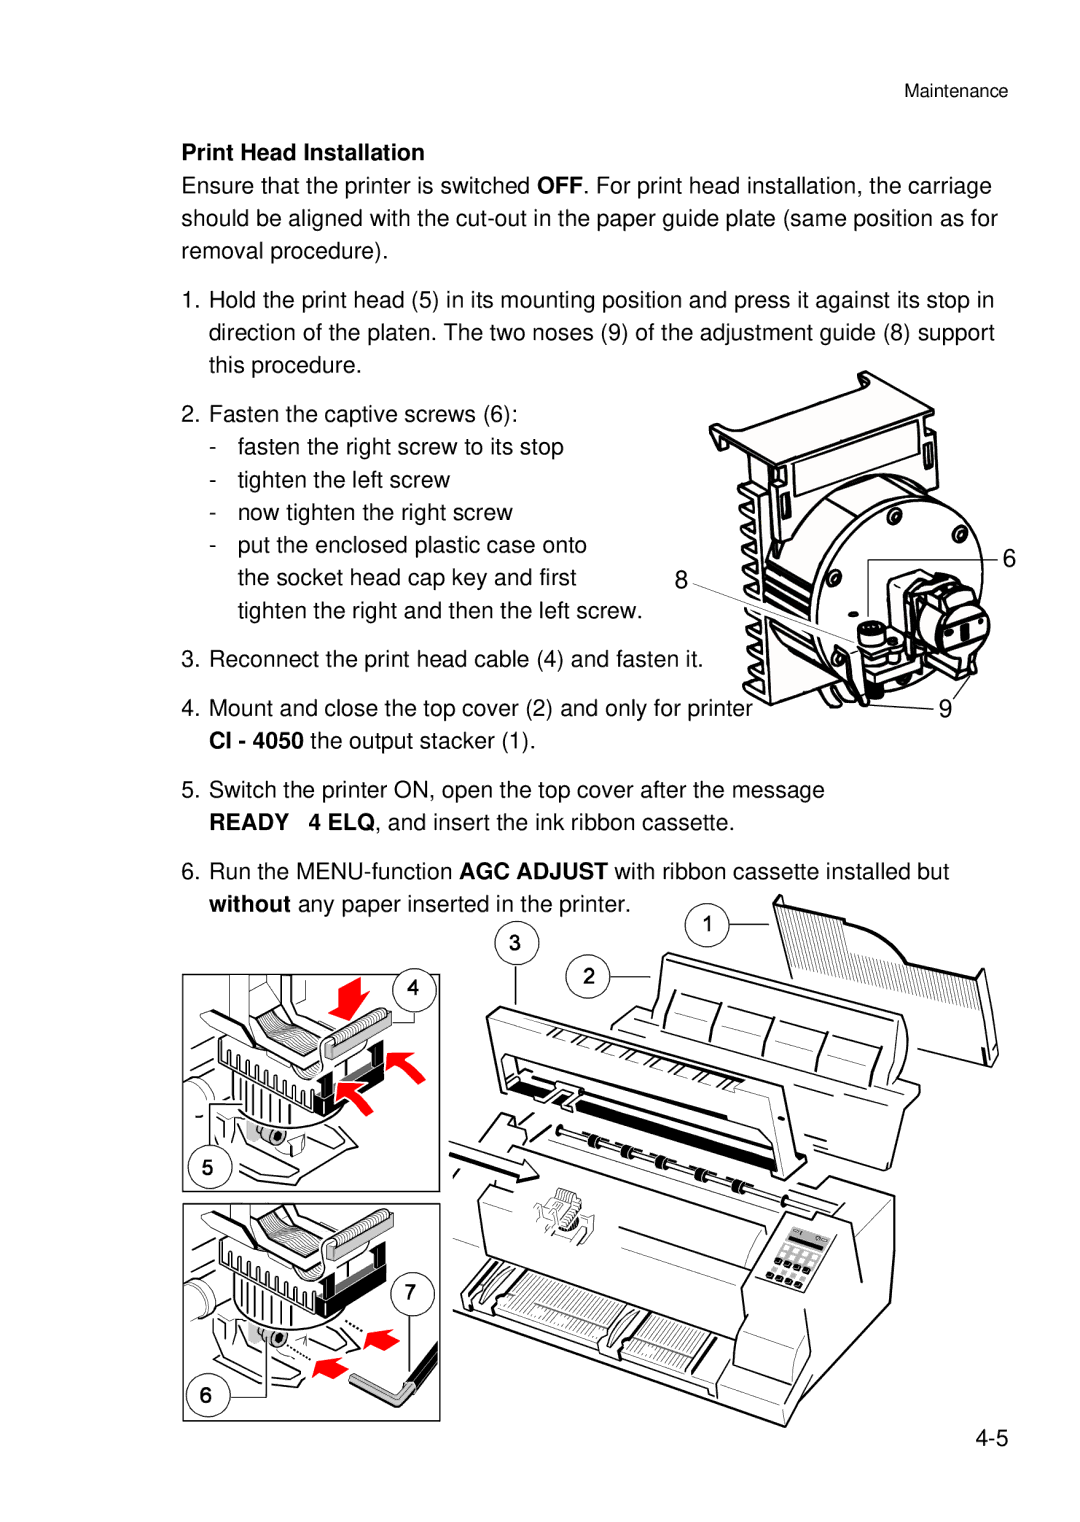
Ensure that the printer is switched OFF. For print head installation, the carriage should be aligned with the
1.Hold the print head (5) in its mounting position and press it against its stop in direction of the platen. The two noses (9) of the adjustment guide (8) support this procedure.
2.Fasten the captive screws (6):
- fasten the right screw to its stop |
| |
- tighten the left screw |
| |
- now tighten the right screw |
| |
- put the enclosed plastic case onto | 6 | |
the socket head cap key and first | ||
8 |
tighten the right and then the left screw.
3. Reconnect the print head cable (4) and fasten it.
4. | Mount and close the top cover (2) and only for printer | 9 |
| CI - 4050 the output stacker (1). |
|
5. | Switch the printer ON, open the top cover after the message |
|
| READY 4 ELQ, and insert the ink ribbon cassette. |
|
6. | Run the | |
| without any paper inserted in the printer. |
|