Replacing the BlackDiamond 12802 Fan Tray
Installing the Replacement BlackDiamond 12804 Fan Tray
To install a replacement fan tray into the BlackDiamond 12802 switch:
1Attach the
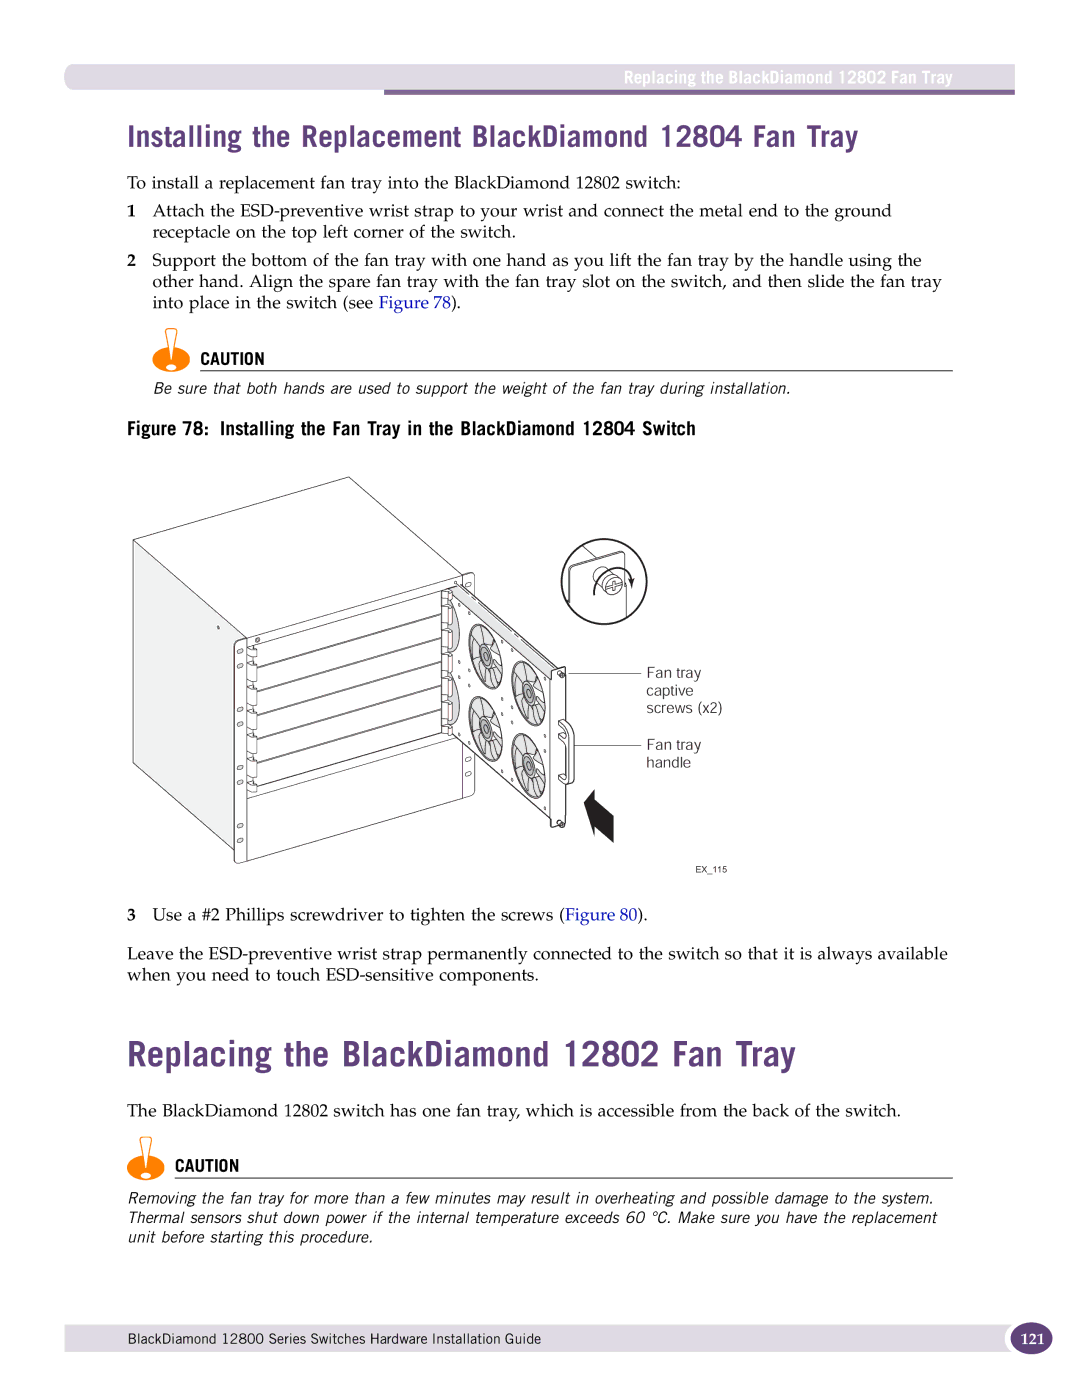
2Support the bottom of the fan tray with one hand as you lift the fan tray by the handle using the other hand. Align the spare fan tray with the fan tray slot on the switch, and then slide the fan tray into place in the switch (see Figure 78).
CAUTION
Be sure that both hands are used to support the weight of the fan tray during installation.
Figure 78: Installing the Fan Tray in the BlackDiamond 12804 Switch
Fan tray captive screws (x2)
Fan tray handle
EX_115
3Use a #2 Phillips screwdriver to tighten the screws (Figure 80).
Leave the
Replacing the BlackDiamond 12802 Fan Tray
The BlackDiamond 12802 switch has one fan tray, which is accessible from the back of the switch.
CAUTION
Removing the fan tray for more than a few minutes may result in overheating and possible damage to the system. Thermal sensors shut down power if the internal temperature exceeds 60 °C. Make sure you have the replacement unit before starting this procedure.
BlackDiamond 12800 Series Switches Hardware Installation Guide | 121 |
|
|