Extreme Networks 325 W AC Power Supply
Removing an Extreme Networks 325 W AC PSU
CAUTION
An operating 325 W AC PSU may be hot to the touch; use thermal protective gloves when handling the 325 W AC PSU during removal.
CAUTION
To disconnect the system power, disconnect ALL power supply units. Disconnect the power cord before you remove the PSU from the chassis.
To remove an Extreme Networks 325 W AC PSU:
1Attach an
2Disconnect the AC power cord from the wall outlet.
3Loosen the middle screw on the power cord bracket to allow removal of the power cord. After the screws are loosened, disconnect the AC power cord from the AC input on the front of the PSU.
4Loosen the two captive screws that secure the PSU front panel to the chassis frame.
5Use the handle to slide the PSU out of the chassis.
NOTE
Leave the ESD strap permanently connected to the switch, so that the strap is always available when you need to handle
Front Panel LEDs
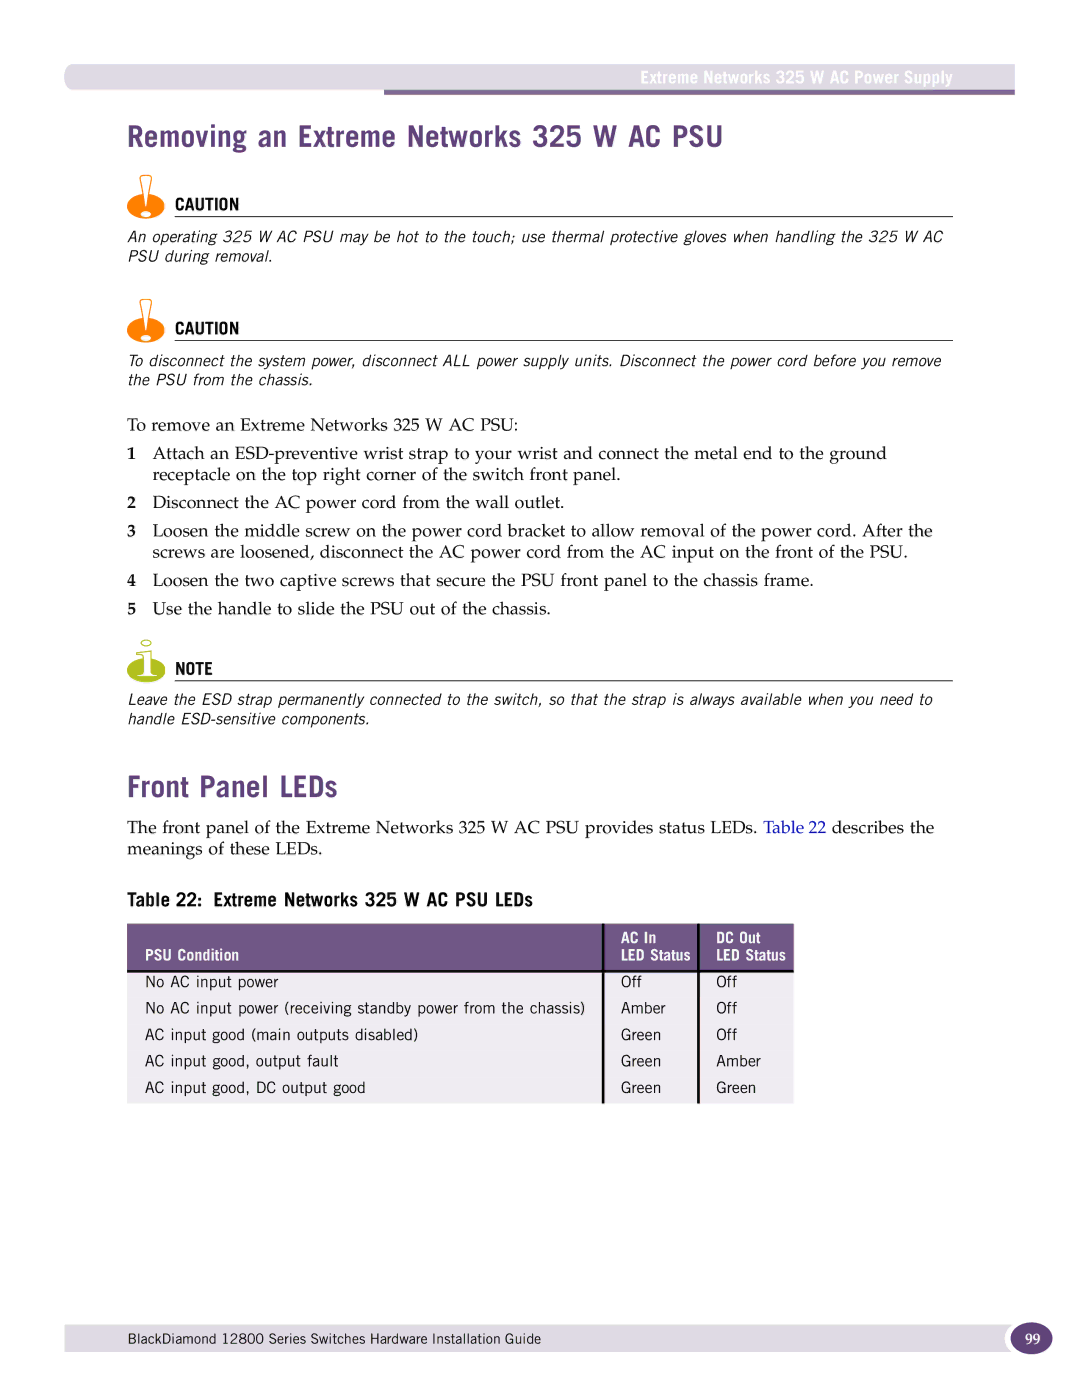
The front panel of the Extreme Networks 325 W AC PSU provides status LEDs. Table 22 describes the meanings of these LEDs.
Table 22: Extreme Networks 325 W AC PSU LEDs
| AC In | DC Out |
PSU Condition | LED Status | LED Status |
|
|
|
No AC input power | Off | Off |
No AC input power (receiving standby power from the chassis) | Amber | Off |
AC input good (main outputs disabled) | Green | Off |
AC input good, output fault | Green | Amber |
AC input good, DC output good | Green | Green |
|
|
|
BlackDiamond 12800 Series Switches Hardware Installation Guide | 99 |
|
|
