![]()
![]()
![]()
![]()
![]()
![]()
![]()
![]()
![]()
![]()
![]()
![]()
![]()
![]()
![]()
![]()
![]()
![]()
![]()
![]()
![]()
![]()
![]()
![]()
![]()
![]()
![]()
![]()
![]()
![]()
![]()
![]()
![]()
![]()
![]()
![]()
![]()
![]()
![]()
![]()
![]()
![]()
![]()
![]()
![]()
![]()
![]()
![]()
![]()
![]()
![]()
![]()
![]()
![]()
![]()
![]()
![]()
![]()
![]()
![]()
![]()
Setting the tempo map
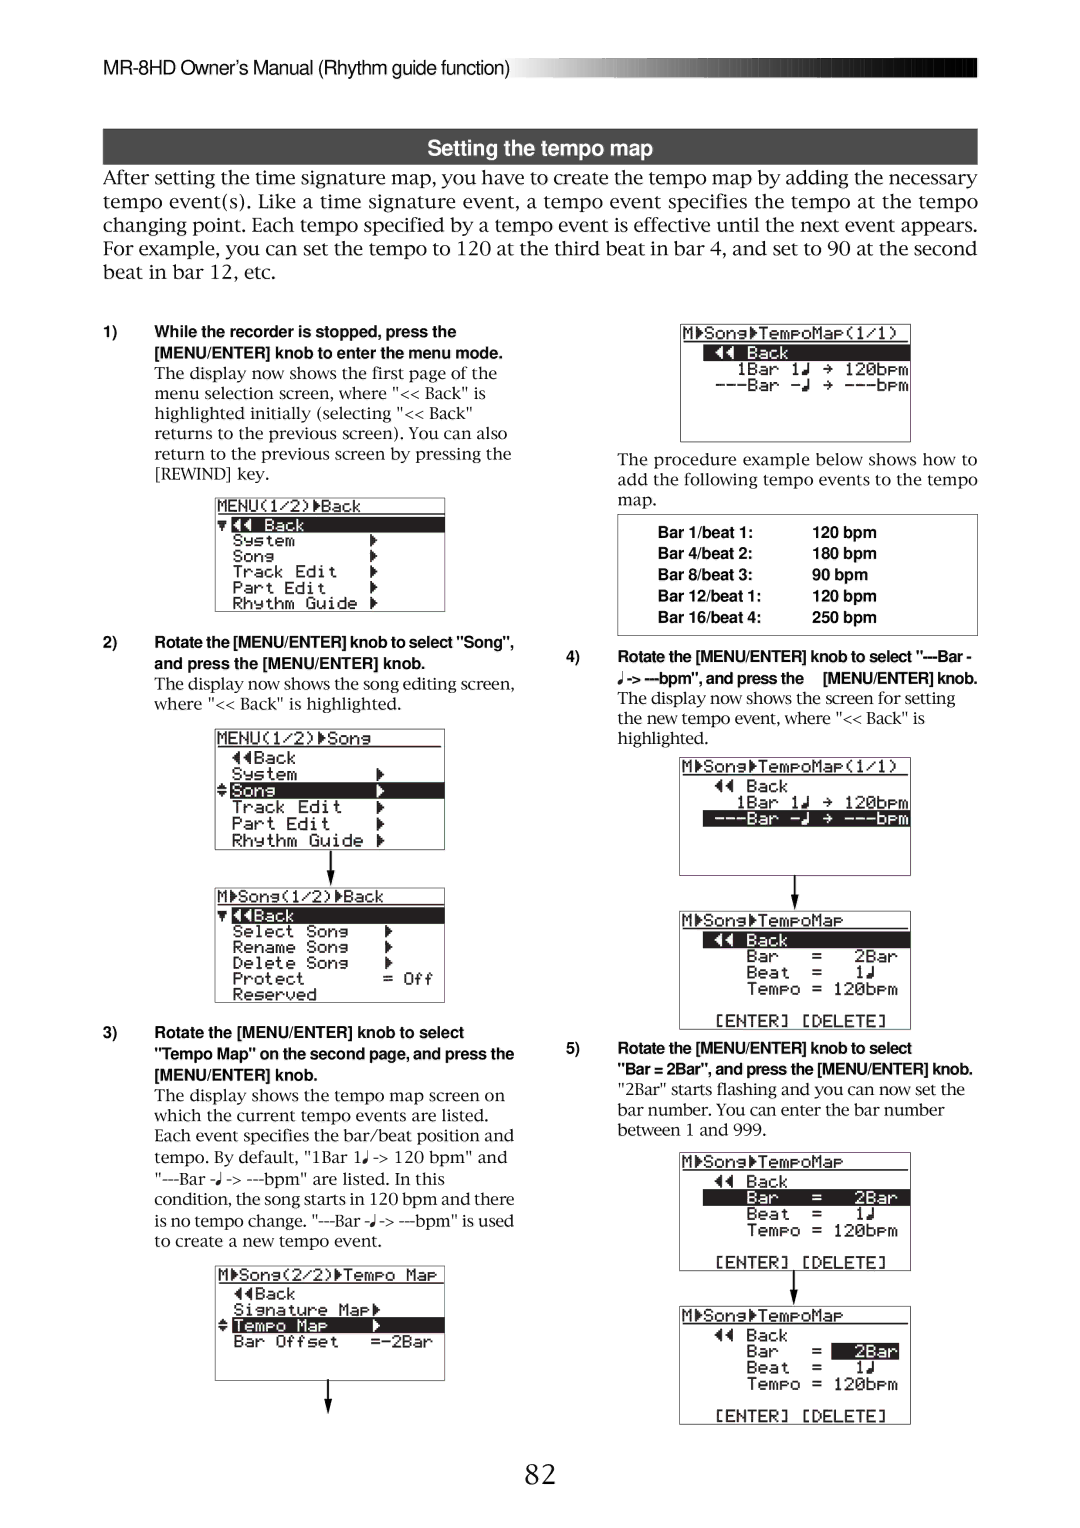
After setting the time signature map, you have to create the tempo map by adding the necessary tempo event(s). Like a time signature event, a tempo event specifies the tempo at the tempo changing point. Each tempo specified by a tempo event is effective until the next event appears. For example, you can set the tempo to 120 at the third beat in bar 4, and set to 90 at the second beat in bar 12, etc.
1)While the recorder is stopped, press the [MENU/ENTER] knob to enter the menu mode.
The display now shows the first page of the menu selection screen, where "<< Back" is highlighted initially (selecting "<< Back" returns to the previous screen). You can also return to the previous screen by pressing the [REWIND] key.
The procedure example below shows how to add the following tempo events to the tempo map.
2)Rotate the [MENU/ENTER] knob to select "Song", and press the [MENU/ENTER] knob.
The display now shows the song editing screen, where "<< Back" is highlighted.
3)Rotate the [MENU/ENTER] knob to select "Tempo Map" on the second page, and press the [MENU/ENTER] knob.
The display shows the tempo map screen on which the current tempo events are listed. Each event specifies the bar/beat position and tempo. By default, "1Bar 1![]()
![]()
![]()
Bar 1/beat 1: | 120 bpm |
Bar 4/beat 2: | 180 bpm |
Bar 8/beat 3: | 90 bpm |
Bar 12/beat 1: | 120 bpm |
Bar 16/beat 4: | 250 bpm |
|
|
4)Rotate the [MENU/ENTER] knob to select
![]()
The display now shows the screen for setting the new tempo event, where "<< Back" is highlighted.
5)Rotate the [MENU/ENTER] knob to select
"Bar = 2Bar", and press the [MENU/ENTER] knob.
"2Bar" starts flashing and you can now set the bar number. You can enter the bar number between 1 and 999.
82