4.INSTALLING OPTIONAL EQUIPMENT
5.Confirm gyrocompass specifications and set up the DIP switches and jumper wires on the GYRO CONVERTER board according to gyrocompass connected:
•Setting jumper wires and DIP switches by gyrocompass specifications: page
•Setting jumper wires and DIP switches by make and model of gyrocompass: page
•Location of jumper wires and DIP switches: page
6.Pass gyrocompass cable through the cable clamp and connect it to connector J602 as shown in the figure on page
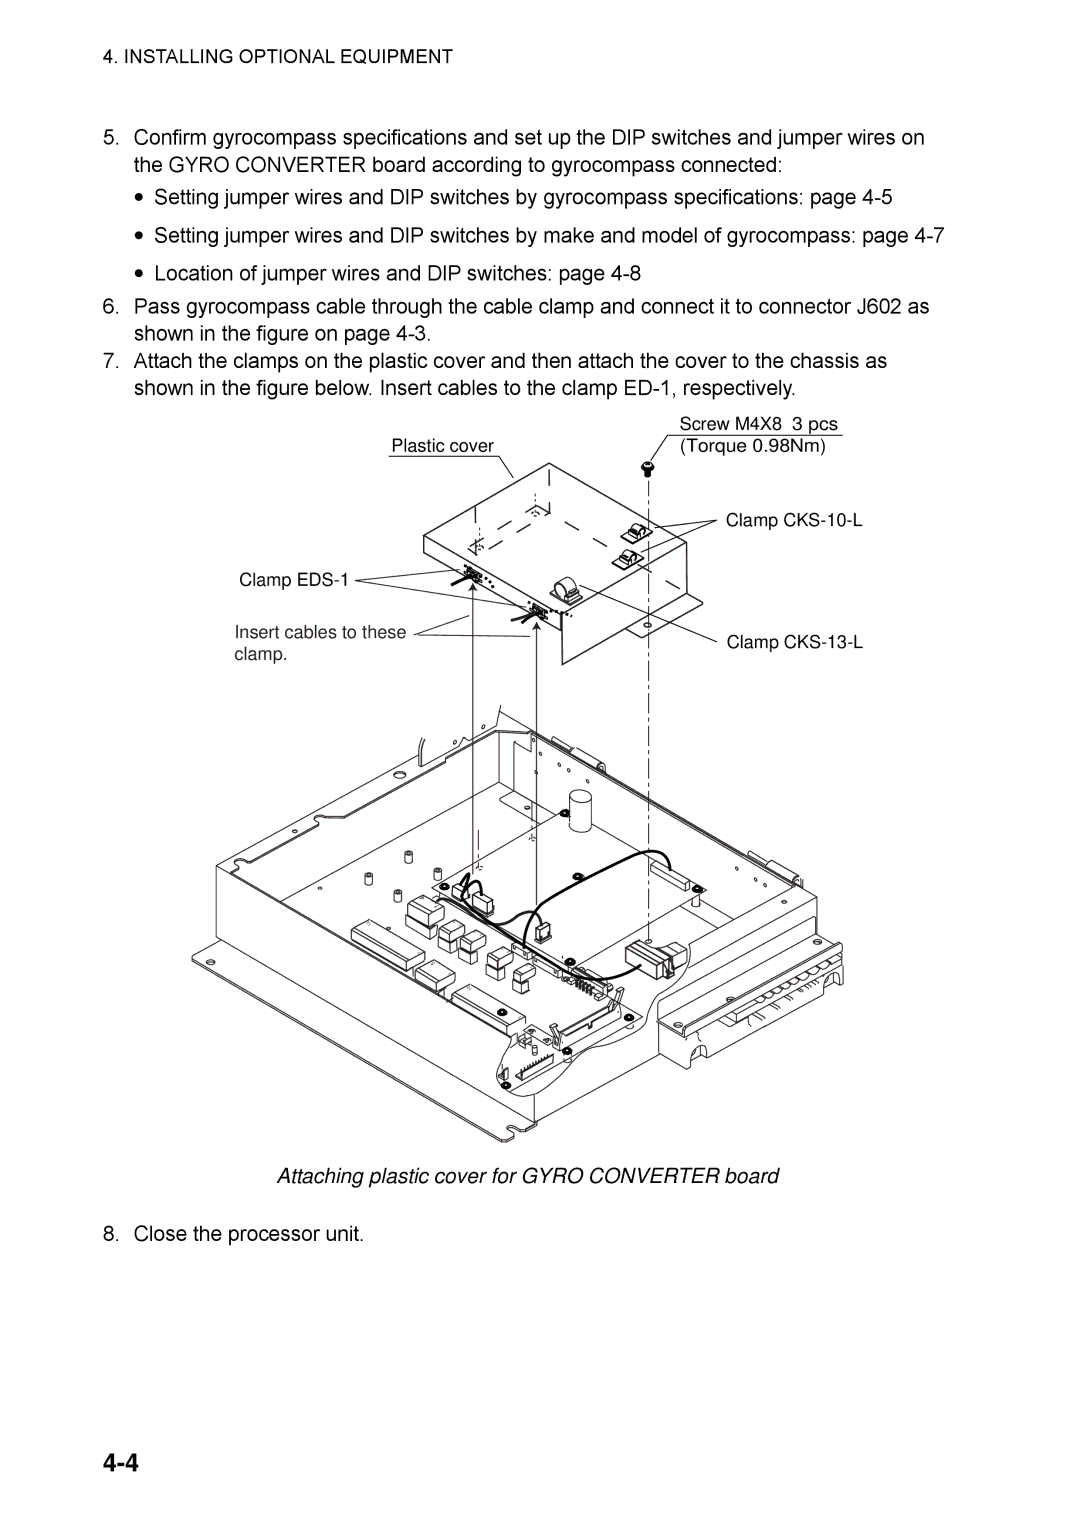
7.Attach the clamps on the plastic cover and then attach the cover to the chassis as shown in the figure below. Insert cables to the clamp
Plastic cover
Clamp
Insert cables to these clamp.
Screw M4X8 3 pcs (Torque 0.98Nm)
![]() Clamp
Clamp
Clamp
12
4 |
|
| 1 |
| 3 |
| 1 |
| 3 |
| 1 |
| 3 |
1 | 1 |
| 5 |
| 21 |
| 1 |
| 12 |
7
1
1
1
Attaching plastic cover for GYRO CONVERTER board
8. Close the processor unit.