2. WIRING
2.5Power Supply Unit
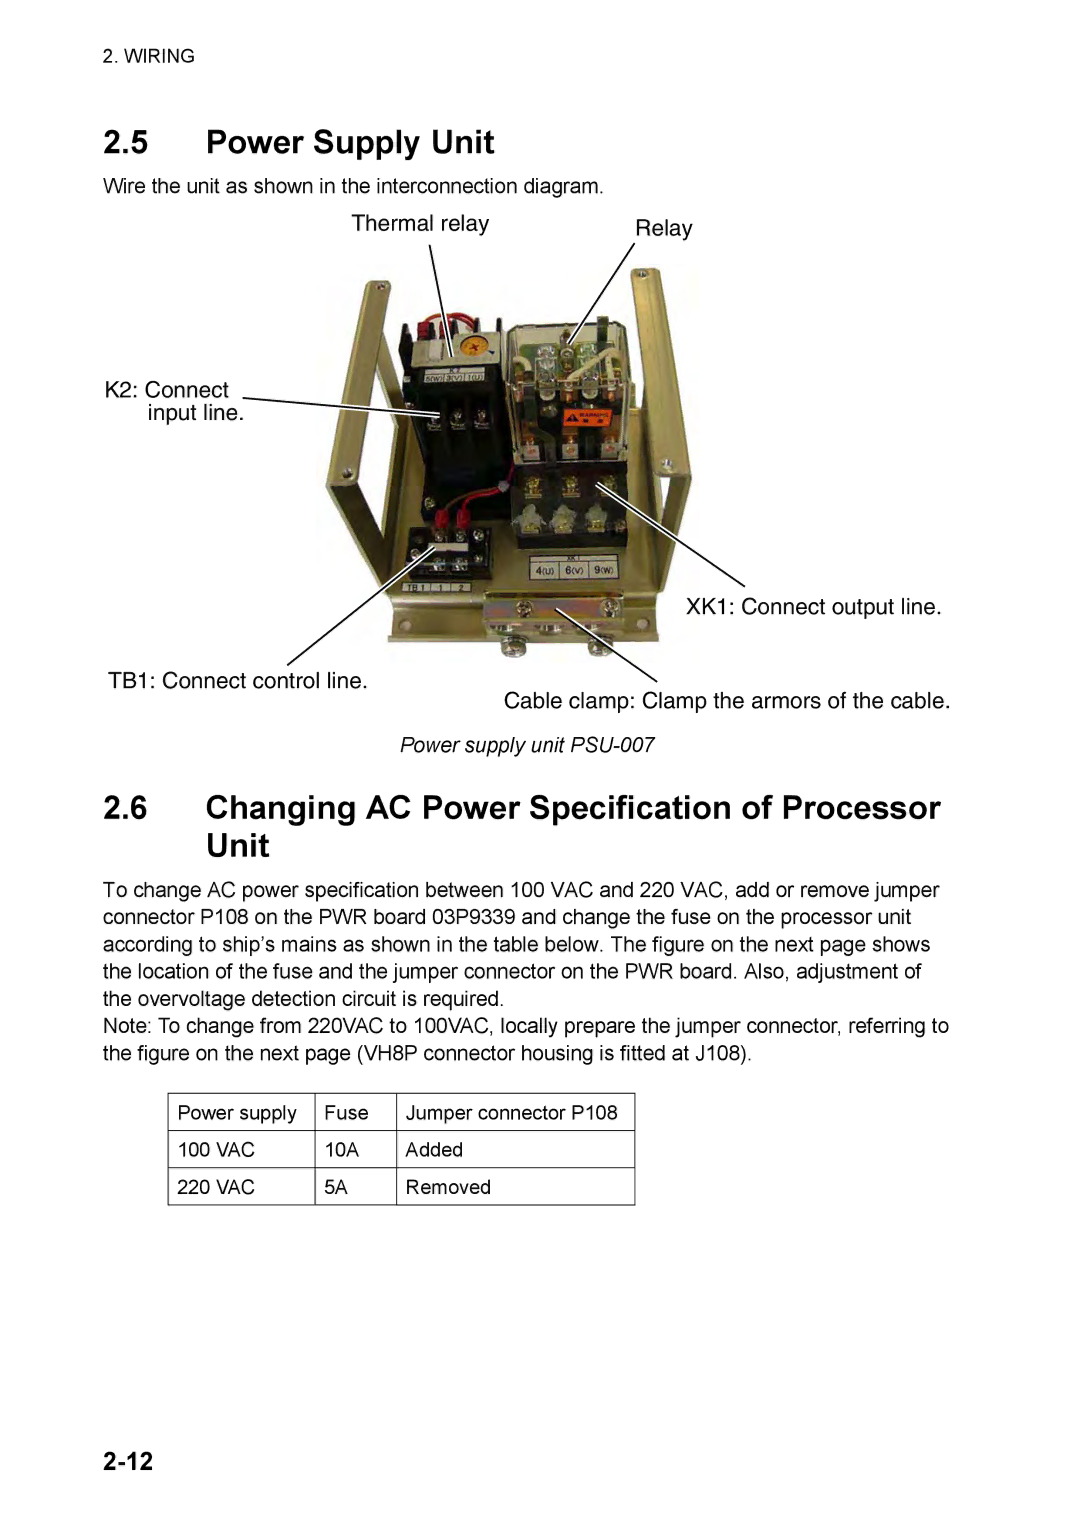
Wire the unit as shown in the interconnection diagram.
Thermal relay | Relay |
K2: Connect input line.
XK1: Connect output line.
TB1: Connect control line.
Cable clamp: Clamp the armors of the cable.
Power supply unit PSU-007
2.6Changing AC Power Specification of Processor Unit
To change AC power specification between 100 VAC and 220 VAC, add or remove jumper connector P108 on the PWR board 03P9339 and change the fuse on the processor unit according to ship’s mains as shown in the table below. The figure on the next page shows the location of the fuse and the jumper connector on the PWR board. Also, adjustment of the overvoltage detection circuit is required.
Note: To change from 220VAC to 100VAC, locally prepare the jumper connector, referring to the figure on the next page (VH8P connector housing is fitted at J108).
Power supply | Fuse | Jumper connector P108 |
|
|
|
100 VAC | 10A | Added |
|
|
|
220 VAC | 5A | Removed |
|
|
|