WARNING:
Removing or disabling the secondary
retention device is extremely dangerous and
may lead to serious injury or death. It also
may void the warranty.
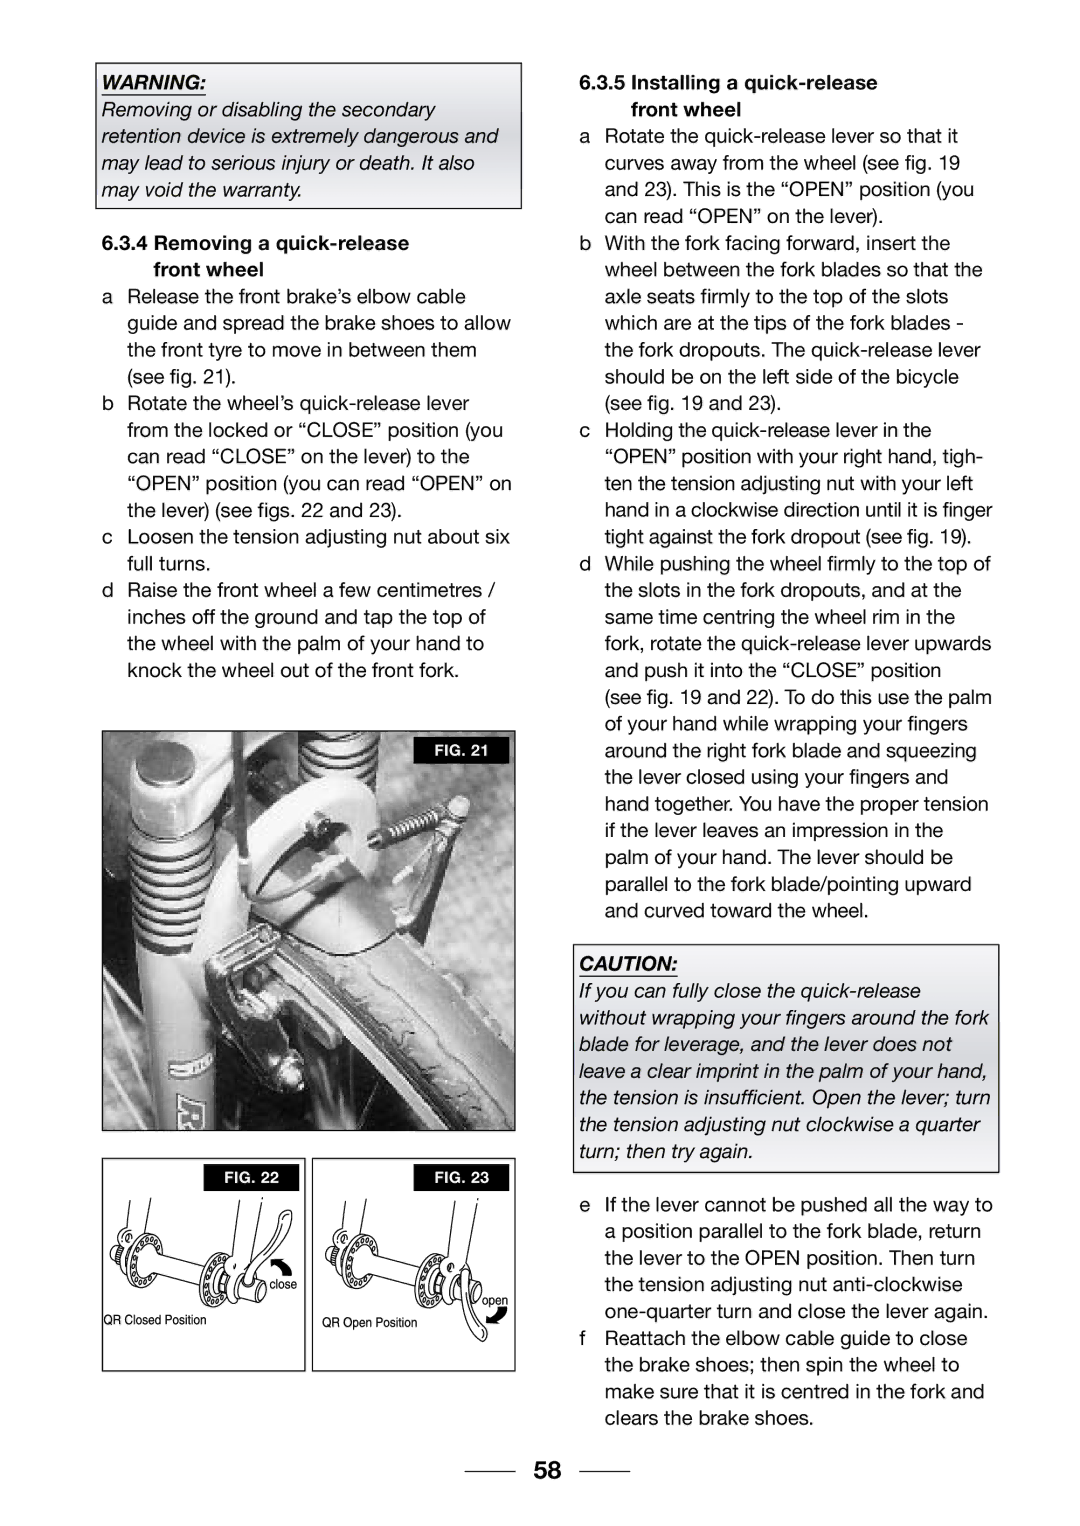
6.3.4Removing a quick-release front wheel
aRelease the front brake’s elbow cable guide and spread the brake shoes to allow the front tyre to move in between them (see fig. 21).
bRotate the wheel’s
cLoosen the tension adjusting nut about six full turns.
dRaise the front wheel a few centimetres / inches off the ground and tap the top of the wheel with the palm of your hand to knock the wheel out of the front fork.
FIG. 21
6.3.5Installing a quick-release front wheel
aRotate the
bWith the fork facing forward, insert the wheel between the fork blades so that the axle seats firmly to the top of the slots which are at the tips of the fork blades - the fork dropouts. The
cHolding the
dWhile pushing the wheel firmly to the top of the slots in the fork dropouts, and at the same time centring the wheel rim in the fork, rotate the
CAUTION:
If you can fully close the
FIG. 22 |
FIG. 23 |
leave a clear imprint in the palm of your hand, the tension is insufficient. Open the lever; turn the tension adjusting nut clockwise a quarter turn; then try again.
eIf the lever cannot be pushed all the way to a position parallel to the fork blade, return the lever to the OPEN position. Then turn the tension adjusting nut
fReattach the elbow cable guide to close the brake shoes; then spin the wheel to make sure that it is centred in the fork and clears the brake shoes.
58