Chapter 6 | Replacing Parts |
Repeat step 10 to replace any other DIMMs for the memory configuration.
11.Carefully reinsert the system board assembly into its guides, and reseat it into its socket by rotating the blue latches to the flat, locked position.
12.Replace the two screws securing the system board assembly to the chassis.
13.Close up the HP NetServer.
14.Reconnect power cords and cables.
15.Restore HP NetServer to normal operation.
This completes your DIMM installation.
Replacing a Processor
The procedure is the same for the
6
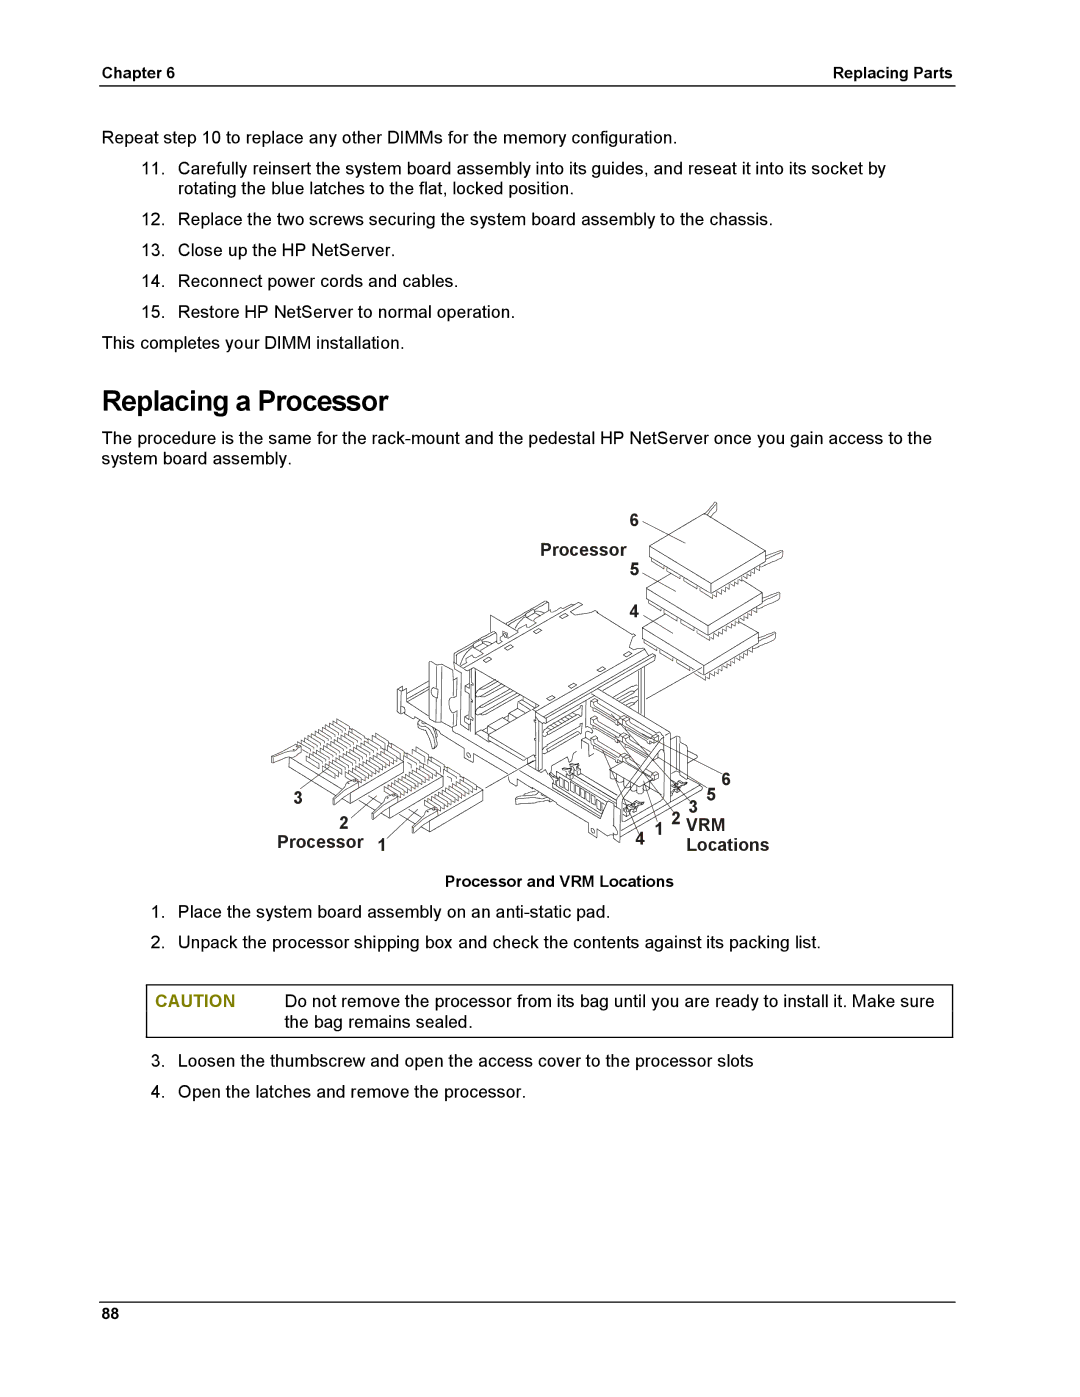
Processor
5
4 ![]()
3


 3 5 6 2 VRM12
Processor 1 | 4 | Locations |
Processor and VRM Locations
1.Place the system board assembly on an
2.Unpack the processor shipping box and check the contents against its packing list.
CAUTION Do not remove the processor from its bag until you are ready to install it. Make sure the bag remains sealed.
3.Loosen the thumbscrew and open the access cover to the processor slots
4.Open the latches and remove the processor.
88