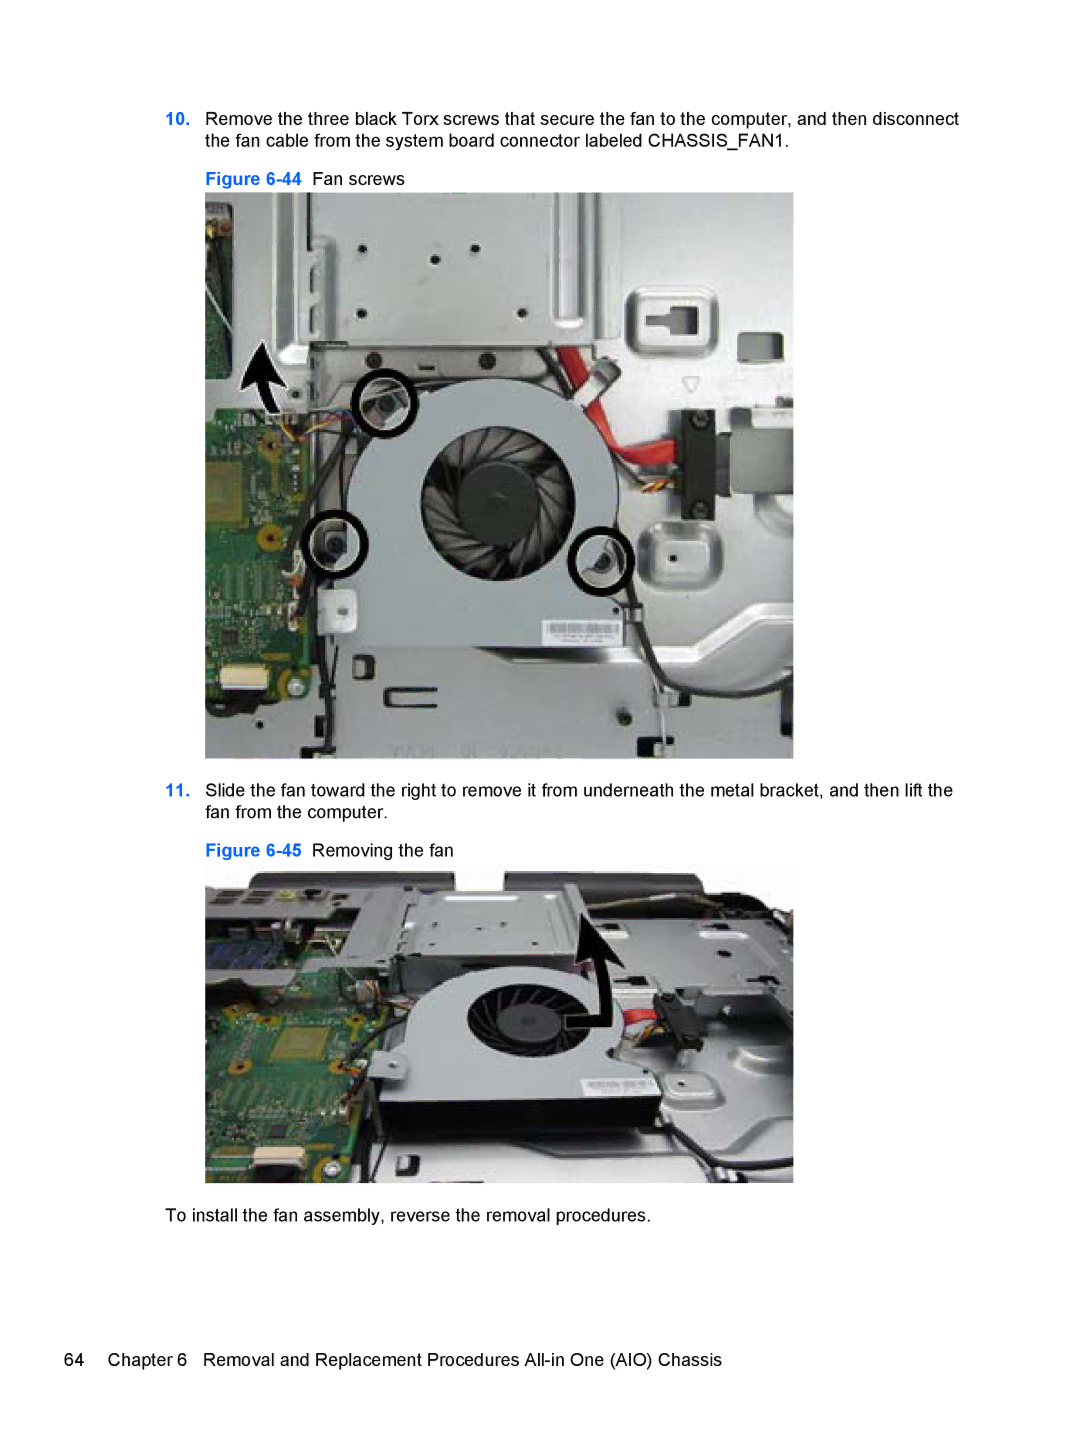
10.Remove the three black Torx screws that secure the fan to the computer, and then disconnect the fan cable from the system board connector labeled CHASSIS_FAN1.
Figure 6-44 Fan screws
11.Slide the fan toward the right to remove it from underneath the metal bracket, and then lift the fan from the computer.
