To remove the system board shield:
1.Prepare the computer for disassembly (see Preparing to Disassemble the Computer on page 33).
2.Remove the center access panel (see Hinge Cover Panel on page 34).
3.Remove the memory access panel (see Memory Access Panel on page 36).
4.Remove the drive access panel (see Drive Access Panel on page 38).
5.Remove the stand (see Stand on page 61).
6.Remove the optical drive (see Optical Drive on page 40).
7.Remove the top panel (see Top Panel on page 58).
8.Remove the heat sink cover (see Heat Sink Cover on page 52).
9.Remove the rear cover (see Rear Cover on page 62).
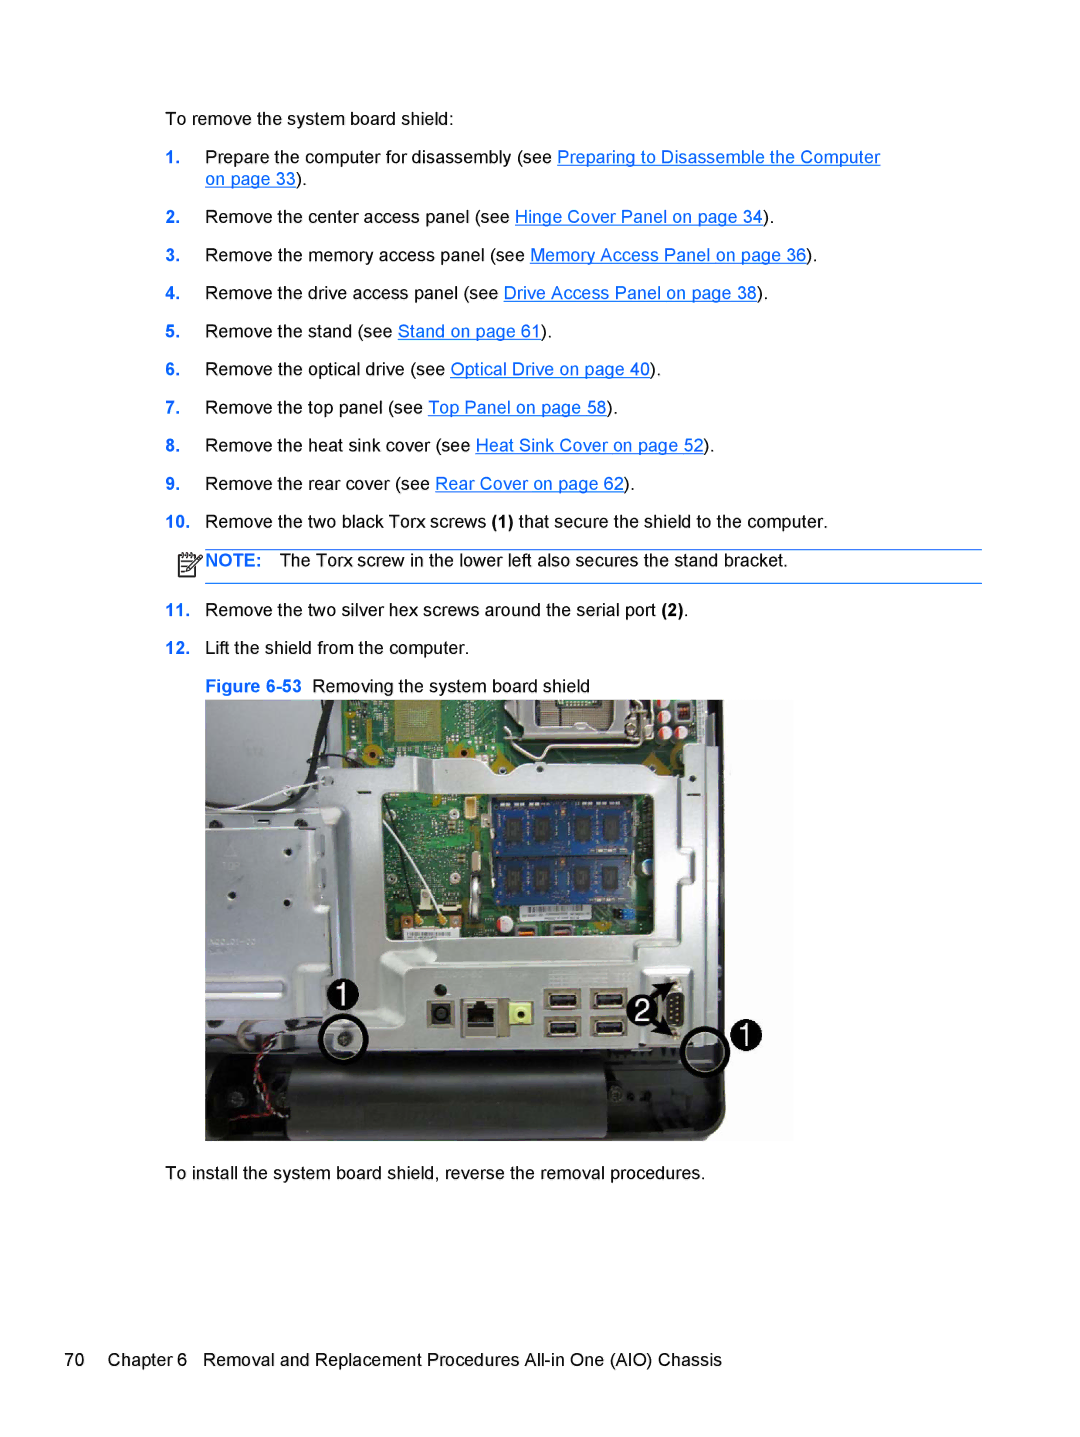
10.Remove the two black Torx screws (1) that secure the shield to the computer.
![]() NOTE: The Torx screw in the lower left also secures the stand bracket.
NOTE: The Torx screw in the lower left also secures the stand bracket.
11.Remove the two silver hex screws around the serial port (2).
12.Lift the shield from the computer.