HP Pro 4300 manual 16Removing the hard drive mounting screws Hard Drive

Models: Pro 4300

1 162
Download 162 pages 51.63 Kb
Page 50
Image 50

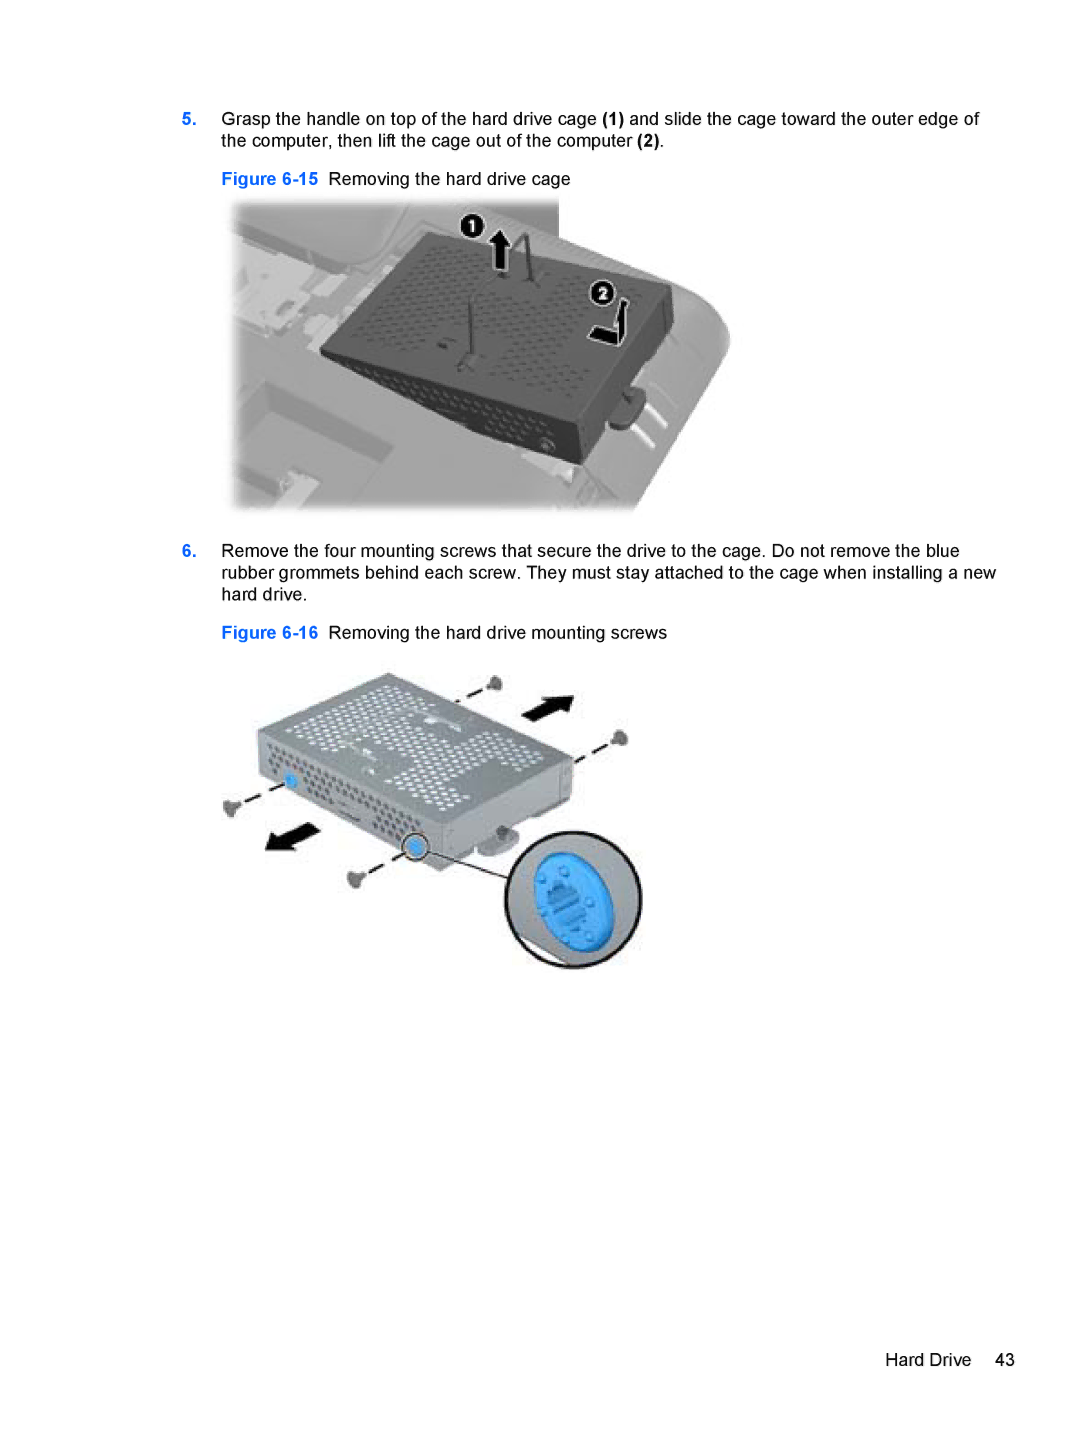
5.Grasp the handle on top of the hard drive cage (1) and slide the cage toward the outer edge of the computer, then lift the cage out of the computer (2).

Figure 6-15Removing the hard drive cage

6.Remove the four mounting screws that secure the drive to the cage. Do not remove the blue rubber grommets behind each screw. They must stay attached to the cage when installing a new hard drive.

Figure 6-16Removing the hard drive mounting screws

Hard Drive 43

Page 50
Image 50
HP Pro 4300 manual 16Removing the hard drive mounting screws Hard Drive