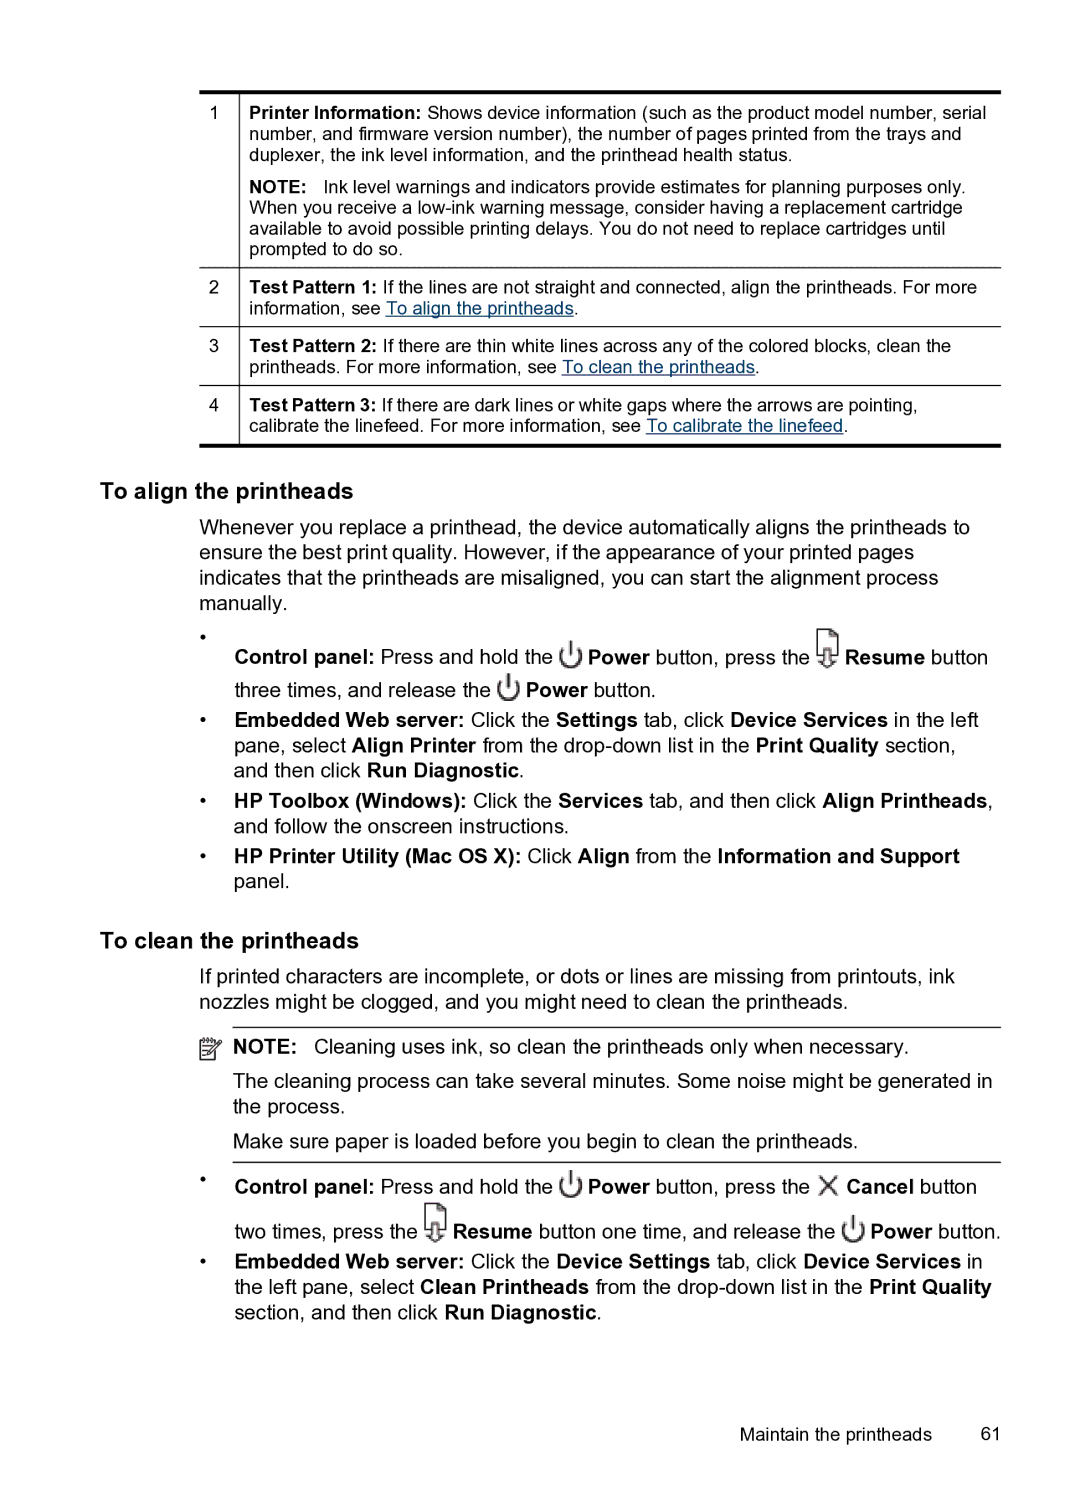
1Printer Information: Shows device information (such as the product model number, serial number, and firmware version number), the number of pages printed from the trays and duplexer, the ink level information, and the printhead health status.
NOTE: Ink level warnings and indicators provide estimates for planning purposes only. When you receive a
2Test Pattern 1: If the lines are not straight and connected, align the printheads. For more information, see To align the printheads.
3Test Pattern 2: If there are thin white lines across any of the colored blocks, clean the printheads. For more information, see To clean the printheads.
4Test Pattern 3: If there are dark lines or white gaps where the arrows are pointing, calibrate the linefeed. For more information, see To calibrate the linefeed.
To align the printheads
Whenever you replace a printhead, the device automatically aligns the printheads to ensure the best print quality. However, if the appearance of your printed pages indicates that the printheads are misaligned, you can start the alignment process manually.
•
Control panel: Press and hold the Power button, press the Resume button three times, and release the ![]() Power button.
Power button.
•Embedded Web server: Click the Settings tab, click Device Services in the left pane, select Align Printer from the
•HP Toolbox (Windows): Click the Services tab, and then click Align Printheads, and follow the onscreen instructions.
•HP Printer Utility (Mac OS X): Click Align from the Information and Support panel.
To clean the printheads
If printed characters are incomplete, or dots or lines are missing from printouts, ink nozzles might be clogged, and you might need to clean the printheads.
![]() NOTE: Cleaning uses ink, so clean the printheads only when necessary.
NOTE: Cleaning uses ink, so clean the printheads only when necessary.
The cleaning process can take several minutes. Some noise might be generated in the process.
Make sure paper is loaded before you begin to clean the printheads.
•Control panel: Press and hold the ![]() Power button, press the
Power button, press the ![]() Cancel button two times, press the
Cancel button two times, press the ![]() Resume button one time, and release the
Resume button one time, and release the ![]() Power button.
Power button.
•Embedded Web server: Click the Device Settings tab, click Device Services in the left pane, select Clean Printheads from the
Maintain the printheads | 61 |